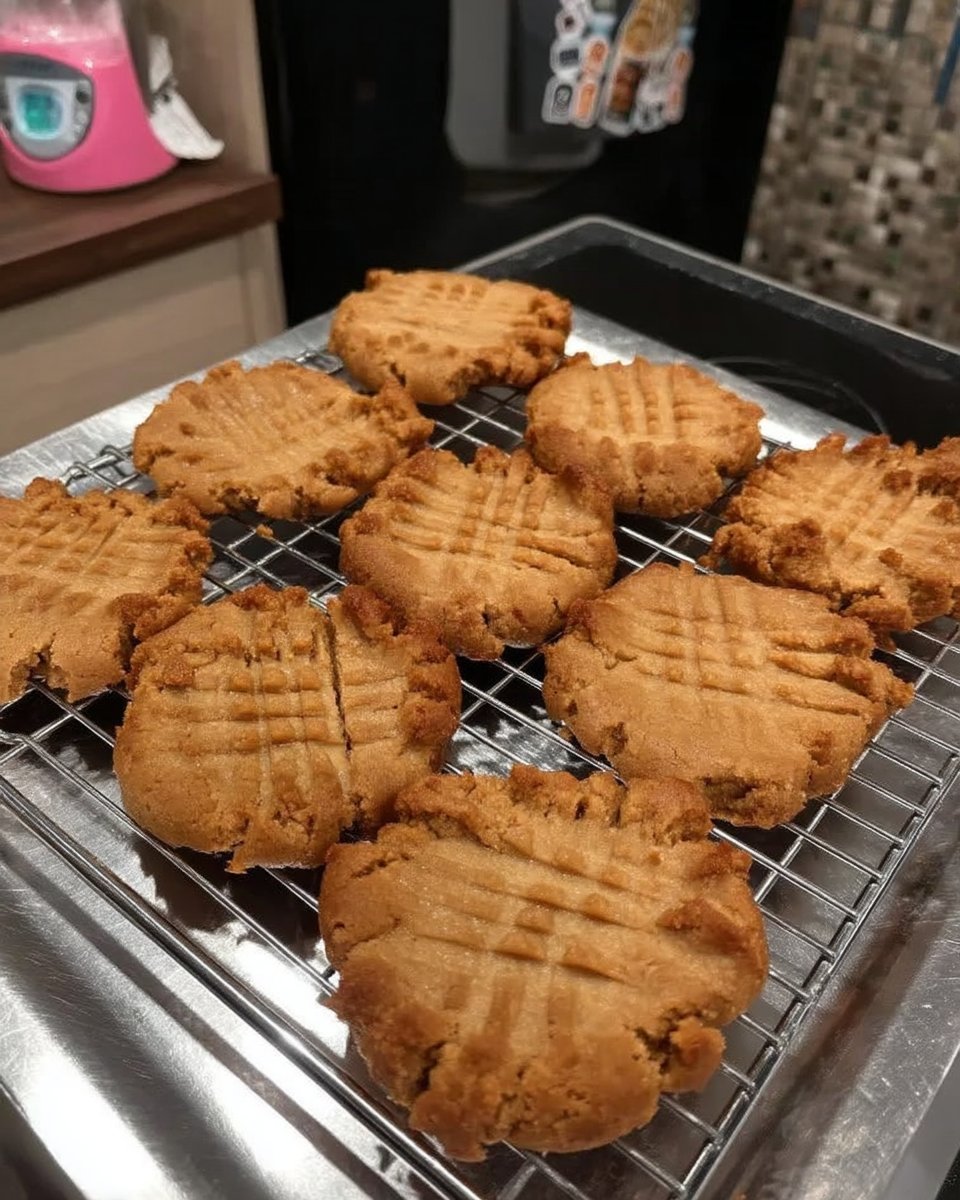
My grandmother, Pearl, kept her most precious recipes on flour-dusted index cards tucked inside a worn tin box that sat on the windowsill. This specific card for classic soft chocolate chip cookies was the most loved, with butter stains marking the corners and her elegant script slightly faded from years of use. It is the scent that hits you first—the unmistakable aroma of pure vanilla and browning sugar that tells you home is right where you are.

These cookies are the true heart of my cookie jar, offering a gentle, golden crunch at the very edge while the center remains tender and soft. We use simple, honest pantry staples to create something that feels like a warm hug from the past, proving that the old ways are often the best ways. Whether you are baking for a school bake sale or a quiet Sunday afternoon, these treats bring a sense of timeless comfort to every kitchen.
A Timeless Treasure for Your Cookie Jar
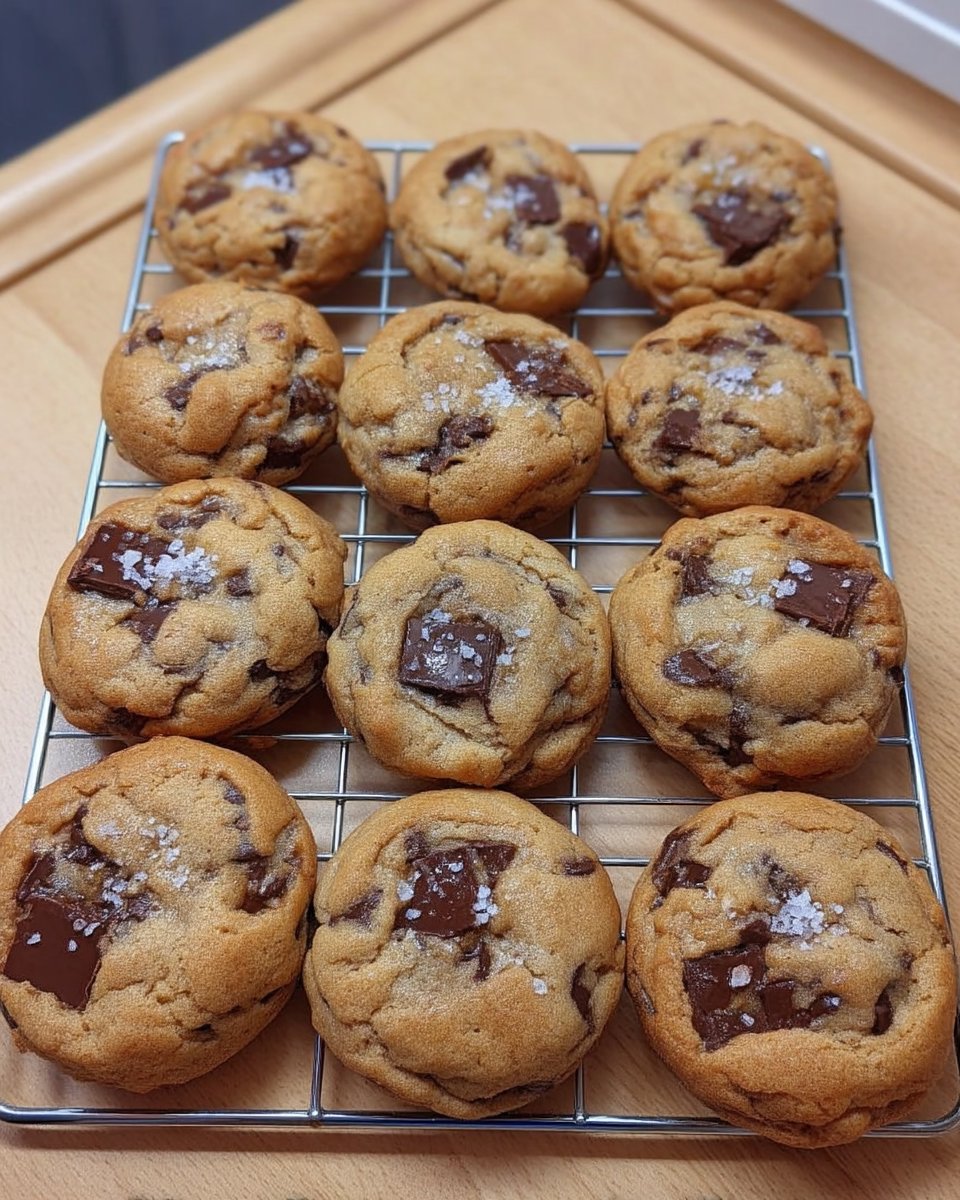
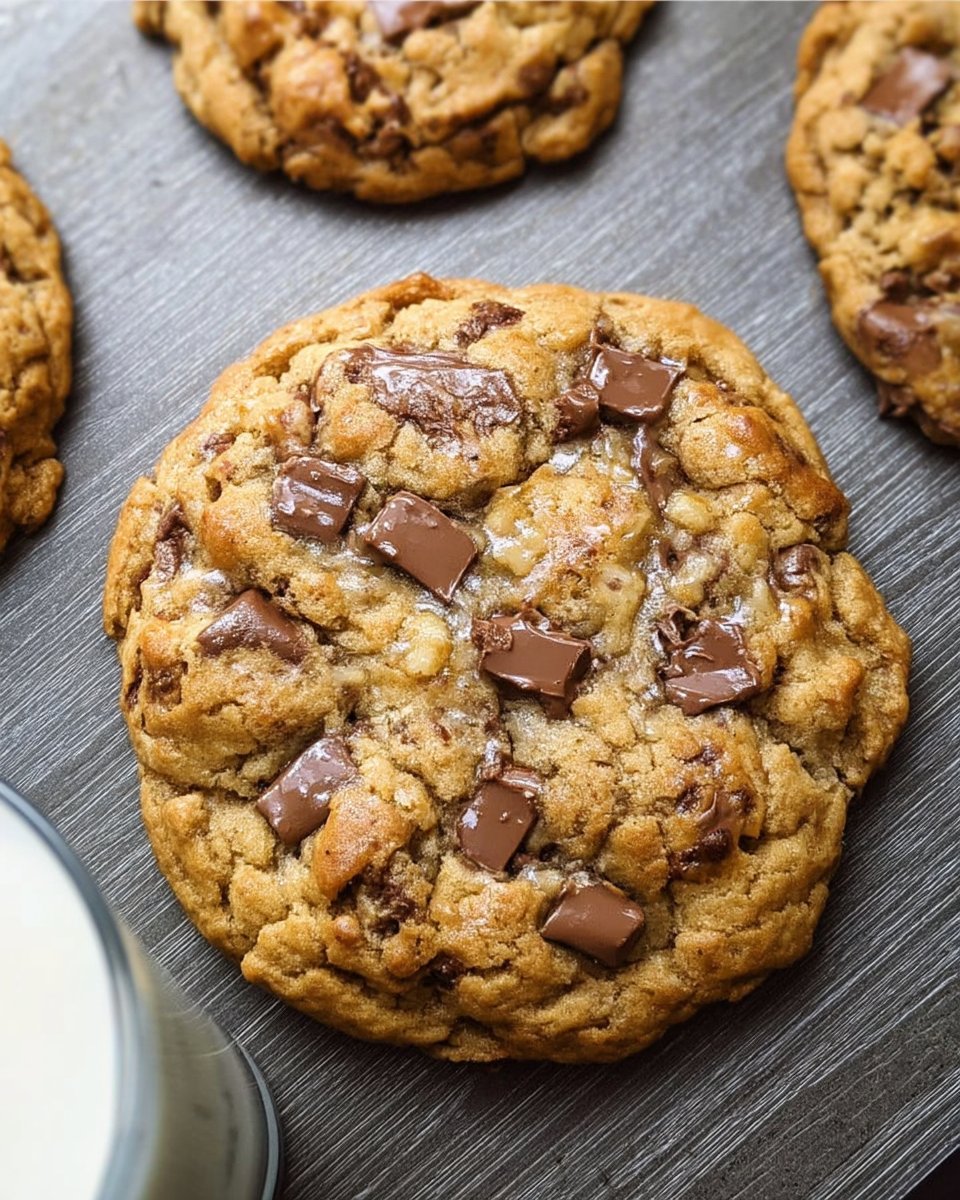
There is a specific kind of joy that comes from pulling a tray of these classic soft chocolate chip cookies out of the oven. Unlike modern recipes that try to do too much, this heritage version focuses on the perfect balance of textures that we all remember from childhood. The edges are just firm enough to hold their shape, while the middle stays beautifully soft, creating a harmony that makes it impossible to stop at just one.
This recipe is a keeper because it relies on the wisdom of generations past. By creaming the butter and sugars for a full five minutes, we build a foundation of air and lightness that results in a cookie that never feels heavy or greasy. It is a reliable friend in the kitchen, a recipe that works every single time and brings people together over a shared plate and a cold glass of milk.
In our house, these are known as the disappearing cookies because the jar never stays full for long. They represent the simple beauty of home baking—no fancy equipment or hard-to-find ingredients, just pure, honest flavor. When you bite into one, you are tasting a piece of history, a recipe that has been passed down and perfected through decades of family gatherings and holiday celebrations.
Print
Classic Soft Chocolate Chip Cookies
- Total Time: 28 mins
- Yield: 24 cookies
- Diet: Vegetarian
Description
These timeless chocolate chip cookies feature a tender, soft center with perfectly golden edges. Made with simple pantry staples and a generous amount of vanilla, they bring a touch of nostalgic comfort to any kitchen.
Ingredients
- 1 cup unsalted butter, softened
- 3/4 cup granulated sugar
- 3/4 cup light brown sugar, packed
- 1 large egg, room temperature
- 1 tablespoon pure vanilla extract
- 2 1/4 cups all-purpose flour
- 1 teaspoon baking soda
- 1/2 teaspoon salt
- 2 cups semisweet chocolate chips
Instructions
- Preheat your oven to 350°F (175°C) and line two large baking sheets with parchment paper or silicone mats.
- In a medium-sized mixing bowl, whisk together the all-purpose flour, baking soda, and salt until evenly distributed.
- In the bowl of a stand mixer, beat the softened butter, granulated sugar, and brown sugar on medium-low speed for at least five minutes until the mixture is light and fluffy.
- Add the egg and vanilla extract to the creamed mixture and continue beating until well combined and smooth, scraping the sides of the bowl as needed.
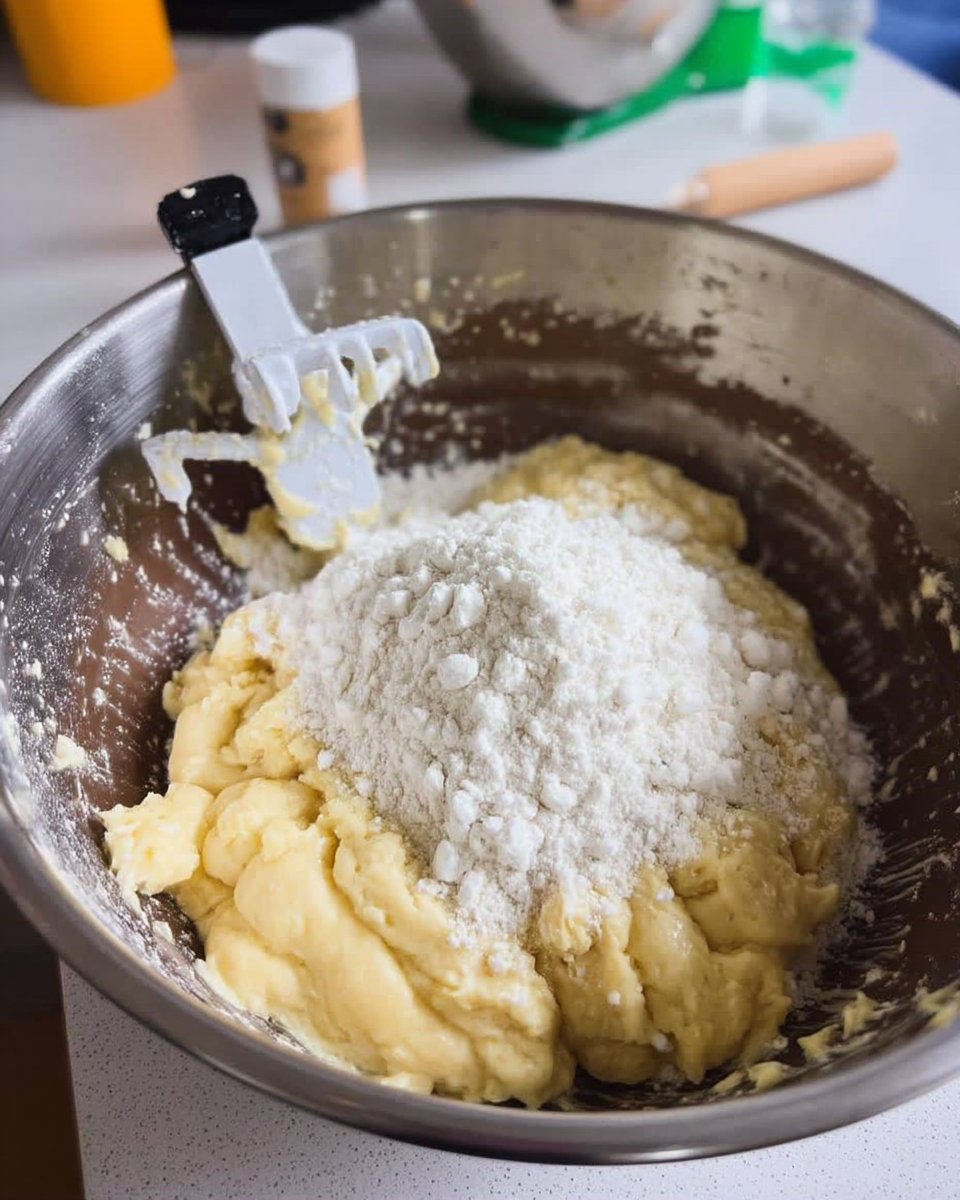
- Turn the mixer to the lowest setting and gradually add the flour mixture, mixing just until streaks disappear, then fold in the chocolate chips by hand.
- Using a 1 1/2-tablespoon cookie scoop, portion the dough into balls and place them on the baking sheets, leaving two inches of space between each.
- Bake for 12 to 14 minutes until the edges are a light honey-gold and the centers are still soft and slightly puffed.
- Allow the cookies to rest on the hot baking sheet for 5 to 10 minutes before moving them to a wire rack to finish cooling.
Notes
For the best results, ensure your butter and egg are at room temperature to create a smooth, emulsified dough. If you have the time, chilling the portioned dough balls for an hour before baking will deepen the flavor and result in a thicker, softer cookie.
- Prep Time: 15 mins
- Cook Time: 13 mins
- Category: Dessert
- Method: Baking
- Cuisine: American
Simple Pantry Staples for Honest Flavor

Gathering your ingredients is the first step in this beautiful tradition. I always say that the quality of your cookies starts with the quality of your staples, so reach for the real butter and the best vanilla you have in the cupboard. These simple elements work together to create a flavor profile that is both nostalgic and deeply satisfying.
- Unsalted Butter: We use softened butter to create that signature creamy texture. Using unsalted allows us to control the seasoning perfectly, just as Grandma always did.
- Granulated and Light Brown Sugar: The combination of these two is vital. The granulated sugar provides the crisp edges, while the brown sugar brings moisture and a hint of molasses for that soft, chewy center.
- All-Purpose Flour: This is the sturdy base of our cookie. Be sure to measure it carefully so the cookies stay light rather than becoming cakey.
- Pure Vanilla Extract: Never settle for the imitation kind. A full tablespoon of real vanilla provides the aromatic backbone that makes these cookies smell like a dream.
- Large Egg: One fresh egg at room temperature acts as the binder, giving the dough its structure and richness.
- Baking Soda and Salt: These humble ingredients are the quiet heroes, providing the lift and balancing the sweetness of the chocolate.
- Semisweet Chocolate Chips: You can use chips or hand-cut chunks for big, melty pools of chocolate in every single bite.
The Heritage Method of Baking
Step 1: Preparing the Hearth
Begin by preheating your oven to 350°F (175°C). This gives the oven plenty of time to reach a steady, even heat. Line two large baking sheets with parchment paper or a silicone mat. This step is a modern convenience that Grandma would have loved, as it prevents sticking and makes cleanup a breeze while protecting the delicate bottoms of your cookies.
Step 2: Whisking the Dry Goods
In a medium-sized mixing bowl, whisk together the all-purpose flour, baking soda, and salt. I like to use a wire whisk to make sure everything is evenly distributed and to break up any little clumps in the flour. This simple act of preparation makes for a much smoother dough later on.
Step 3: Creaming with Care
In the bowl of your stand mixer, or a large bowl with a hand mixer, combine the softened butter with both the granulated and brown sugars. This is where the magic happens. Beat them together on medium-low speed for at least five minutes. You want the mixture to look very light, fluffy, and almost like pale clouds. This long creaming time is the secret to a soft, airy cookie.
Step 4: The Heart of the Dough
Add the egg and that wonderful tablespoon of vanilla extract to the creamed butter. Continue beating until the mixture is well combined and smooth. Be sure to stop and scrape down the sides of the bowl with a spatula once or twice. We want every bit of that golden butter and sugar to be fully incorporated into the dough.
Step 5: Bringing it Together
Turn your mixer to its lowest setting and gradually add the flour mixture. Mix just until the white streaks of flour disappear—be careful not to overwork it! Over-mixing can make the cookies tough, and we want them to stay tender. Use a sturdy spoon or spatula to gently fold in the semisweet chocolate chips by hand, making sure they are scattered evenly throughout.
Step 6: Shaping the Memories
Using a 1½-tablespoon cookie scoop, portion the dough into neat balls and place them on your prepared baking sheets, leaving about two inches between them. For a little extra love, press a few additional chocolate chips into the top of each ball. If you have the patience, chilling these dough balls in the refrigerator for an hour will deepen the flavor and prevent too much spreading.
Step 7: The Golden Bake
Place the sheets in the oven and bake for 12 to 14 minutes. Watch them closely; you are looking for edges that have turned a beautiful honey-gold while the centers still look slightly puffed and soft. If you chilled your dough, they might need an extra minute or two. For the most even results, I recommend baking one sheet at a time in the center of the oven.
Step 8: The Cooling Rest
Let the cookies rest on the hot baking sheet for 5 to 10 minutes after you take them out. This allows the centers to set perfectly without becoming hard. Once they are firm enough to move, transfer them to a wire rack to finish cooling. If you like a little sparkle, a tiny pinch of flaked salt on top while they are still warm adds a lovely modern touch to this classic treat.
Grandma’s Secrets for the Perfect Batch
One of the most important lessons I learned in Grandma’s kitchen was the value of patience. When measuring your flour, never scoop it directly with the measuring cup, as this packs it down and leads to dry, crumbly cookies. Instead, fluff the flour with a spoon, sprinkle it into the cup, and level it off with the back of a knife. This small change makes a world of difference in the final texture.
Another secret to success is using room temperature ingredients. When your egg and butter are at the same temperature, they emulsify much better, creating a smooth dough that bakes evenly. If you forgot to take your egg out of the fridge, just let it sit in a bowl of warm water for a few minutes. For more guidance on mastering the basics, have a look at our Classic Cookie Recipes for more timeless techniques.
Finally, remember that the cookie jar is your friend. These cookies actually improve in texture after sitting in an airtight container for a few hours. The moisture from the chocolate chips and the brown sugar softens the crumb even further, making them the perfect treat to bake a day before you plan to share them. Keeping a slice of plain white bread in the jar with them will help keep them soft for up to a week.
Heritage Twists for Every Generation
While the original recipe is perfection, our family has added a few little twists over the years to suit different occasions. For a deeper, more sophisticated flavor, you can try browning the butter before mixing it with the sugars. This creates a nutty, toasted aroma that pairs beautifully with the chocolate. If you enjoy a bit of crunch, adding half a cup of chopped walnuts or pecans is a traditional way to add texture and heartiness to the batch.
During the colder months, we often turn these into a festive treat by adding a half-teaspoon of cinnamon or a touch of orange zest to the dough. These small additions can make a familiar favorite feel brand new. If you are looking for ideas for the next big gathering, you might find inspiration in our collection of Holiday Cookie Celebrations. Whether you swap the chocolate chips for white chocolate or add a handful of dried cranberries, the base dough is sturdy enough to handle your family’s unique traditions.
Sharing the Tradition

There is no better way to serve these classic soft chocolate chip cookies than straight from the cookie jar with a tall, cold glass of milk. In our family, the ritual of the ‘after-school cookie’ is a sacred time for catching up and sharing stories. If you are entertaining guests, arrange the cookies on a vintage porcelain plate or a simple wooden board to highlight their rustic, homemade charm.
For an extra special treat, try serving these cookies warm with a small scoop of vanilla bean ice cream on the side. The heat from the cookie slightly melts the ice cream, creating a simple but elegant dessert. If you are in a rush and need something just as satisfying but a bit faster to prepare, you can browse our Quick & Easy Cookies for more family-friendly ideas. These cookies also make wonderful gifts; simply stack them in a glass jar tied with a bit of twine or gingham ribbon to share a piece of your home with a neighbor.
The Sweet Heritage of Home Baking
Baking these cookies is about more than just satisfying a sweet tooth; it is about carrying forward a tradition of love and care. Every time you whisk the flour or cream the butter, you are participating in a ritual that has brought comfort to kitchens for generations. These cookies represent the enduring power of simple ingredients and the joy of sharing something handmade with the people who matter most to you. I hope this recipe finds a permanent home in your recipe box and brings as much warmth to your family as it has to mine.
If you are interested in exploring more mindful ways to bake, you might enjoy our Wholesome Cookie Options which offer a different take on the classics. For even more inspiration and to see what we are currently pulling out of the oven, come visit us on Pinterest, Instagram, or Facebook. You can also find wonderful tips on achieving the perfect texture in this guide by Preppy Kitchen. Keep your cookie jar full and your heart warm. Happy baking!
