Many vintage icebox cookies suffer from a common flaw: they start with a lovely crunch but turn into brittle, dry crumbs within forty-eight hours. I spent months in my kitchen adjusting the sugar ratios and chilling durations to solve this heritage hurdle without losing the soul of the recipe. This version keeps that classic, old-world flavor while providing a tender, jar-fresh texture that lasts for over a week.

These cookies rely on a patient overnight chill to allow the flour to fully hydrate and the butter to stabilize. The result is a dough that is easy to slice paper-thin, creating a delicate wafer that offers a satisfying snap followed by a buttery melt-away finish. It is the perfect balance of vintage charm and modern texture reliability.
A Perfect Treat for Any Occasion
There is something deeply comforting about a cookie that waits for you. Unlike drop cookies that demand immediate attention, this recipe fits your schedule perfectly. You can prepare the dough on a quiet Tuesday evening and bake off a fresh batch whenever the craving strikes or unexpected guests arrive. This flexibility is a hallmark of the icebox method, allowing the flavors of cinnamon and toasted almonds to meld and deepen over time.
Beyond the convenience, the texture is truly the star of the show. By using a full pound of butter, we create a rich, shortbread-like base that resists going stale. The light brown sugar provides just enough moisture to keep the center from becoming dusty, while the granulated sugar creates those iconic golden, crisp edges. These cookies are a treasure for anyone who loves a treat that stays soft and fresh in the jar for days on end.
Finally, the addition of slivered almonds adds a sophisticated layer of crunch that contrasts beautifully with the tender crumb. Every thin slice reveals a beautiful mosaic of nuts, making them look as wonderful as they taste. They are elegant enough for a holiday platter but simple enough for a Tuesday afternoon snack with a cold glass of milk.
Print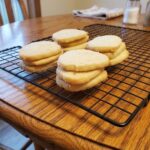
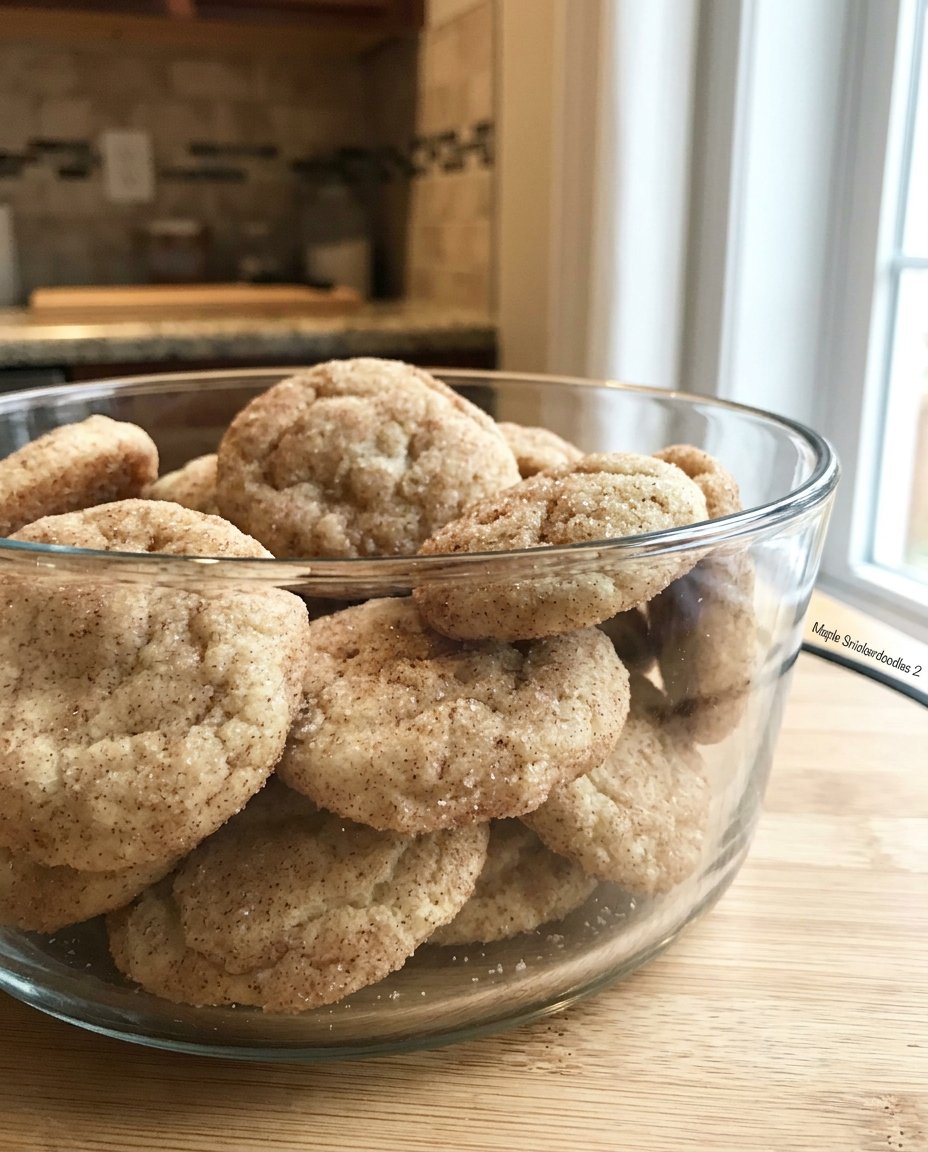
Icebox Cookies
- Total Time: 8 hours 30 mins
- Yield: 8 dozen
- Diet: Vegetarian
Description
Experience the nostalgic delight of these heritage icebox cookies, featuring a rich buttery base and a sophisticated almond crunch. This recipe solves the common problem of dry crumbs by using a specific sugar ratio and a patient chilling process for a perfect, long-lasting texture.
Ingredients
- 16 oz Unsalted Butter, softened
- 1 cup Light Brown Sugar
- 1 cup Granulated Sugar
- 3 Large Eggs
- 5 cups All-Purpose Flour
- 1 teaspoon Baking Soda
- 1 teaspoon Ground Cinnamon
- 1/2 pound Slivered Almonds
Instructions
- In a large mixing bowl, cream the softened butter with both the light brown and granulated sugars on medium-high speed until the mixture is pale and fluffy.
- Incorporate the eggs one at a time, mixing thoroughly after each addition to ensure proper emulsification.
- In a separate bowl, whisk together the flour, baking soda, and cinnamon.
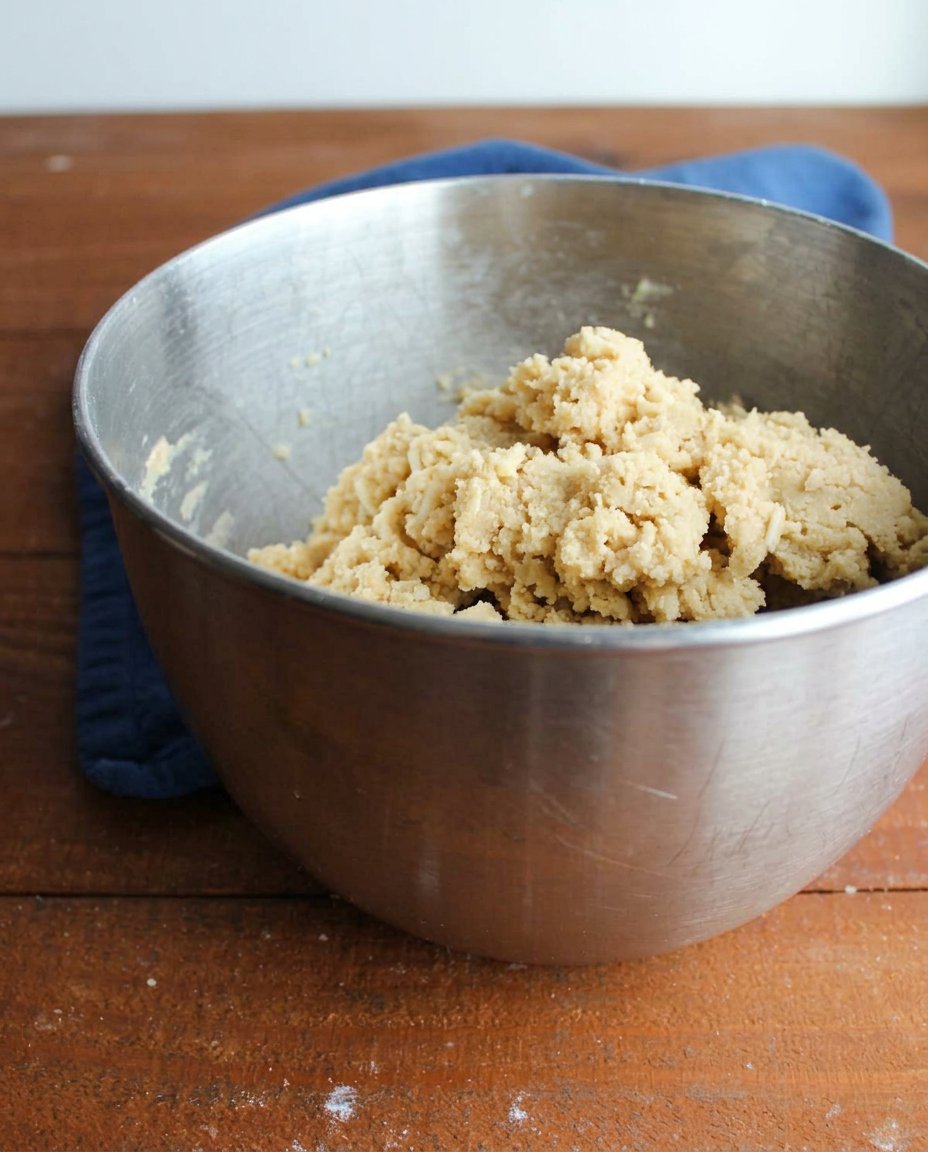
- Gradually add the dry ingredients to the butter mixture on low speed, mixing only until the flour streaks disappear.
- Fold in the slivered almonds with a spatula until they are evenly distributed throughout the thick dough.
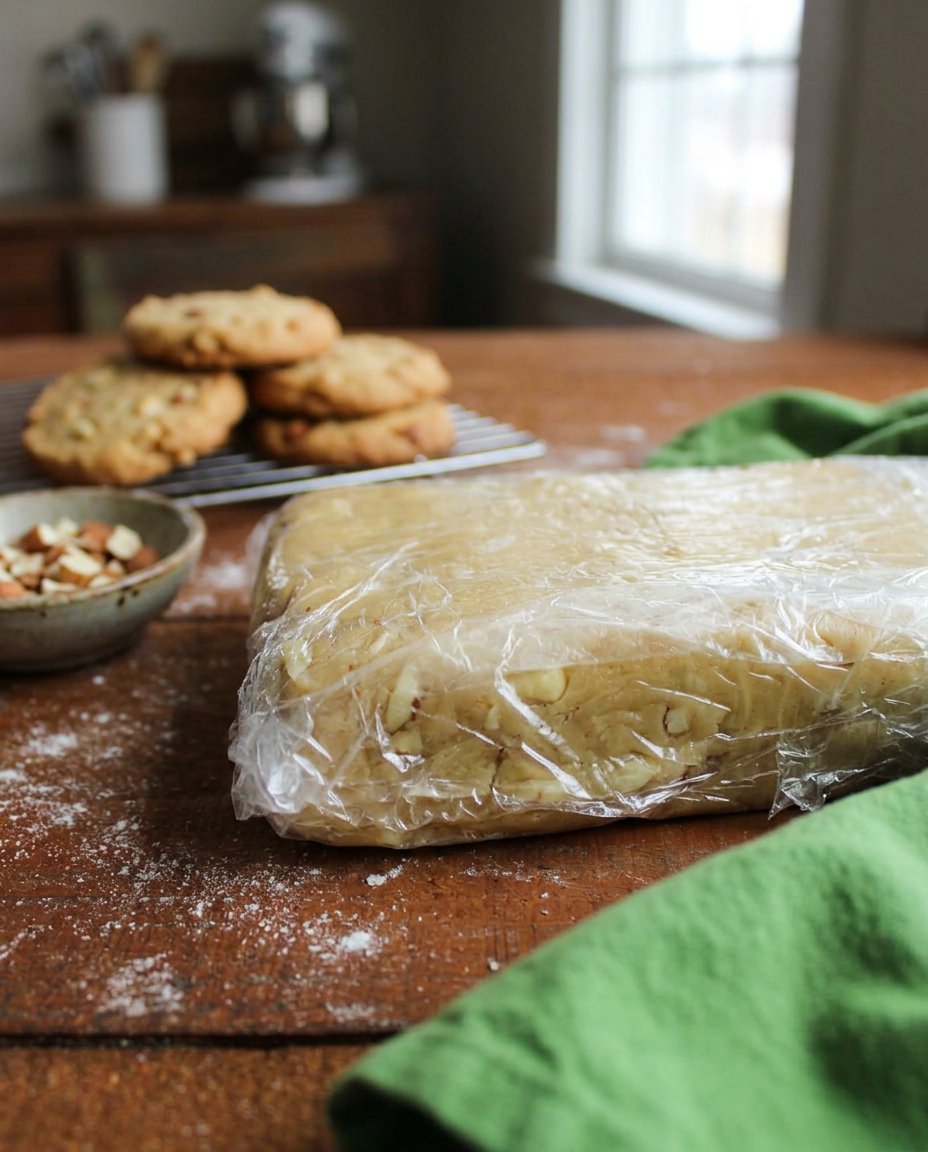
- Divide the dough into portions and shape into long logs or rectangular loaves, wrapping them tightly in plastic wrap.
- Chill the dough in the refrigerator for at least 8 hours, though 24 to 48 hours is recommended for the best flavor and texture.
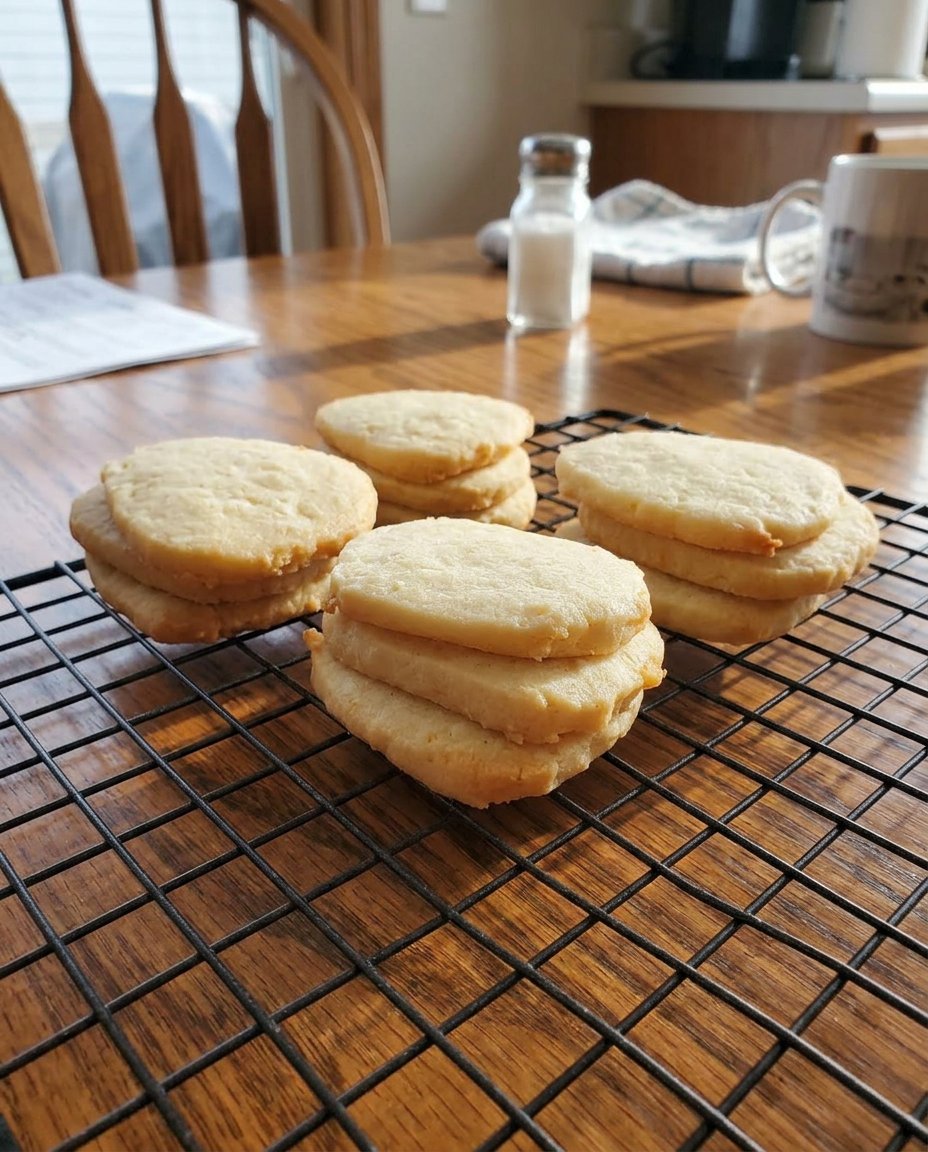
- Preheat your oven to 350℉ (175℃) and use a sharp knife to cut the chilled dough into paper-thin slices, about 1/8 inch thick.
- Place slices on a parchment-lined cookie sheet and bake for 7 minutes, or until the edges are golden brown and the centers are pale.
- Allow the cookies to set on the baking sheet for 5 minutes before transferring them to a wire rack to cool completely.
Notes
For the cleanest slices, use a very sharp chef’s knife and avoid a sawing motion; instead, apply firm downward pressure. If you find the dough log flattening on one side while you cut, simply rotate the log a quarter-turn after every few slices to maintain a uniform shape throughout the batch.
- Prep Time: 20 mins
- Cook Time: 7 mins
- Category: Dessert
- Method: Bake
- Cuisine: American
The Secrets to Lasting Freshness
To achieve a cookie that maintains its integrity for days, we must select ingredients that prioritize moisture retention and fat stability. Each component in this list serves a specific purpose in building the ultimate icebox texture.
- Unsalted Butter (16 oz): This high fat content is the backbone of the recipe. It coats the flour proteins, preventing tough gluten networks from forming and ensuring a tender, melt-in-your-mouth bite.
- Light Brown Sugar (1 cup): The molasses in brown sugar is a natural humectant, meaning it grabs onto moisture and keeps the cookies from drying out in the cookie jar.
- Granulated Sugar (1 cup): This provides the structure and encourages the edges to brown and crisp up into a honey-gold ring.
- Large Eggs (3): Eggs provide the necessary structure and leavening. They help the dough hold its shape even when sliced very thin.
- All-Purpose Flour (5 cups): This provides the body of the cookie. We use enough to make the dough sturdy for slicing, but not so much that it becomes heavy or bready.
- Slivered Almonds (1/2 pound): These provide a distinct crunch and a nutty depth that complements the warm cinnamon notes.
- Baking Soda & Cinnamon: The soda provides a tiny bit of lift, while the cinnamon adds a nostalgic, warm aroma that defines old-fashioned baking.
How to Master the Icebox Method
Step 1: Cream the Base
Begin by placing your softened butter into a large mixing bowl. Add both the light brown sugar and the granulated sugar. Beat them together on medium-high speed until the mixture looks pale and feels fluffy. This process incorporates air, which helps the cookies stay light rather than dense.
Step 2: Incorporate the Eggs
Add the large eggs to the butter mixture one at a time. It is important to mix thoroughly after each addition to ensure the fat and water from the eggs emulsify correctly. This step is vital for a uniform texture across the entire batch.
Step 3: Combine Dry Ingredients
In a separate bowl, whisk together the all-purpose flour, baking soda, and cinnamon. Gradually add this to the wet ingredients, mixing on low speed. Be careful not to overmix here; you want to stop as soon as the last streaks of flour disappear into the dough.
Step 4: Fold in the Almonds
Use a sturdy spatula to fold in the slivered almonds. You want them distributed evenly throughout the dough so that every slice has a good amount of nut pieces. The dough will be quite thick and slightly tacky at this stage.
Step 5: Shape and Chill
Divide the dough into two or three portions and shape each into a long, rectangular loaf or a round cylinder. Wrap each loaf tightly in plastic wrap. Place them in the refrigerator for at least 8 hours, though 24 to 48 hours is even better for flavor development. This chill time is what makes the dough firm enough to slice.
Step 6: Slice for Success
When you are ready to bake, preheat your oven to 350℉ (175℃). Use a very sharp chef’s knife to cut the dough into paper-thin slices, about 1/8 inch thick. Place them on a parchment-lined cookie sheet about 1/2 inch apart. They do not spread much, so you can fit many on one tray.
Step 7: The Golden Bake
Bake for about 7 minutes. Keep a close eye on the first batch; you want the edges to turn a light golden brown while the centers remain pale. Let them cool on the baking sheet for 5 minutes to set their shape before moving them to a wire rack.
Mehmet’s Texture Secrets
To get the most out of your icebox cookies, pay close attention to the temperature of your dough. If the dough starts to feel soft while you are slicing, put it back in the freezer for ten minutes. A firm dough is the only way to get those consistent, paper-thin wafers. Also, for those who want to see a similar technique used for different flavors, check out these Quick & Easy Cookies for more inspiration on efficient baking. For even more detailed guidance on traditional methods, you can see how others handle old fashioned icebox cookies to compare notes on slicing techniques.
Customizing Your Heritage Batch
You can easily adapt this recipe to suit your family’s preferences. If you prefer a darker, more caramel-like flavor, try replacing the light brown sugar with dark brown sugar. For a different crunch, swap the slivered almonds for chopped pecans or walnuts. If you are looking for ideas to serve during the holidays, our Holiday Cookie Celebrations guide offers many ways to spice up a basic dough with nutmeg or orange zest while maintaining that perfect, stays-fresh texture.
Preserving the Jar-Fresh Crunch
These cookies are best enjoyed with a warm beverage that allows the buttery notes to shine. I recommend serving them alongside a strong black tea or a creamy latte. Because they are so thin and crisp, they also make excellent garnishes for a bowl of vanilla bean ice cream. To see more ways to present your bakes for guests, look through our Classic Cookie Recipes section. Remember to store them in a glass jar with a tight seal to maintain that wonderful texture for up to two weeks.
The Final Texture Truth
Baking these icebox cookies is a wonderful way to bring a piece of history into your modern kitchen while ensuring a quality result that won’t go stale. By respecting the chill time and using plenty of butter, you create a treat that stays soft and satisfying for many days. For more tips on maintaining the best texture in your pantry, visit our Wholesome Cookie Options. If you enjoyed this recipe, please share your results with us on Pinterest, Instagram, or Facebook. Happy baking, and may your cookie jar always be full of fresh, chewy treats!


