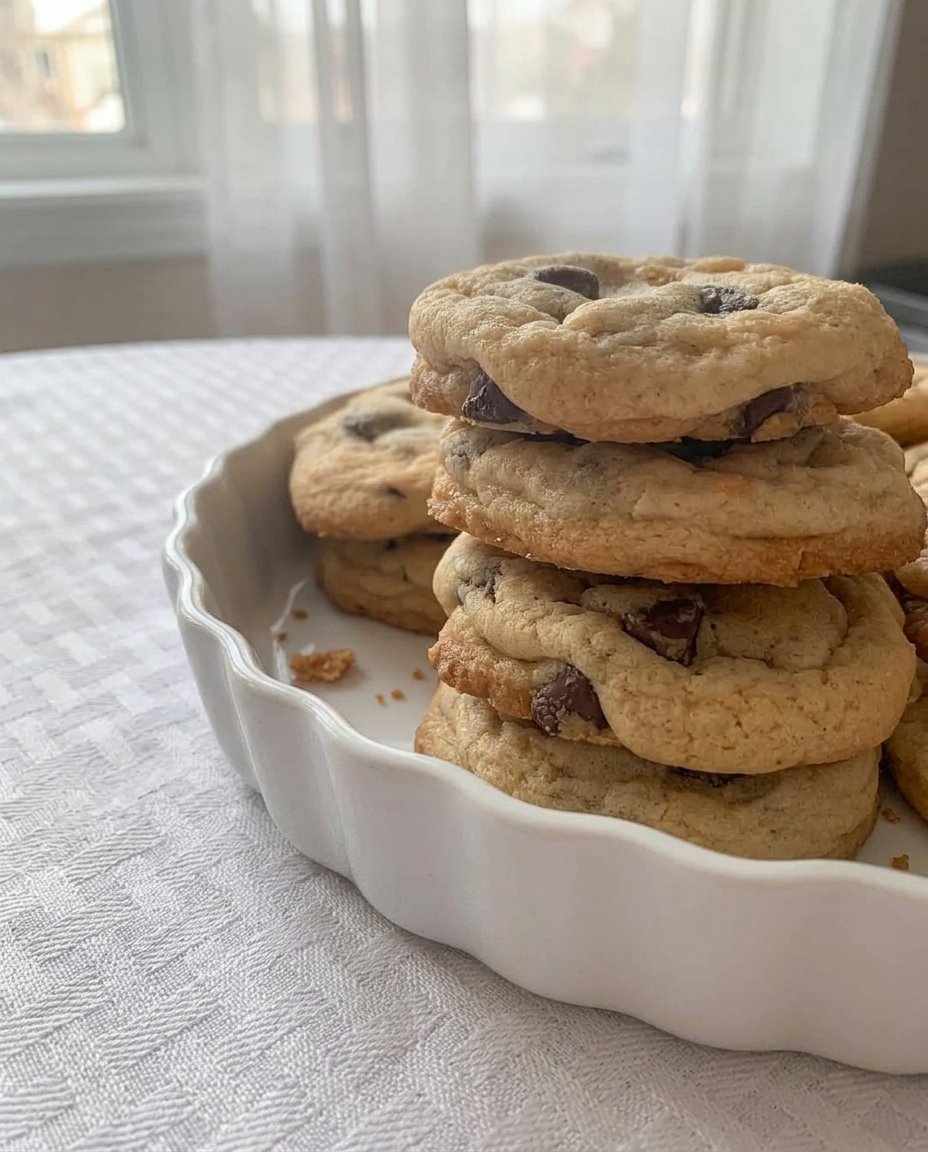
I remember watching Grandma pull out five different bowls just to make a simple batch of chocolate chip cookies. While I treasure those memories, my own kitchen is often a whirlwind of activity, leaving little time for heavy cleanup. This recipe is a heritage shortcut I discovered that delivers that exact same nostalgic flavor using only a single bowl and twenty-five minutes of your time.

These one bowl cookies represent the perfect marriage of vintage heart and modern speed. There is no rolling or chilling required here—just a simple drop method that results in a soft, chewy cookie with perfectly crisp edges. It is the ultimate solution for those weeknight cravings when you want something homemade but need to keep things efficient.
Grandma’s Flavor, Modern Speed
You will love these one bowl cookies because they provide a direct path to comfort without the usual kitchen chaos. Most heritage recipes demand hours of patience and a mountain of dishes, but this method respects your time while honoring traditional tastes. It is a small-batch approach, making exactly eight large cookies, which means you get a fresh treat without a week’s worth of leftovers cluttering your counter. The texture is exactly what a classic cookie should be: buttery, rich, and loaded with chocolate, achieved through a specific mixing order that mimics the multi-bowl methods of the past.
Another reason to adore this recipe is its reliability. Whether you are a seasoned baker or someone who rarely touches an oven mitt, the steps are clear and the results are consistent. We use a single egg yolk to achieve a dense, fudgy chewiness that normally requires special flours or long chilling times. By simplifying the process, we make it possible to have a house smelling like vanilla and warm sugar even on your busiest Tuesday. It is about bringing that wonderful feeling of a grandmother’s kitchen into our fast-paced lives with practical, tested techniques.
Print
One Bowl Cookies
- Total Time: 25 mins
- Yield: 8-10 cookies
- Diet: Vegetarian
Description
These easy chocolate chip cookies use a single bowl and a simple drop method to deliver classic, chewy results in under thirty minutes. Perfect for small batches, they offer a nostalgic, buttery flavor with minimal cleanup for busy bakers.
Ingredients
- 1/4 cup butter, softened
- 1/4 cup brown sugar, packed
- 1/4 cup granulated sugar
- 1 large egg yolk
- 1 tsp vanilla extract
- 1/2 cup plus 2 tablespoons (85 grams) all-purpose flour
- 1/4 tsp baking soda
- 1/4 tsp salt
- 2/3 cup chocolate chips
Instructions
- Preheat your oven to 350°F (175°C) and line a baking sheet with parchment paper.
- In a medium bowl, combine softened butter with brown and granulated sugars; beat for 2 to 3 minutes until light and fluffy.
- Add the egg yolk and vanilla extract to the mixture and beat until smooth and glossy.
- Move the wet mixture to one side of the bowl; add the flour, baking soda, and salt to the other side, stir the dry ingredients together, and then fold everything together until just combined.
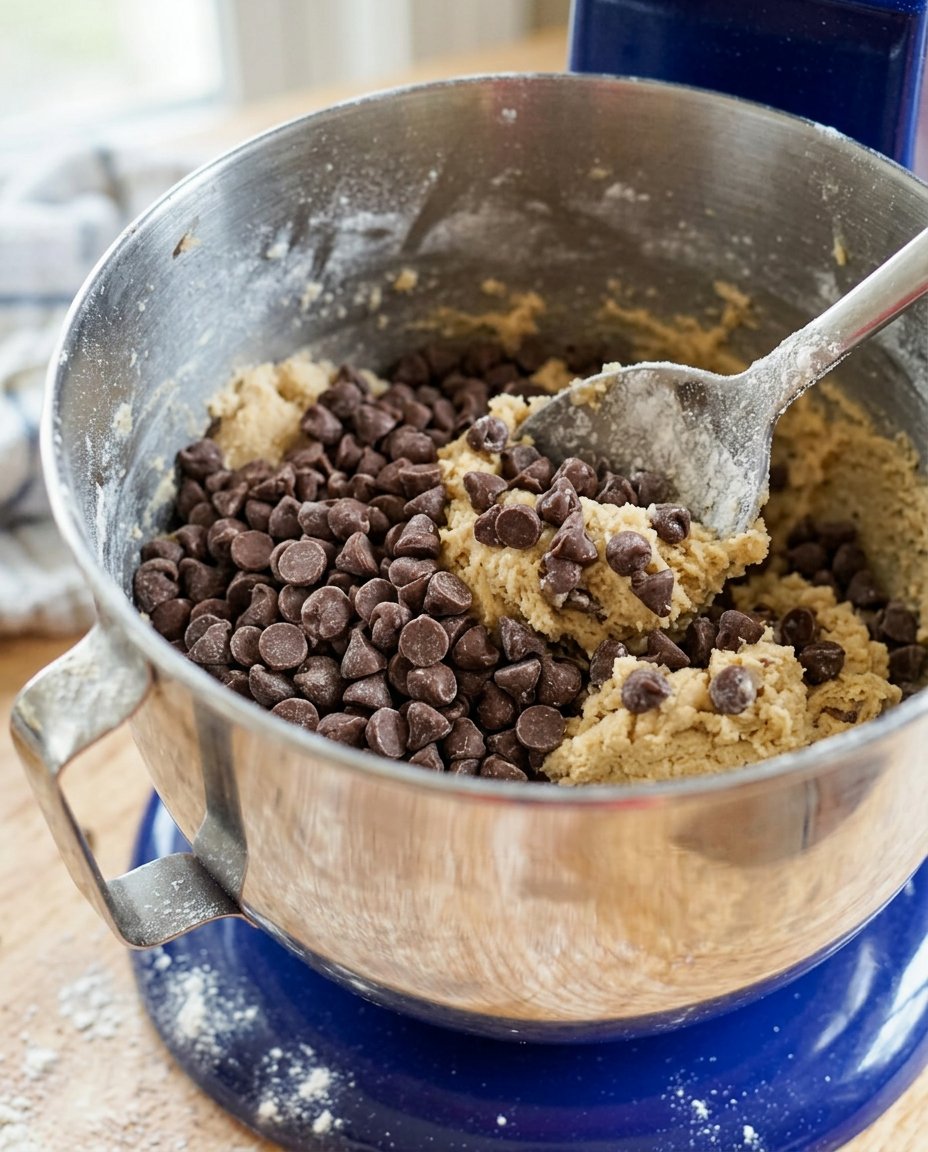
- Gently fold in the chocolate chips with a spatula.
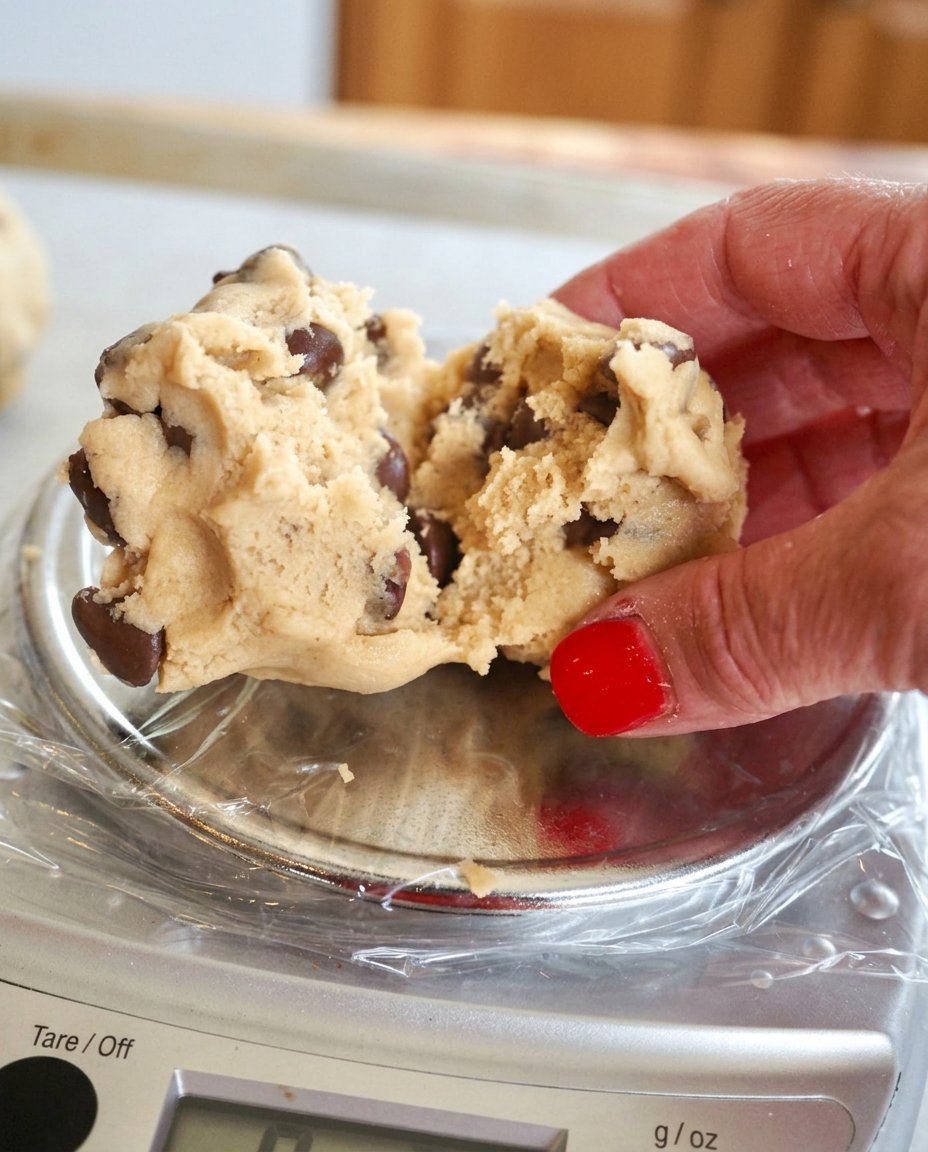
- Scoop the dough into 8 to 10 balls and place them on the prepared baking sheet with 2 inches of space between them.
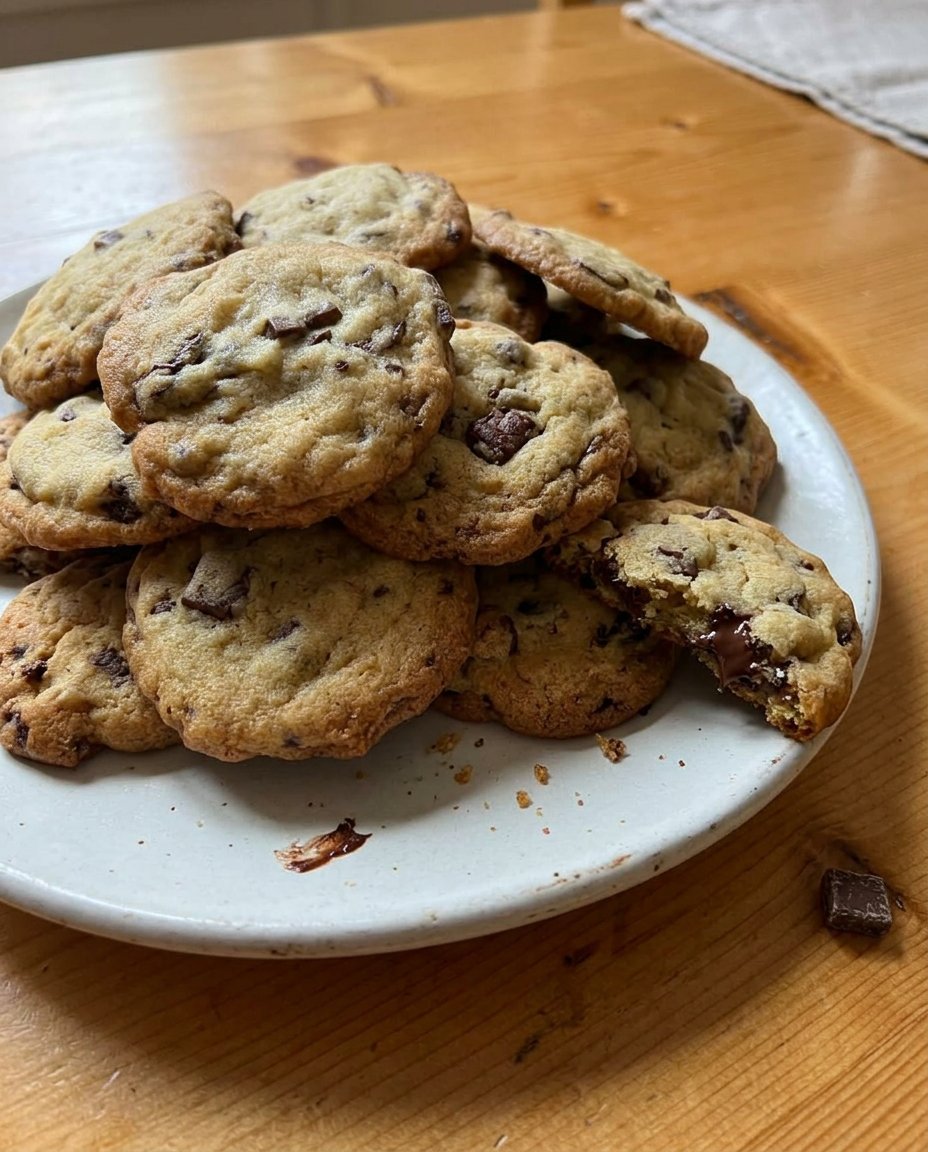
- Bake for 9 to 11 minutes until edges are light golden brown, then let them cool on the pan for at least 10 minutes to firm up.
Notes
For the chewiest texture, ensure you use only the egg yolk, as the white can make the cookies more cake-like. If you prefer a flatter, crisper cookie, press the dough balls down slightly with the back of a spoon before placing the tray in the oven.
- Prep Time: 15 mins
- Cook Time: 10 mins
- Category: Dessert
- Method: Baking
- Cuisine: American
Simple Pantry Staples
Building a great cookie starts with quality basics that you likely already have in your cupboard. This recipe relies on a specific balance of fats and sugars to create that classic profile without needing a dozen different ingredients. Here is what you will need for these one bowl cookies:
- Butter (1/4 cup): Make sure your butter is softened to room temperature so it creams perfectly with the sugars. This provides the foundational richness.
- Brown Sugar (1/4 cup): Packed brown sugar adds moisture and that deep, molasses-like undertone that defines a vintage cookie.
- Granulated Sugar (1/4 cup): This helps the edges crisp up and provides the classic sweetness we all expect.
- Egg Yolk (1 large): Using only the yolk is a modern secret for a chewier, richer texture. It prevents the cookies from becoming too cake-like or puffy.
- Vanilla Extract (1 tsp): A generous amount of vanilla brings out the buttery notes and ties all the flavors together.
- All-Purpose Flour (1/2 cup plus 2 tablespoons / 85 grams): This specific measurement is the key to the structure. Too much flour makes them dry, while too little causes them to spread too thin.
- Baking Soda and Salt (1/4 tsp each): These provide the lift and flavor balance. Don’t skip the salt; it makes the chocolate pop.
- Chocolate Chips (2/3 cup): Semi-sweet is the traditional choice, but you can use what you have on hand.
Using a scale for the flour is highly recommended to keep the heritage flavor consistent every time you bake.
Quick Method for Busy Bakers
Step 1: Cream the Butter and Sugars
Start by preheating your oven to 350°F (175°C) and lining a baking sheet with parchment paper. In your medium bowl, combine the softened butter with both the brown and granulated sugars. Using a hand mixer or a standing mixer, beat these together for a full 2 to 3 minutes. You are looking for a light, fluffy texture that looks pale in color. This step is vital because it creates the tiny air pockets that give the cookie its structure.
Step 2: Incorporate the Wet Ingredients
Once your butter and sugar mixture is perfectly creamed, add in the single egg yolk and the vanilla extract. Beat the mixture again until everything is fully combined. It should look smooth and slightly glossy. This is the stage where the flavor is built, so make sure no streaks of egg remain.
Step 3: Add the Dry Ingredients
Instead of grabbing a second bowl, simply shift your wet mixture to one side of the bowl. On the empty side, add your flour, baking soda, and salt. Use a fork or a small whisk to gently stir these dry components together right there in the bowl before folding them into the wet base. This little trick preserves the ‘one bowl’ promise while keeping the leavening agents distributed. Stir until the flour just disappears—do not overmix.
Step 4: Fold and Scoop
Gentle fold in your chocolate chips with a spatula. Use a large cookie scoop to portion the dough into 8 to 10 balls. Place them on your prepared baking sheet with about 2 inches of space between them. If you don’t have a scoop, aim for balls about 2 to 3 inches in diameter. The simplicity of this drop method means you don’t have to worry about perfectly round shapes; they will even out beautifully in the heat of the oven.
Step 5: Bake to Golden Perfection
Slide the tray into the oven and bake for 9 to 11 minutes. You want to pull them out when the edges are just starting to turn a light golden brown, even if the centers still look a bit soft. They will continue to firm up as they cool on the hot pan. Let them rest for at least 10 minutes before moving them, though the smell will make it hard to wait!
Meagan’s Time Savers
To get the best results with these one bowl cookies, always use room temperature ingredients. Cold butter won’t cream properly, which can lead to flat cookies. If you are in a rush, you can soften butter quickly by placing it near the preheating oven, but be careful not to melt it. Using parchment paper is another non-negotiable for me; it prevents sticking and makes the cleanup nearly nonexistent. For more time-saving ideas and simple methods, look at our Quick & Easy Cookies section. This method was inspired by the simplicity found in this one bowl small batch recipe. Another quick win is using a metal cookie scoop, which keeps your hands clean and ensures every cookie bakes at the same rate.
Quick Flavor Twists
While the classic chocolate chip version is a treasure, you can easily adapt this base for different moods. Swap the chocolate chips for white chocolate and macadamia nuts for a tropical feel, or use dark chocolate chunks and a pinch of espresso powder for a more grown-up taste. If you want something even more traditional, check out these Classic Cookie Recipes. You can also add a teaspoon of cinnamon to the dry ingredients to turn these into a warm, spiced treat that feels like autumn in every bite. Adding sprinkles is a fast way to make these feel like a celebration without any extra effort.
Modern Sharing Moments
These cookies are best enjoyed warm with a cold glass of milk, just like Grandma used to serve them. They also make wonderful additions to school lunchboxes because they stay soft for several days when stored in an airtight container. For a quick dessert, try sandwiching a scoop of vanilla bean ice cream between two cookies for an easy ice cream sandwich. These make great additions to our Wholesome Cookie Options for busy weeks when you need a little joyful reward at the end of the day. They are also the perfect size for gifting to a neighbor in a small parchment-lined box.
Heritage Rediscovered
Baking doesn’t have to be a multi-hour project to be meaningful. These one bowl cookies prove that we can keep our family traditions alive even when our schedules are packed. Every bite is a reminder that the simplest things—butter, sugar, and a little bit of time—can create a lasting connection to the past. Prepare for your next event with our Holiday Cookie Celebrations. We would love to see your batches, so please share your photos with us! Follow our journey for more quick nostalgia on Pinterest, Instagram, and Facebook.

