I remember watching my grandmother spend her entire Saturday in her warm kitchen, carefully chilling her dough in the old cellar to get the perfect texture. She always said that the best things in life take a little time, but in my busy house, I have learned how to capture that same magic much faster. These cookies bridge the gap between her patient tradition and our modern need for a quick, reliable treat that tastes like home.

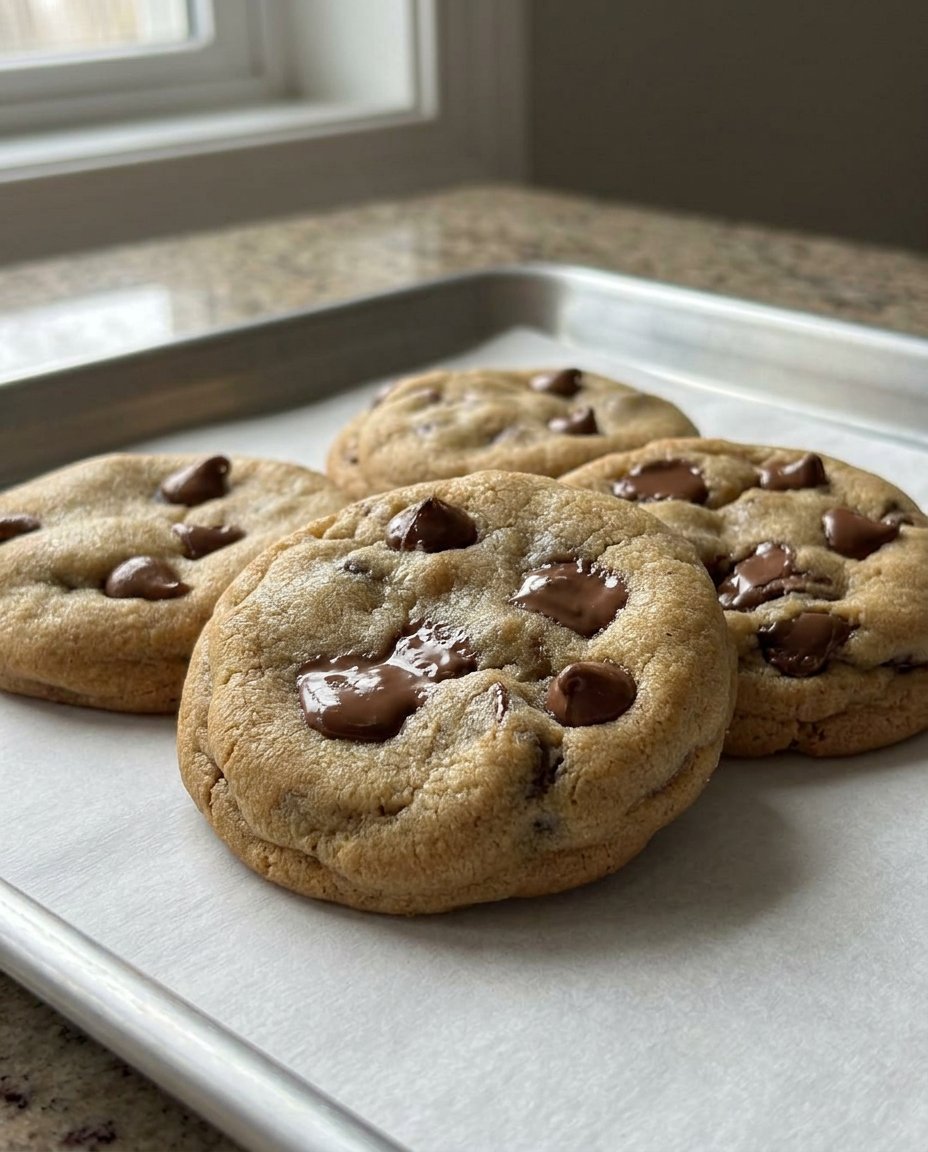
These heavy, bakery-style treats are designed to be thick and chewy with those iconic crinkly tops that look like they came from a professional shop window. We use a combination of simple pantry staples and a specific chilling method to get that high-end look without needing any fancy equipment or advanced skills. It is the perfect way to bring a bit of nostalgia into your weeknight routine without the stress of an all-day project.
A Modern Heritage Favorite
You will love these cookies because they deliver that impressive, oversized bakery look without any complicated steps or hard-to-find ingredients. The texture is perfectly balanced between a crisp outer edge and a soft, almost dough-like center that stays fresh and chewy for days. By using melted butter instead of creaming it for long periods, we save time while creating a denser, more satisfying bite that feels much more substantial than a standard cookie. It is a wonderful way to treat your family to something special that feels like it came from an old-fashioned confectionery shop, even if you only had a small window of time to bake.
Another reason to fall in love with this recipe is the reliability of the results. Because we use a mix of flours, the cookies hold their shape beautifully and do not spread into thin puddles on your tray. This means you get that signature height and those lovely ridges every single time you bake. It is a practical recipe for the modern baker who wants quality without the guesswork. Whether you are baking for a school event or just a quiet evening at home, these cookies bring a sense of joy and accomplishment to your kitchen.
Print
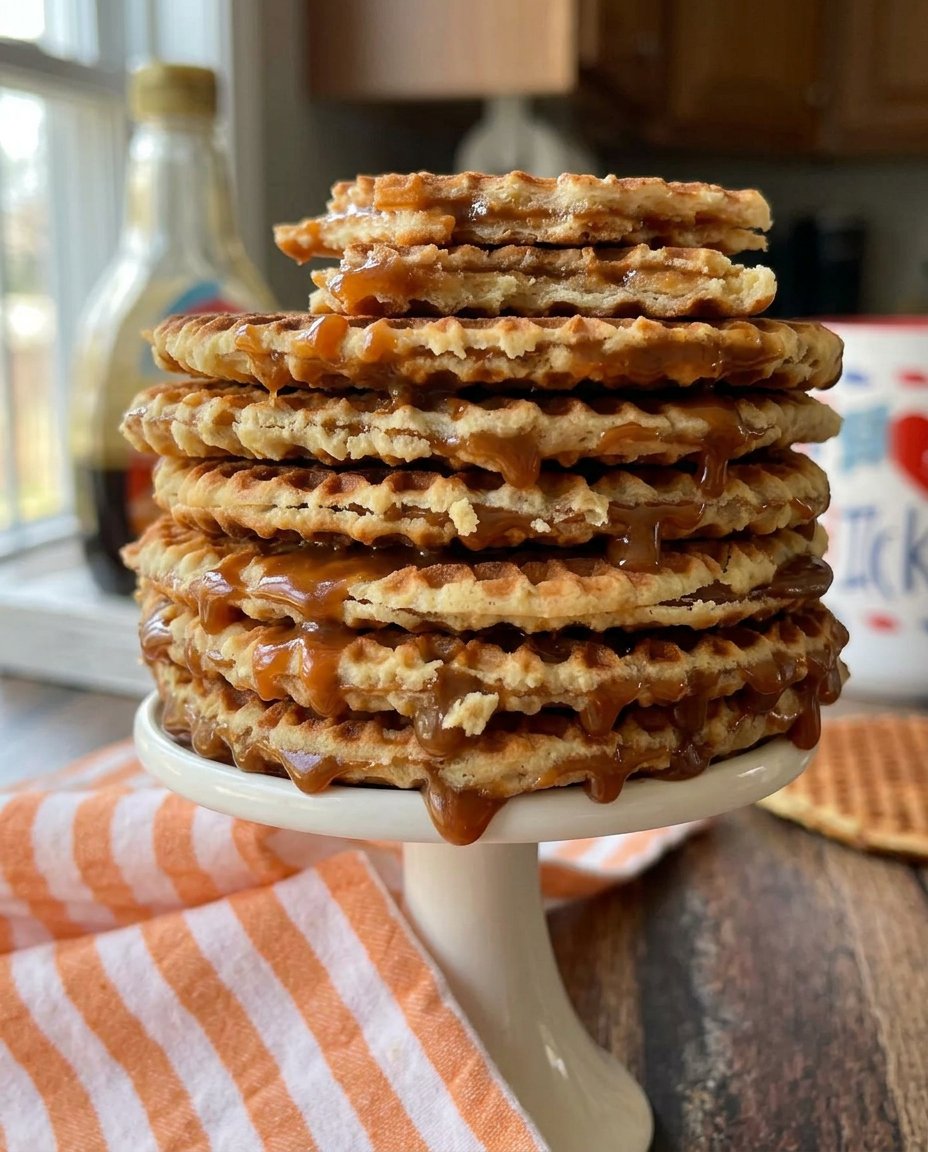
Bakery Style Chocolate Chip Cookies 3
- Total Time: 2 hours 32 mins
- Yield: 12 cookies
Description
These thick, bakery-style chocolate chip cookies feature a perfect balance of a crisp golden exterior and a soft, chewy center. By using a blend of flours and melted butter, you can achieve professional results with deep caramel notes and plenty of chocolate in every bite.
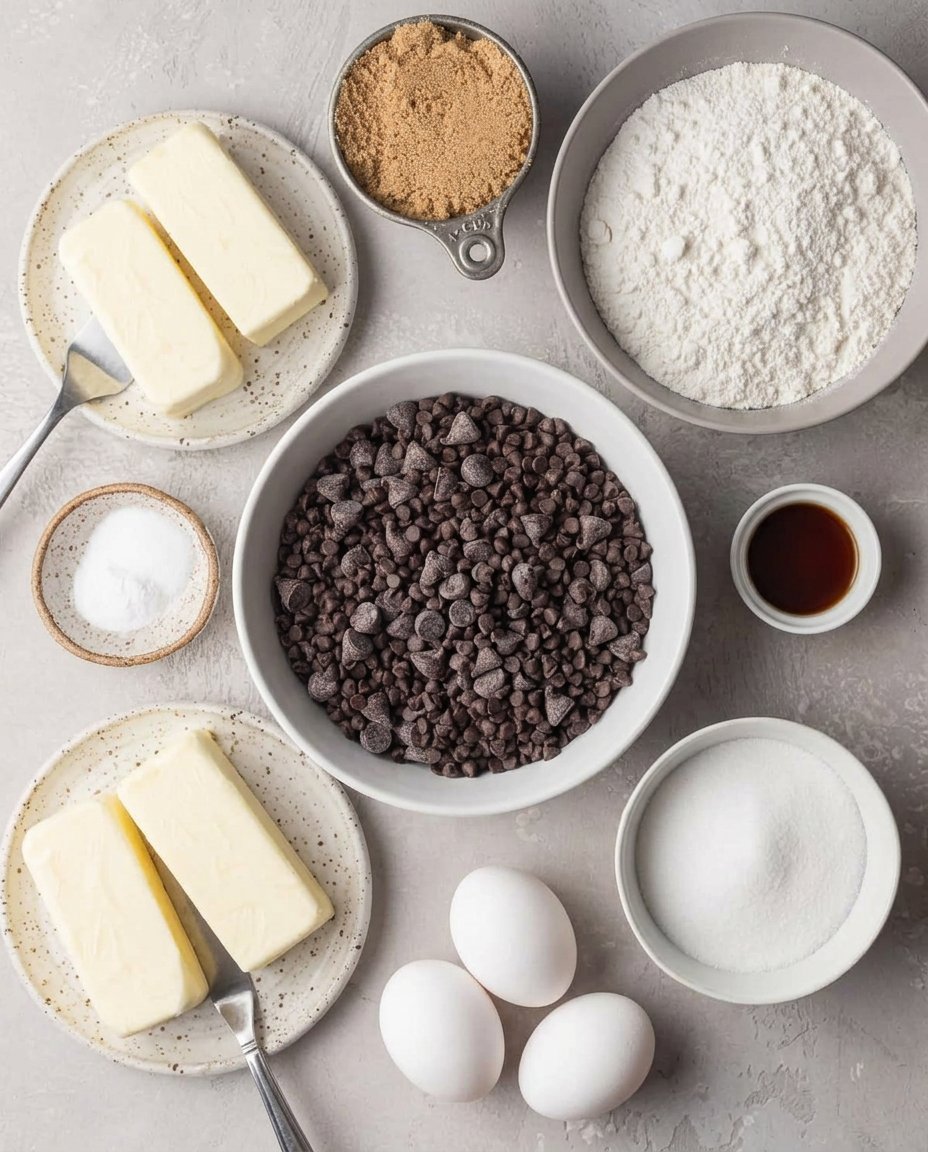
Ingredients
- 2 cups all-purpose flour
- 1 1/2 cups cake flour
- 1 teaspoon baking soda
- 1 teaspoon salt
- 1 cup unsalted butter, melted and cooled
- 1 1/4 cups light brown sugar, packed
- 1/2 cup granulated sugar
- 2 large eggs
- 1 large egg yolk
- 1 tablespoon vanilla extract
- 2 cups semi-sweet chocolate chips (mixture of regular and mini)
Instructions
- Line large baking sheets with parchment paper or silicone mats and whisk together the all-purpose flour, cake flour, baking soda, and salt in a medium-sized bowl.
- In a larger bowl, stir the melted and cooled butter with the light brown and granulated sugars using a wooden spoon or spatula until well combined.
- Add the eggs, extra egg yolk, and vanilla extract to the butter mixture and stir until the batter looks smooth and glossy.
- Gently fold the dry flour mixture into the wet ingredients until just combined, then stir in the chocolate chips evenly.
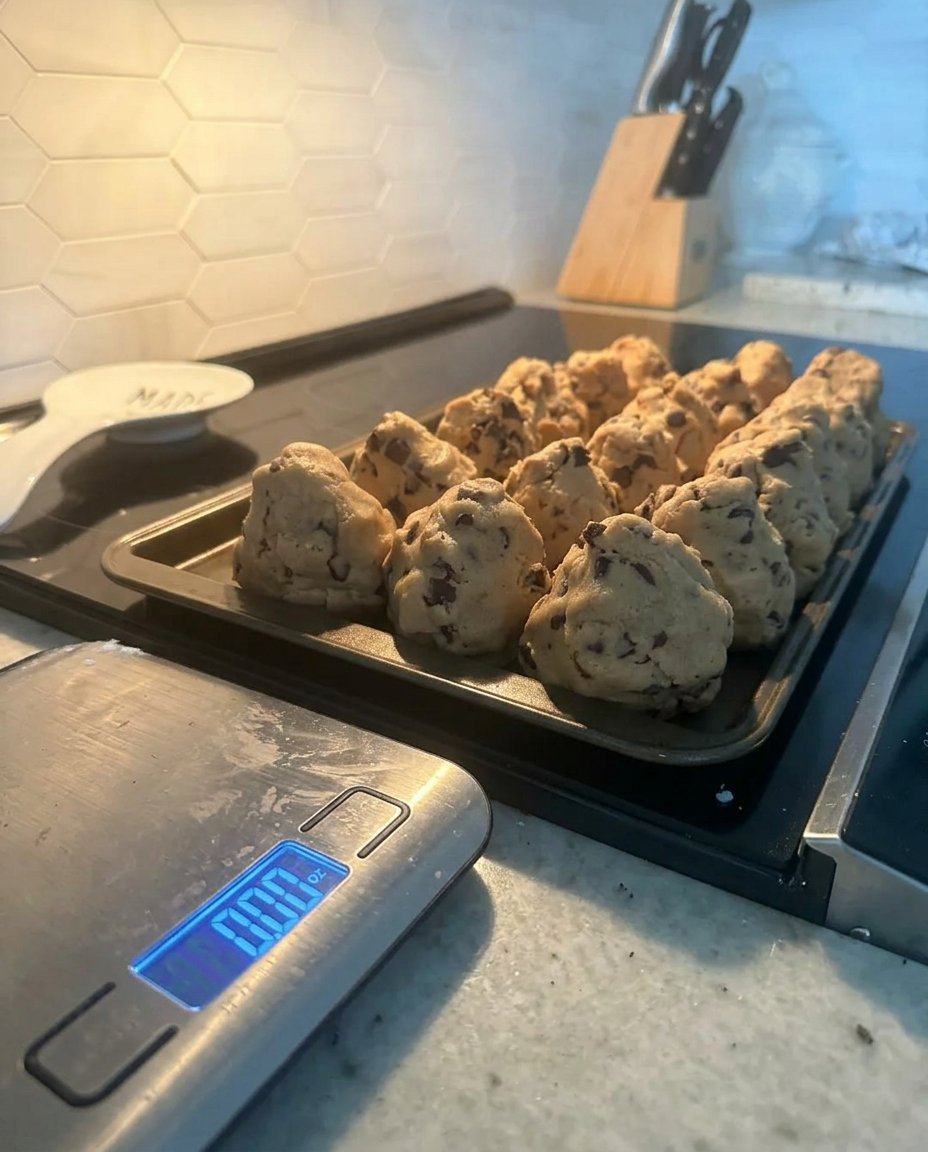
- Scoop the dough into large balls (about 3 ounces or 1/3 cup each), place on a tray, cover with plastic wrap, and refrigerate for at least 2 hours to allow flavors to meld.
- Preheat your oven to 375°F and space the chilled dough balls well apart on the prepared sheets to allow for expansion.
- Bake until the edges are just starting to turn light golden brown, then allow the cookies to rest on the hot baking sheet for 15 minutes before moving them to a wire rack to cool completely.
Notes
To ensure your cookies have that signature height, do not skip the refrigeration step as chilling the dough prevents the fat from melting too quickly in the oven. Using a combination of regular and mini chocolate chips ensures that every bite is packed with chocolate for a truly decadent experience.
- Prep Time: 20 mins
- Cook Time: 12 mins
- Category: Dessert
- Method: Baking
- Cuisine: American
Simple Ingredients for Big Flavor
To get that specific bakery finish, we rely on a few smart choices in the pantry that respect the original ratios while working with modern kitchen efficiency. This recipe honors the traditional chocolate chip cookie but uses a specific blend of flours to give it more structure and a professional height that makes each cookie feel like a real treat.
- All-Purpose and Cake Flour: Mixing these two provides the perfect protein balance. The cake flour adds a delicate tenderness while the all-purpose flour gives the cookie the strength it needs to be thick and chewy.
- Light Brown Sugar: We use a higher ratio of brown sugar to white sugar to provide extra moisture and that deep, caramel-like sweetness that defines a classic heritage cookie.
- Extra Egg Yolk: This is a simple but powerful modern shortcut. Adding just one more yolk makes the dough richer and creates a much chewier texture than using whole eggs alone.
- Melted Unsalted Butter: Melting the butter instead of softening it leads to a denser cookie. It also means you do not have to wait hours for butter to come to room temperature.
- Semi-Sweet Chocolate Chips: I love using a mix of regular and mini chips. This simple trick makes sure that every single millimeter of the cookie is filled with chocolate, giving you a better flavor in every bite.
- Baking Soda and Salt: These are the quiet heroes that provide the lift and balance the sweetness of the sugars and chocolate.
Simple Steps to Cookie Perfection
Step 1: Prepare Your Tools
Start by lining your large baking sheets with parchment paper or silicone mats. This modern shortcut prevents sticking and makes your cleanup a breeze, which is a must for any busy baker working on a tight schedule. In a medium-sized bowl, whisk together your all-purpose flour, cake flour, baking soda, and salt. Make sure these are well-mixed so that the leavening is distributed evenly throughout the dough.
Step 2: Mix the Wet Base
In a larger bowl, stir your melted and cooled butter with both the light brown and granulated sugars. You do not need a stand mixer for this part; a simple wooden spoon or a sturdy spatula works great to keep the texture dense and chewy. Add your eggs, the extra yolk, and a generous splash of vanilla extract. Stir the mixture until it looks smooth, glossy, and well-incorporated. The smell at this stage is absolutely heavenly and reminds me of my grandmother’s kitchen.
Step 3: Combine and Fold
Gently fold the dry flour mixture into your butter and sugar base. Be careful not to overwork the dough at this stage, as we want to keep the crumb tender rather than tough. Once the flour barely disappears into the wet ingredients, pour in all those chocolate chips. Stir them in evenly so that every cookie gets a fair share of the chocolate. The dough will be thick, heavy, and very easy to handle.
Step 4: Scoop and Rest
Use a large scoop or a 1/3 cup measuring cup to form hefty balls of dough, weighing about 3 ounces each. This large size is what gives them that professional bakery appearance and that wonderful contrast between the edges and the center. Place the balls on your tray, cover them tightly with plastic wrap, and let them rest in the fridge. This step is vital because it allows the flours to hydrate and the flavors to truly meld together.
Step 5: The Golden Bake
Preheat your oven and space the chilled dough balls well apart on your prepared sheets, as they will expand slightly. Bake them until the edges are just starting to turn a light golden brown while the tops still look slightly soft and underdone. They will finish setting on the hot pan after you take them out of the oven. Allow them to cool on the tray for at least 15 minutes before moving them to a wire rack to cool completely.
Meagan’s Time-Saving Secrets
Using a kitchen scale to measure your ingredients by weight is the fastest way to get consistent results every time you bake. It saves you from washing multiple measuring cups and avoids the common mistake of packing too much flour into the dough, which can make your cookies dry. If you are looking for more ways to simplify your baking routine while keeping things classic, check out these Classic Cookie Recipes that I have updated for our busy modern lives. For a deeper look at the science behind this specific oversized texture, you can also see how others handle bakery style chocolate chip cookies. Always make sure your butter has cooled down to room temperature after melting; if it is too hot, it might accidentally cook the eggs or melt the chocolate chips prematurely.
Easy Twists for Every Occasion
If you want to change things up for a holiday or a special event, try using dark chocolate chunks instead of standard chips for a more sophisticated flavor profile. You can also mix in some chopped walnuts or toasted pecans to add a nostalgic crunch that reminds me of the treats my aunt used to bring to family reunions. For more inspiration on adapting your favorite treats for different seasons, visit our collection of Quick & Easy Cookies. Another favorite variation is adding a teaspoon of espresso powder to the dry ingredients, which makes the chocolate flavor stand out even more without making the cookies taste like coffee. You could even sprinkle a tiny bit of flaky sea salt on top right after they come out of the oven to balance the rich sweetness.
Fresh Ways to Enjoy Your Bake
These cookies are massive and impressive, making them a fantastic base for a decadent dessert platter when you have friends over. Serve them warm with a tall glass of cold milk for a classic afternoon snack that brings a bit of old-fashioned comfort to your kitchen table. If you are planning a larger party or a school bake sale, you might find more helpful ideas in our Holiday Cookie Celebrations section. They also make wonderful gifts; I like to wrap them in simple parchment paper and tie them with a bit of baker’s twine for a rustic, homemade look that feels very special without taking much time at all.
Heritage Flavor in Modern Time
Bringing these classic, time-honored flavors into our modern lives is my favorite way to stay connected to the past while keeping up with the present. These cookies prove that you do not need to spend all day in the kitchen to create something that feels like a true family treasure. If you enjoy making these and want to try more creative projects, you might also like exploring our Cookie Decorating Traditions for your next baking afternoon. Be sure to share your photos with our community on Pinterest, Instagram, or Facebook so we can see how your beautiful bakery-style treats turned out!
