I still remember the soft scratch of my grandmother’s fountain pen as she transcribed this recipe onto a lined index card, now yellowed with age and dusted with flour. Every Saturday afternoon, the heavy door of her porcelain icebox would creak open, revealing a neatly wrapped log of dough that promised the scent of toasted pecans and sweet butter. These cookies weren’t just a treat; they were a quiet tradition that filled our home with a sense of steady, reliable comfort.

These Refrigerator Cookies represent the beauty of a slower pace of life, where the dough is allowed to rest and the flavors are given time to truly become acquainted. It is a heritage recipe that honors the simple pantry staples found in every farmhouse kitchen—flour, sugar, and real creamery butter. Today, I am sharing this piece of my heart with you, so you can keep your own cookie jar full of memories that stay fresh for days.
A Timeless Classic for Your Cookie Jar
There is a special kind of magic in a recipe that asks for nothing more than patience and honest ingredients. These cookies are a cherished favorite because they offer the ultimate convenience for a busy household without ever sacrificing that authentic, homemade taste we all crave. By keeping a log of dough in the chill of the refrigerator, you are always only minutes away from the warmth of a fresh-baked batch when a neighbor stops by for a chat.
Texture is where this heritage recipe truly shines, offering a delicate balance between a crisp, golden edge and a tender center that melts away. The inclusion of chopped pecans provides a rustic crunch that reminds me of autumn afternoons spent on the porch. Unlike modern cookies that often lean on too many frills, these rely on the deep, molasses-like richness of brown sugar and the pure essence of vanilla to create a flavor profile that is both humble and deeply satisfying.
Families have loved this method for generations because it fits so perfectly into the rhythm of a home. You can prepare the dough on a quiet morning, let it firm up while you go about your day, and bake just as many as you need for dessert. It is a tradition that encourages us to slow down and appreciate the simple joy of a cookie that tastes exactly like home should.
Print
Refrigerator Cookies
- Total Time: 5 hours 23 mins
- Yield: 4 dozen cookies
- Diet: Vegetarian
Description
A nostalgic heritage recipe for slice-and-bake cookies featuring the rich flavor of toasted pecans and real creamery butter. These classic treats offer a perfect balance of a crisp edge and a tender center, making them a reliable staple for any well-stocked cookie jar.
Ingredients
- 1 cup real butter, softened
- 1 cup packed brown sugar
- 1 large egg yolk, room temperature
- 1 teaspoon pure vanilla extract
- 1/4 teaspoon salt
- 1/2 teaspoon baking soda
- 2 tablespoons hot water
- 2 cups all-purpose flour
- 1/2 cup chopped pecans
Instructions
- In a large mixing bowl, beat the softened butter for about two minutes until creamy, then add the brown sugar and beat for another minute until the mixture is pale and fluffy.
- Incorporate the egg yolk, pure vanilla extract, and salt, beating the mixture until it is smooth and well combined.
- Dissolve the baking soda in two tablespoons of hot water in a small cup, then pour this into the butter mixture and stir well.
- Gradually add the all-purpose flour and chopped pecans, mixing just until the flour streaks disappear to keep the dough tender.
- Cover the bowl tightly with plastic wrap and refrigerate for one hour to make the dough easier to handle.
- Turn the dough onto wax paper and shape it into a log approximately 1.5 inches wide, then wrap tightly and chill in the refrigerator for at least four hours or up to three days.
- Preheat your oven to 400F (200C) and line baking sheets with parchment paper; use a sharp knife to slice the log into one-quarter-inch rounds.
- Place slices an inch apart on the sheets and bake for 6 to 8 minutes until edges are light brown, then let rest for five minutes before moving to a wire rack.
Notes
To maintain a perfectly round shape for your cookies, try resting the wrapped dough log inside an empty cardboard paper towel tube while it chills in the refrigerator. If you prefer to bake in smaller batches, this dough log can be frozen for up to two months; simply thaw it slightly in the refrigerator before slicing as usual.
- Prep Time: 15 mins
- Cook Time: 8 mins
- Category: Dessert
- Method: Baking
- Cuisine: American
Simple Pantry Staples and Heritage Wisdom
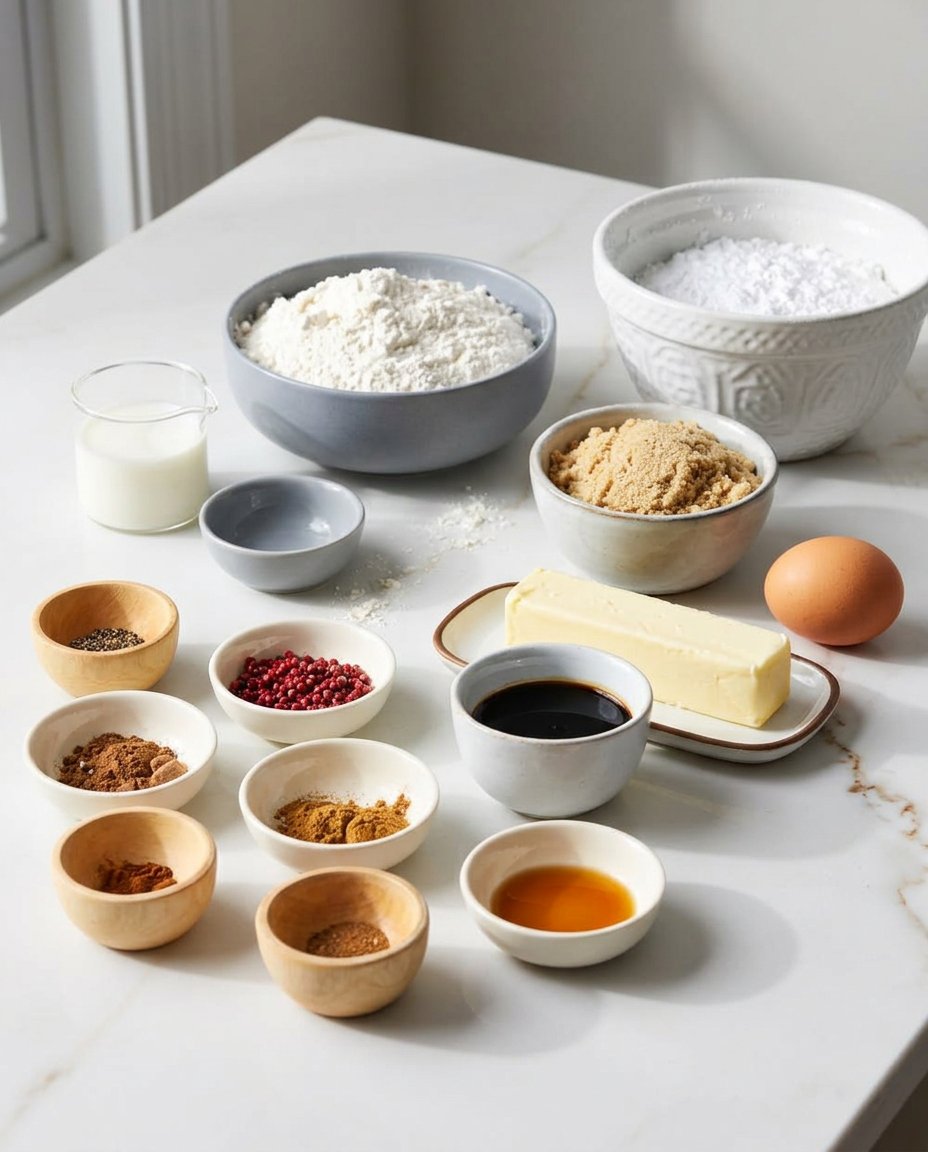
To recreate these nostalgic treats, you will only need a few basic items that are likely already tucked away in your cupboards. The quality of these simple ingredients is what makes the final result so special, so I always recommend using the best you have on hand.
- Real Butter: Always use softened, high-quality butter to provide that unmistakable richness and a melt-in-your-mouth crumb.
- Packed Brown Sugar: This provides the deep sweetness and moisture that gives these cookies their characteristic chewy-yet-crisp texture.
- Large Egg Yolk: By using just the yolk at room temperature, we add a wealth of richness and a beautiful golden hue to the dough.
- Pure Vanilla Extract: Think of this as the heartbeat of your baking; it carries the foundation of the flavor.
- Baking Soda and Hot Water: This is a classic technique from Grandma’s era—dissolving the soda in a bit of warm water helps it distribute evenly for a perfect rise.
- All-Purpose Flour: The sturdy base that holds our traditions together.
- Chopped Pecans: These add a wonderful earthy note and a satisfying crunch that pairs perfectly with the buttery dough.
The Classic Way to Bake Memories
Step 1: Creaming the Butter and Sugar
Start by beating your softened butter in a large mixing bowl until it is exceptionally soft and creamy. This usually takes about two minutes of steady work. Once the butter is ready, add in your packed brown sugar and continue to beat for another minute until the mixture looks like pale, fluffy clouds.
Step 2: Incorporating the Heritage Flavors
Next, gently add the egg yolk, your pure vanilla extract, and a pinch of salt. If you are using unsalted butter, make certain to add a full quarter-teaspoon of salt to balance the sweetness. Beat these together until the mixture is smooth and well combined.
Step 3: The Secret Leavening Trick
In a small cup, mix your baking soda with two tablespoons of hot—but not boiling—water. Stir it quickly until dissolved, then pour this into your butter mixture. This old-fashioned step is a hallmark of many heritage recipes and helps create a very consistent texture throughout the batch.
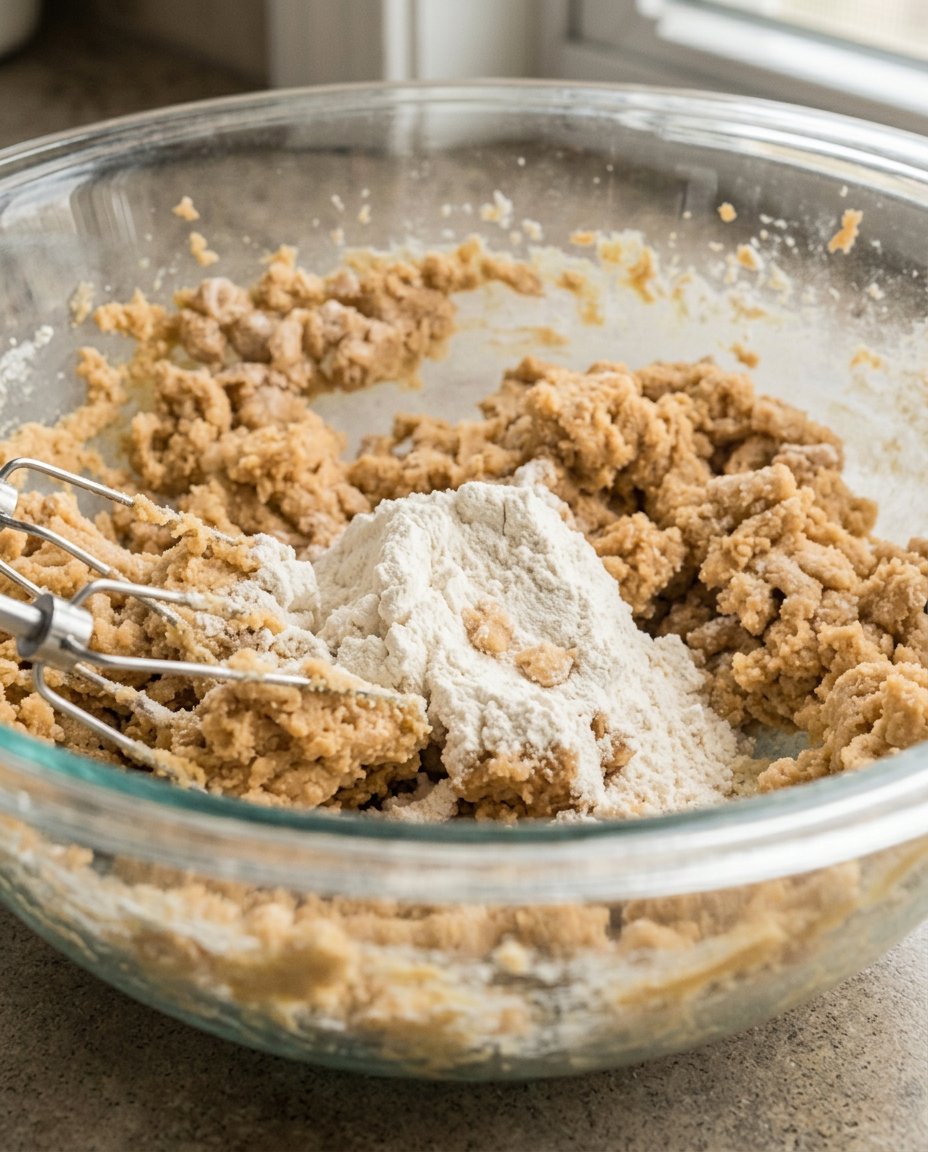
Step 4: Folding in the Flour and Nuts
Gradually add the all-purpose flour and the chopped pecans to the bowl. Mix these in just until the white streaks of flour disappear. You want to be gentle here to keep the cookies tender; over-mixing can make them a bit too tough for the cookie jar.
Step 5: The Initial Chill
Cover your bowl tightly with plastic wrap and place it in the refrigerator for about one hour. This initial rest makes the dough firm enough to handle without it sticking to your fingers as you move to the next stage.
Step 6: Shaping the Cookie Log
Turn the chilled dough onto a piece of wax paper or plastic wrap and form it into a long log about one-and-a-half inches wide. Roll it back and forth gently to get a nice round shape. Wrap the log snugly and return it to the refrigerator for at least four hours, though it can stay there for up to three days.
Step 7: Slicing with Care
When you are ready for a treat, preheat your oven to 400F (200C) and line your baking sheets with parchment paper. Use a sharp knife to cut the log into one-quarter-inch slices. Place them about an inch apart on the sheets to allow the heat to circulate around each golden round.
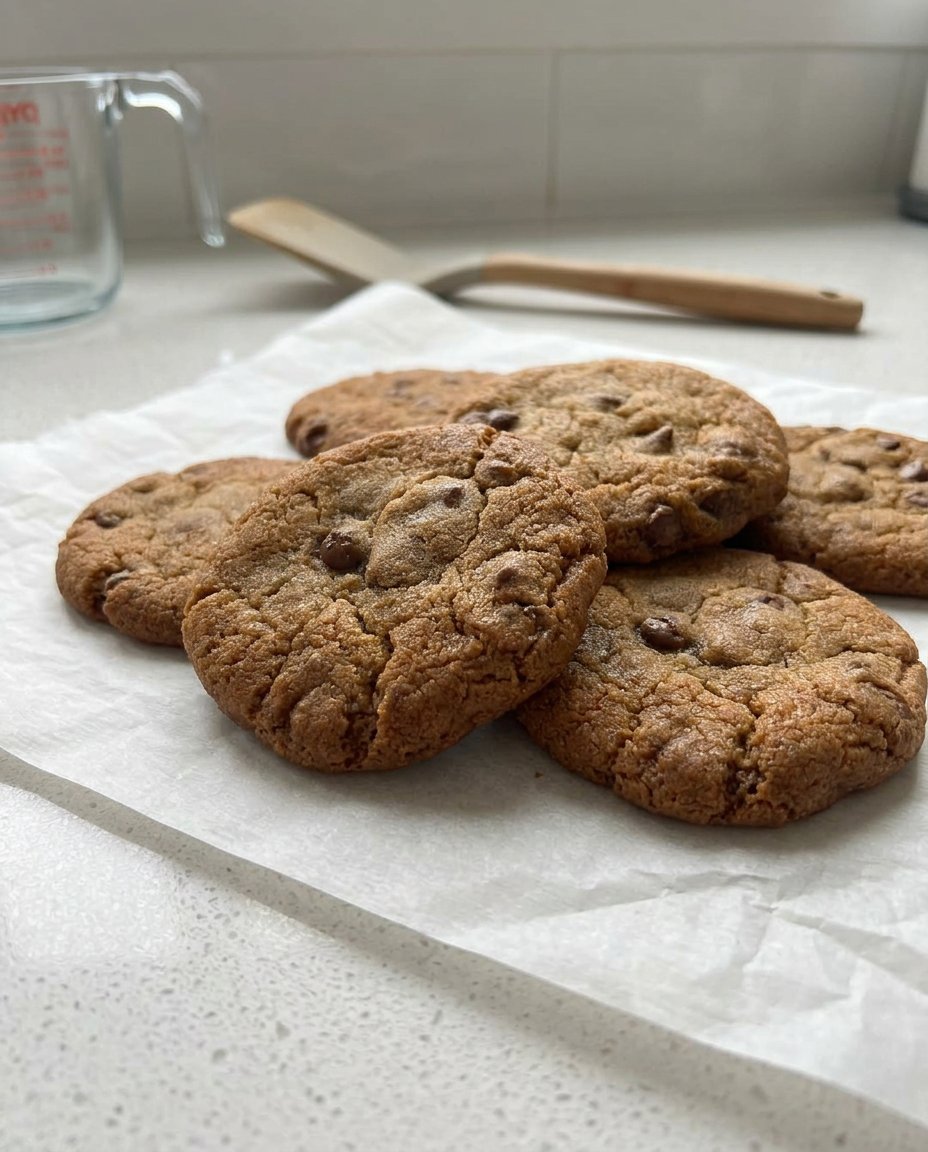
Step 8: Baking to Golden Perfection
Bake the cookies for 6 to 8 minutes, or until the edges are just beginning to turn a lovely light brown. Let them rest on the baking sheet for five minutes to firm up before moving them to a wire rack to cool completely. The smell will be absolutely heavenly.
Grandma’s Secrets for the Perfect Log
One of the best ways to keep your cookies perfectly round is to rotate the dough log every hour or so during the first part of the chilling process; this prevents one side from becoming flat as it rests on the shelf. If you find the dough is crumbling when you try to slice it, let it sit on the counter for just five minutes to take the chill off slightly. Always use a very sharp, thin blade to get those clean, professional-looking edges. For those who enjoy a bit of variety in their baking routine, learning about Quick & Easy Cookies can help you keep your pantry stocked with minimal effort. Remember that these cookies will look a bit soft when they first come out of the oven, but they will crisp up beautifully as they sit on the cooling rack.
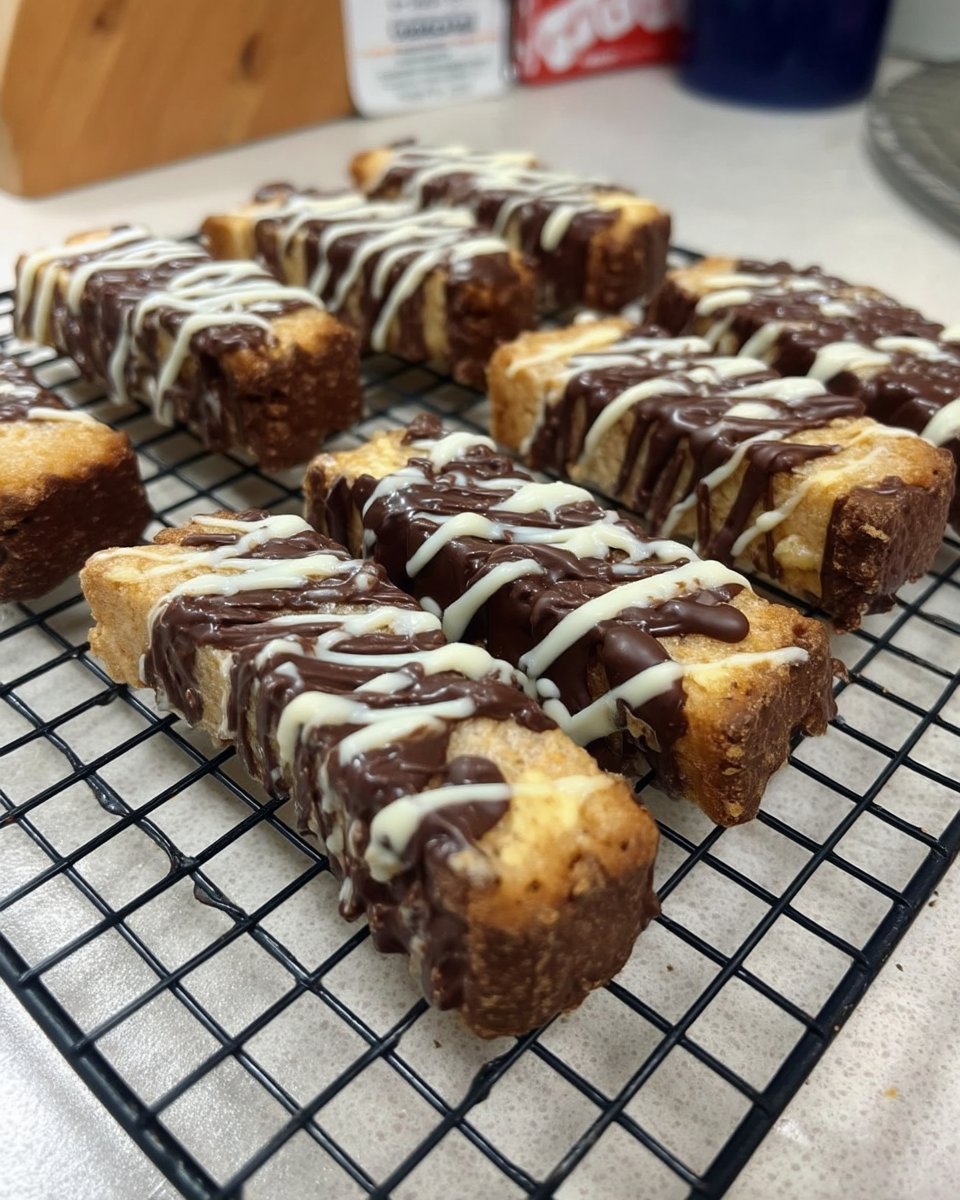
Heritage Twists and Family Favorites
While the pecan version is a staple in my home, you can easily swap the nuts for black walnuts or even toasted almonds for a different flavor profile. Some folks like to add a teaspoon of ground cinnamon to the flour for a warm, spiced aroma that feels perfect for the winter months. If you are looking for a slightly more indulgent treat, you might consider this classic butter pecan variation which offers a similar nostalgic appeal. For those who love variety, my collection of Classic Cookie Recipes features many other ways to adapt these simple doughs into something entirely new. You can even press a single pecan half into the center of each slice before baking for a truly decorative touch.
Sharing the Tradition and the Cookie Jar
These cookies were practically made for a tall, cold glass of milk or a steaming cup of afternoon tea. I love to pile them high in a vintage glass jar and leave them on the counter where they can be easily reached by little hands. If you are hosting a gathering, these cookies make a wonderful addition to a larger dessert spread. You might find more inspiration for your next get-together among our Wholesome Cookie Options. Sharing a tin of these with a new neighbor or a friend in need of comfort is a timeless way to spread a little bit of joy through heritage baking.
The Timeless Joy of Heritage Baking
Baking a batch of these cookies is like reaching back through time to hold the hand of the generations who came before us. It is a reminder that the best things in life don’t need to be complicated; they just need to be made with care and shared with love. I hope this recipe finds a permanent home in your own family’s collection, tucked away on an index card of your own. For more ways to celebrate the season with your loved ones, please see our Holiday Cookie Celebrations. We would love to see your baking journey, so please join our community on Pinterest, Instagram, and Facebook to share your photos and stories with us.


