I still remember the scent of almond paste filling my grandmother’s tiny kitchen every December. She would sit at her worn oak table, her hands moving with a grace that only comes from decades of practice, mashing the paste until it was just right. Those gold-flecked Pignoli Cookies were more than just a treat; they were a testament to our family heritage and the love she baked into every single batch.

These classic Italian treats are a marvel of simple pantry staples coming together to create something truly extraordinary. With a chewy, marzipan-like center and a crunchy coating of buttery pine nuts, they have earned a permanent spot in my holiday cookie jar. They are naturally gluten-free and carry a sophisticated flavor that takes me right back to those childhood afternoons spent waiting for the oven timer to ding.
A Timeless Treasure from the Heritage Jar
You will find that these cookies are a true labor of love, yet they require only a handful of honest ingredients. The beauty of this recipe lies in its simplicity and the way it honors old-world baking traditions that many have forgotten. These aren’t your typical sugary drops; they are dense, nutty, and possess a refined sweetness that lingers on the tongue like a fond memory.
What makes these so special is the contrast in textures. The outside becomes crisp and toasted thanks to the pine nuts, while the inside remains soft and almost candy-like. Because they rely on almond flour and almond paste rather than wheat, they have a rich depth of flavor that modern cookies often lack. They stay fresh for days, making them the perfect candidate for sharing with neighbors or keeping tucked away in a ceramic jar for whenever a friend stops by for coffee.
In our house, we call these the ‘memory cookies’ because one bite is enough to start a conversation about the old country and the mothers who taught us how to bake. They are a celebration of patience and the joy of working with your hands. When you pull these out of the oven, you aren’t just serving a dessert; you are sharing a piece of history that has been passed down through generations of women who knew that the best things in life take time and a little bit of heart.
Print
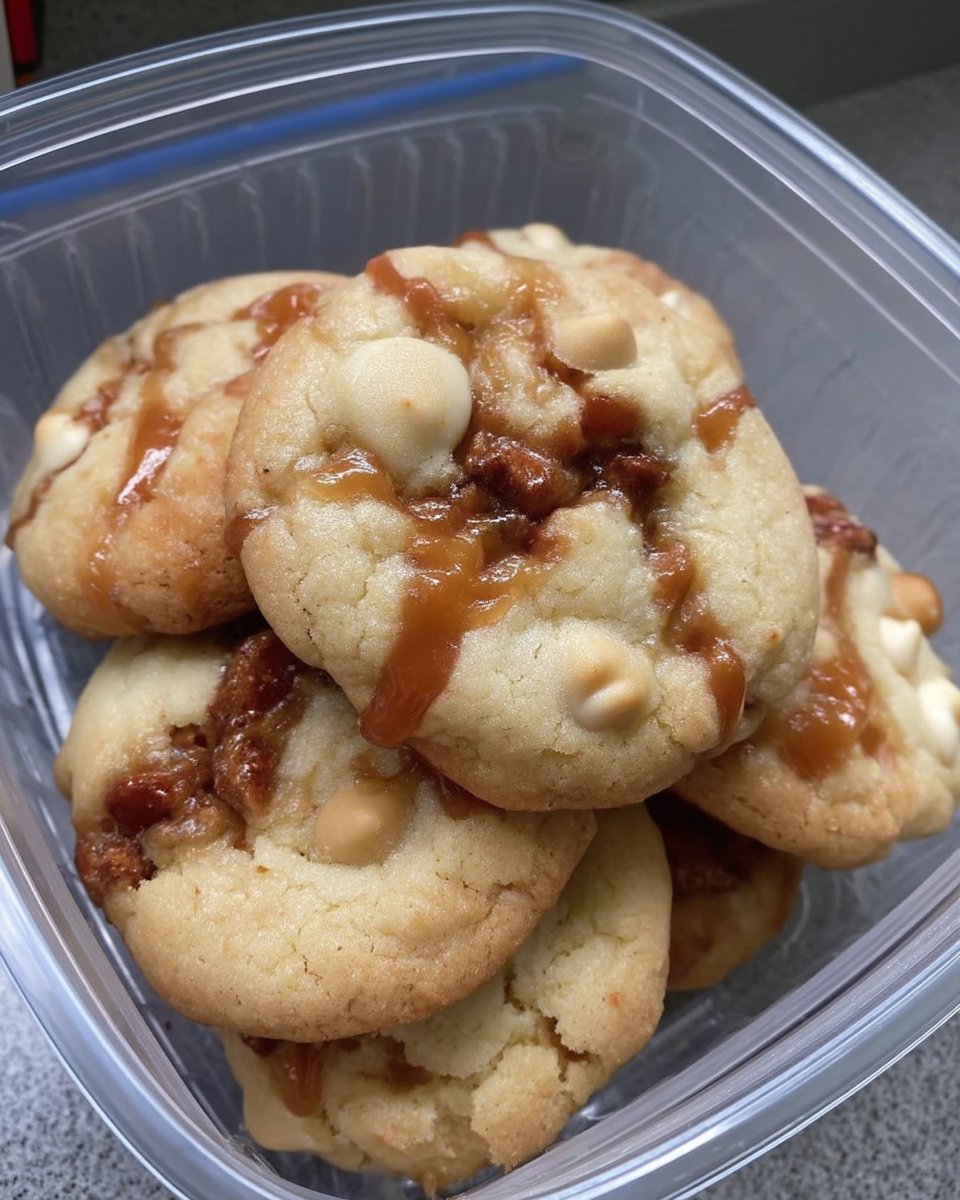
Pignoli Cookies
- Total Time: 35 mins
- Yield: 18 cookies
- Diet: Gluten-Free
Description
These traditional Italian Pignoli cookies feature a soft, chewy almond center wrapped in a crunchy layer of toasted pine nuts. Naturally gluten-free and elegantly simple, they are a beloved holiday staple that brings the authentic taste of an Italian bakery to your home.
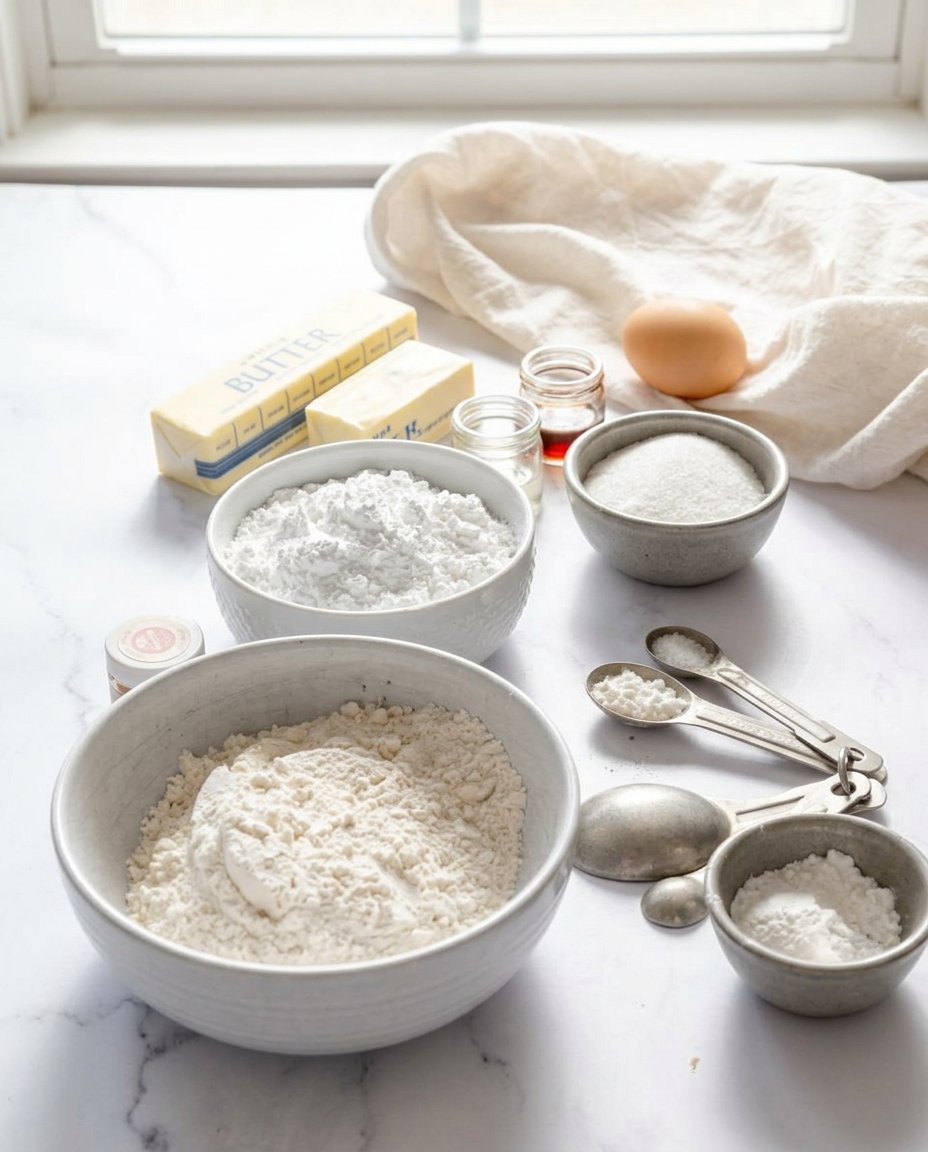
Ingredients
- 7 ounces almond paste, broken into small pieces
- 1/2 cup granulated sugar
- 1/2 cup powdered sugar
- 1 large egg white
- 1 pinch sea salt
- 1/2 cup finely ground almond flour
- 1 cup pine nuts (pignoli)
Instructions
- Preheat your oven to 325°F (165°C) and line a large baking sheet with parchment paper to prevent sticking.
- In a medium mixing bowl, combine the broken almond paste, granulated sugar, powdered sugar, egg white, and sea salt; mash with a fork or pastry blender until a smooth, thick paste forms.
- Gently fold the almond flour into the mixture using a wooden spoon until a thick, sticky dough is formed.
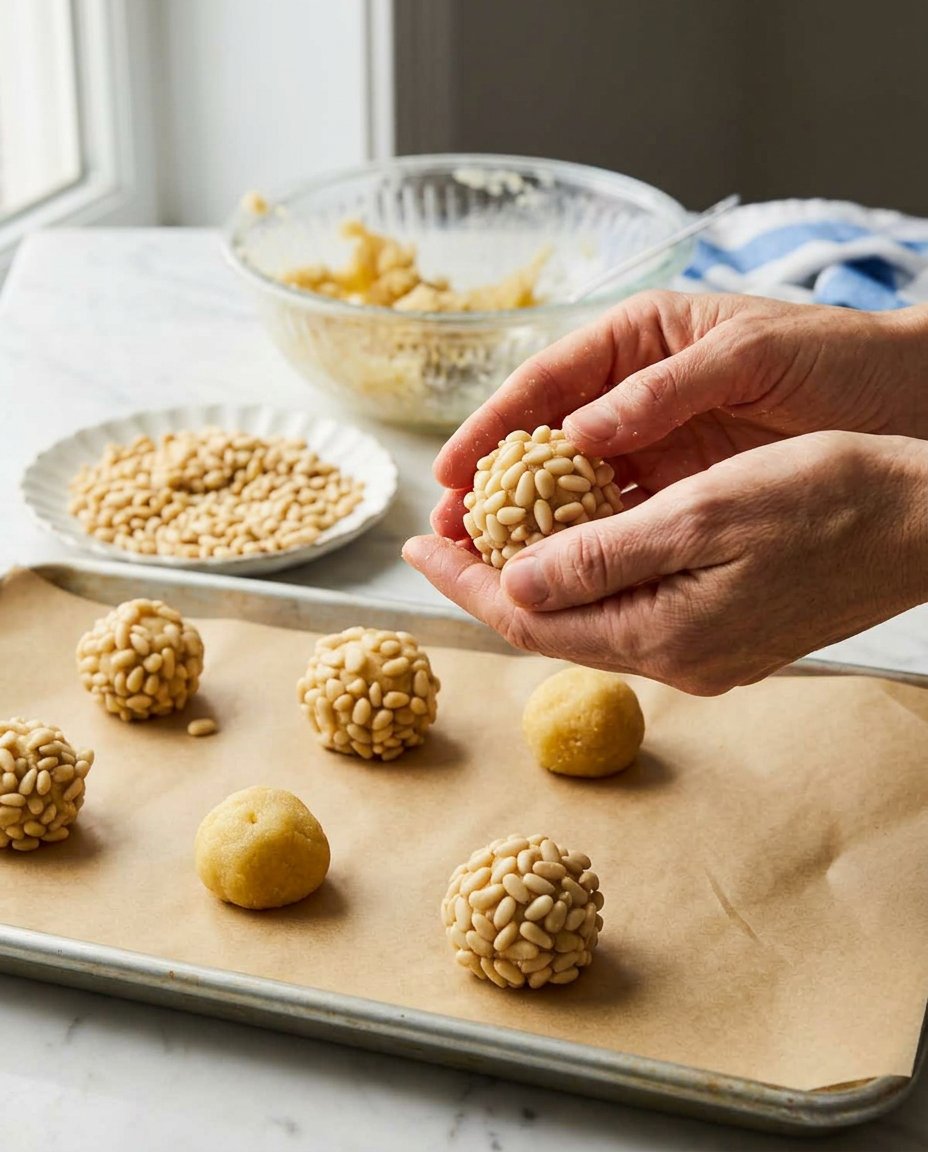
- Roll heaping tablespoons of dough into balls approximately the size of a walnut, then roll each ball in the bowl of pine nuts, pressing lightly so the nuts embed into the dough.
- Place the coated dough balls on the prepared baking sheet at least one inch apart and press down with your palm to flatten them into thick discs.
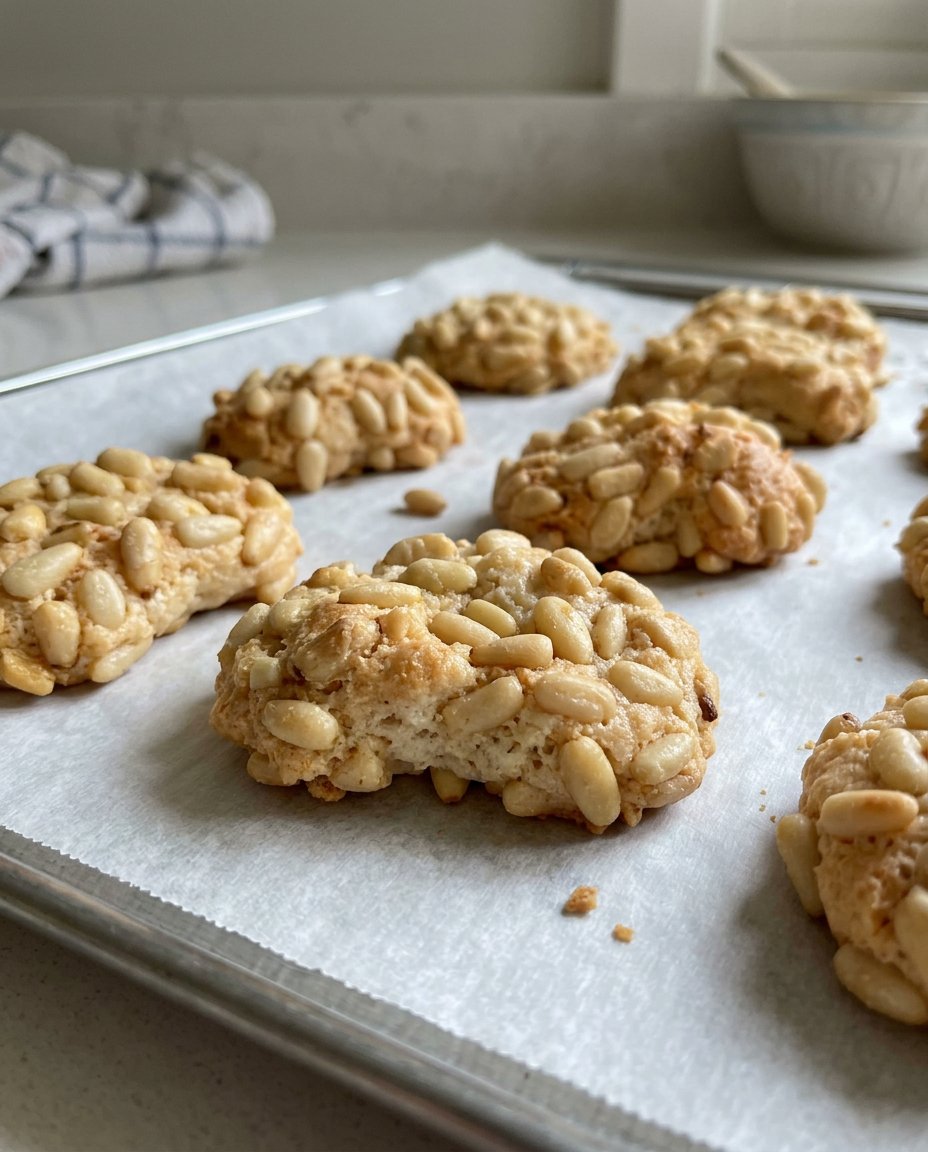
- Bake for 18 to 22 minutes until the edges are a very light golden brown, then let them rest on the sheet for 10 minutes to set before moving to a wire rack.
Notes
Ensure you use pure almond paste rather than marzipan for this recipe to achieve the correct texture and deep almond flavor. If the dough feels too sticky to roll easily, chill it in the refrigerator for 10 minutes or lightly dust your hands with powdered sugar before shaping the balls.
- Prep Time: 15 mins
- Cook Time: 20 mins
- Category: Dessert
- Method: Baking
- Cuisine: Italian
Simple Pantry Staples for an Authentic Flavor
To make these cookies just like my mother and grandmother did, you must start with the best basics you can find. We don’t need fancy gadgets here, just honest ingredients that speak for themselves. The star of the show is the almond paste, which provides that unmistakable heritage aroma.
- Almond Paste: Look for the 7-ounce cans or packages. It should be firm but pliable. This is the heart of the cookie, providing the structure and that deep, nostalgic almond soul.
- Granulated and Powdered Sugars: We use a blend here. The granulated sugar adds a bit of crunch and structure, while the powdered sugar helps create that delicate, melt-in-your-mouth finish.
- Egg White: Just one large egg white is all you need to bind everything together. It keeps the dough light and helps the pine nuts adhere to the surface.
- Sea Salt: A tiny pinch of salt is essential to balance the sweetness of the almond and bring out the toasted notes of the nuts.
- Almond Flour: This reinforces the nutty profile and keeps the cookies tender. Make sure it is finely ground for the best texture.
- Pine Nuts (Pignoli): These are the crowning jewel. They provide a buttery, resinous crunch that is the hallmark of a true Italian bakery classic.
The Heritage Method for Perfect Cookies
Step 1: Prep Your Workspace
Warm your kitchen by preheating the oven to 325°F (165°C). Line a large, sturdy baking sheet with parchment paper. This prevents the delicate sugars in the almond paste from sticking and makes clean-up as easy as a summer breeze. Having everything ready before you start is a secret Grandma always shared to keep the spirit of baking calm and joyful.
Step 2: Prepare the Almond Base
Take your almond paste and break it into small pieces into a medium-sized mixing bowl. Following the tradition of my mother, I prefer to use a fork or a pastry blender to mash the paste with the granulated sugar, powdered sugar, egg white, and sea salt. You want to work it until it becomes a thick, smooth, and consistent paste. While some use a machine, doing it by hand allows you to feel the dough and know exactly when it has reached that perfect, supple state.
Step 3: Incorporate the Flour
Once your base is smooth, gently stir in the almond flour. Use a wooden spoon and fold it in until just combined. The dough will be quite thick and a bit sticky—that is exactly what you want. It should smell strongly of sweet almonds, a scent that always reminds me of holiday mornings.
Step 4: Shape and Coat with Care
Place your pine nuts in a shallow bowl. Scoop out heaping tablespoons of the dough and roll them between your palms to form neat balls about the size of a walnut. If the dough sticks to your hands, a little dusting of powdered sugar can help. Roll each ball in the pine nuts, pressing very gently so the nuts embed themselves into the dough. You want each cookie to be generously adorned with these little golden treasures.
Step 5: The Gentle Press
Arrange the coated balls on your prepared baking sheet, leaving at least an inch of space between them to allow for a slight spread. Use the flat of your hand or the bottom of a glass to press down on the tops, flattening them into thick discs. This helps them bake evenly and ensures that every bite has the perfect ratio of crunchy nut to chewy center.
Step 6: Bake Until Golden
Slide the tray into the center of the oven and bake for 18 to 22 minutes. You are looking for a very light golden brown color around the edges. The pine nuts should look toasted but not dark. The house will smell heavenly at this point. Let them rest on the baking sheet for at least 10 minutes to firm up before moving them to a wire rack. They need this time to set their internal structure.
Grandma’s Secrets for the Perfect Batch
The most important piece of wisdom I can share is to watch your pine nuts closely during the final minutes of baking, as they can go from golden to burnt in a heartbeat. If your dough feels a bit too soft to handle, don’t be afraid to let it rest in the refrigerator for five or ten minutes; this makes rolling much easier and helps the cookies hold their shape. For those looking to broaden their repertoire of seasonal bakes, I always recommend looking through our Holiday Cookie Celebrations for more inspiration. Also, remember that almond paste and marzipan are not the same thing; almond paste has less sugar and a stronger nut flavor, which is vital for the authentic taste of these pignoli treats.
Family Favorites and Heritage Twists
While the traditional recipe is nearly perfect, many families have their own little secrets passed down through the years. Some like to add a teaspoon of fresh lemon or orange zest to the dough to provide a bright, citrusy lift that cuts through the richness of the almonds. You might also try replacing half of the pine nuts with slivered almonds if you want a different kind of crunch. If you enjoy experimenting with the foundations of baking, you might find our Classic Cookie Recipes section quite helpful. Another lovely variation is to dip the bottoms of the cooled cookies in melted dark chocolate for an extra layer of indulgence that feels very much like a trip to a fancy Italian cafe.
Cookie Jar Time and Sharing Tradition
Serving these cookies is an act of hospitality that goes back centuries. They are best enjoyed with a small cup of strong espresso or a glass of sweet dessert wine after a hearty family meal. If you are preparing a large spread for guests, consider how they look alongside other heritage bakes. You can find beautiful ways to display your treats in our guide on Cookie Decorating Traditions. I love to place them on a vintage lace doily or a silver platter to emphasize their timeless quality. They are also wonderful when shared with children alongside a cold glass of milk, teaching the next generation the simple joy of a well-made cookie. For more inspiration on classic pairings, check out the lovely ideas over at Love and Lemons.
The Sweet Heritage of Home Baking
Baking these Pignoli Cookies is a way to keep the stories of our mothers and grandmothers alive in our own kitchens. Every time I smell that almond aroma, I feel a connection to the women who came before me, who found beauty in simple ingredients and joy in the act of sharing. I hope this recipe finds a place in your heart and your cookie jar, becoming a new tradition for your family to cherish. If you find yourself in need of something a bit faster for a busy weekday, you might enjoy our Quick & Easy Cookies collection. Please share your baking photos with me on Pinterest, Instagram, and Facebook. There is nothing that warms my heart more than seeing these heritage recipes being baked with love in homes across the world. Keep your jars full and your spirits high.
