I remember the old blue-tiled kitchen where Grandma kept her recipe box, a small wooden chest filled with handwritten memories. She would pull out a worn, butter-stained card for these Walnut Shortbread cookies every autumn as the leaves began to turn. The smell of toasted nuts and browning butter always meant that tea time was about to become something truly special for all of us gathered around her table.

These cookies are a beautiful balance of hearty whole wheat and rich, buttery goodness that tastes like a warm hug. They aren’t overly sweet, allowing the natural earthiness of the toasted walnuts to shine through with every bite. It’s a recipe that feels as sturdy and reliable as the family traditions it represents, staying fresh in the jar for days on end.
A Timeless Treasure for Your Cookie Jar
There is a quiet dignity in a well-made shortbread that modern, flashy treats just can’t match. This Walnut Shortbread is a testament to the beauty of simple ingredients coming together with patience and care. You will love the way the whole wheat flour adds a nutty depth that complements the toasted walnuts perfectly, creating a texture that is both crisp and tender.
It’s the kind of cookie that invites you to slow down, put the kettle on, and enjoy a moment of peace. Whether you’re sharing them with a neighbor or tucking them into a lunchbox, they carry a sense of home in every crumb. These are cookies that actually improve after a day or two in the jar, making them a wonderful gift for someone you cherish.
In our family, these have always been the bridge between the seasons, providing comfort during chilly evenings. The addition of cinnamon gives them a subtle warmth that lingers, reminding us of heritage baking at its finest. They are simple to prepare yet offer a sophisticated flavor profile that appeals to both children and grandparents alike.
Print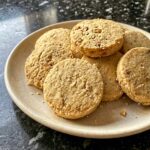
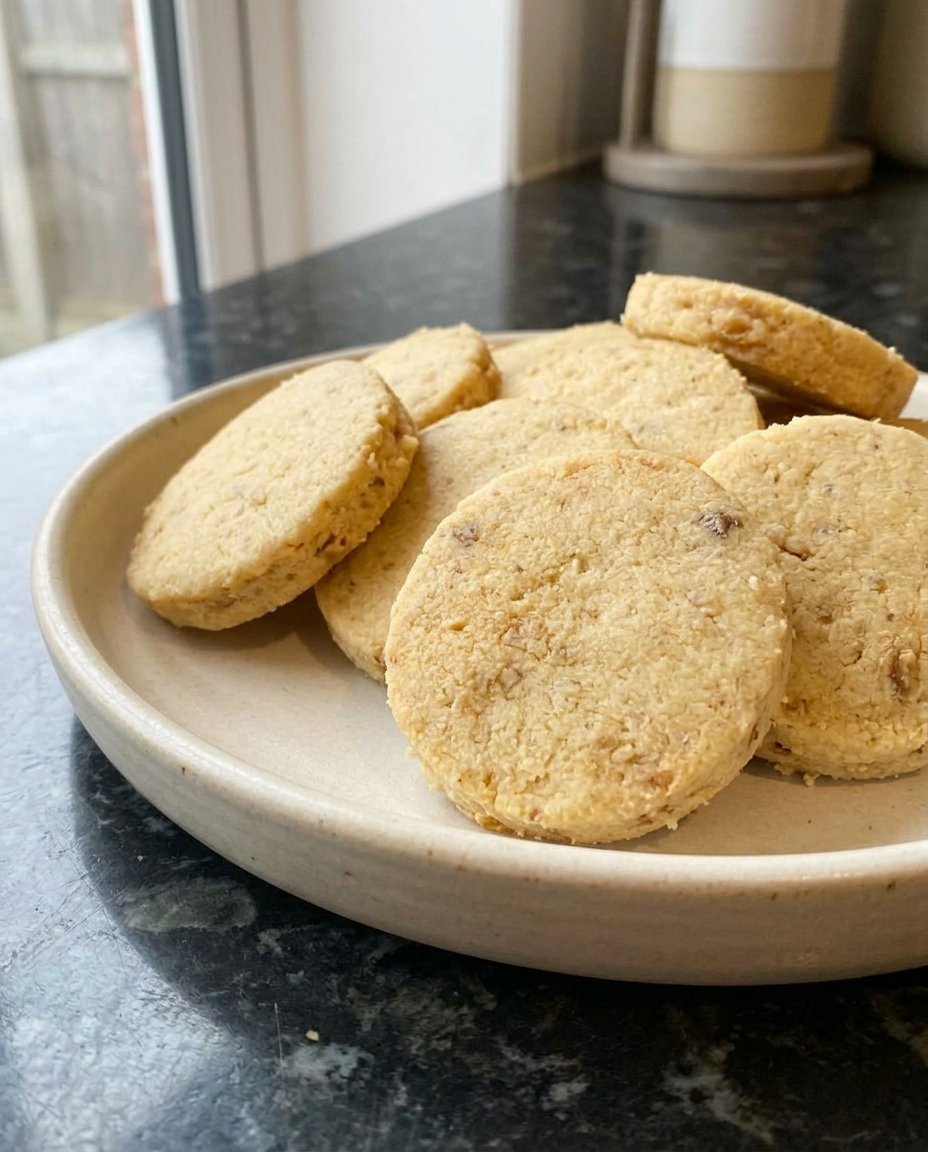
Walnut Shortbread
- Total Time: 1 hour 50 mins
- Yield: 24 cookies
- Diet: Vegetarian
Description
These rustic, buttery shortbread cookies feature a hearty combination of whole wheat flour and crunchy toasted walnuts. Subtly sweetened and spiced with cinnamon, they offer a traditional flavor that pairs perfectly with a afternoon tea.
Ingredients
- 1 cup walnuts, toasted and roughly chopped
- 2 cups whole wheat flour
- 1 cup unsalted butter, softened
- 1/2 cup light brown sugar, packed
- 1/2 teaspoon ground cinnamon
- 1/4 teaspoon salt
- 1–2 tablespoons milk, optional
Instructions
- Preheat oven to 340°F (170°C) and line a baking sheet with parchment paper. Toast walnuts until golden and fragrant, then pulse in a processor into small pieces.
- In a medium-sized bowl, whisk together the whole wheat flour, cinnamon powder, and salt until the mixture is well aerated.
- In a separate large bowl, beat the softened butter and light brown sugar using an electric mixer for 2 to 3 minutes until light and fluffy.
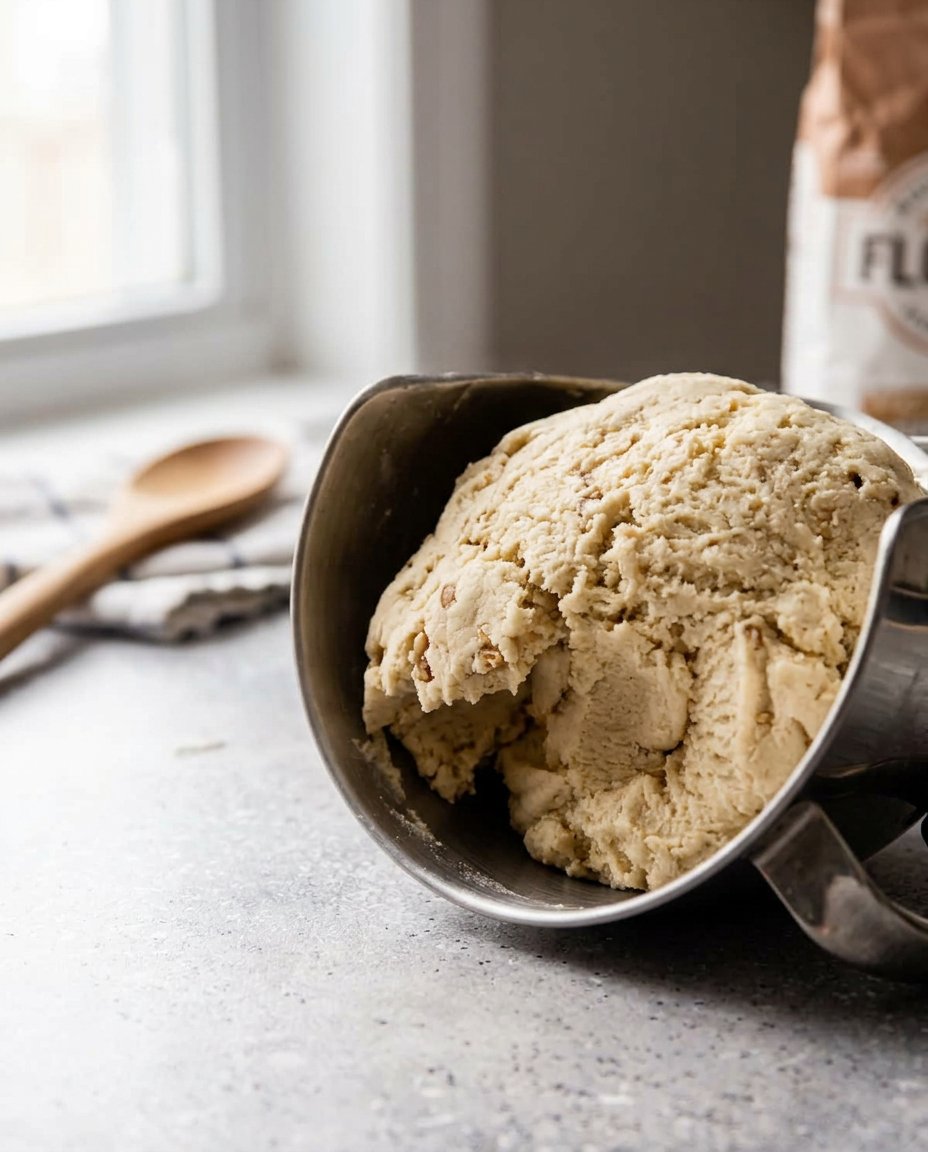
- Gradually fold the flour mixture into the creamed butter, then stir in the toasted walnuts. If the dough is too crumbly, add milk one tablespoon at a time until it holds its shape.
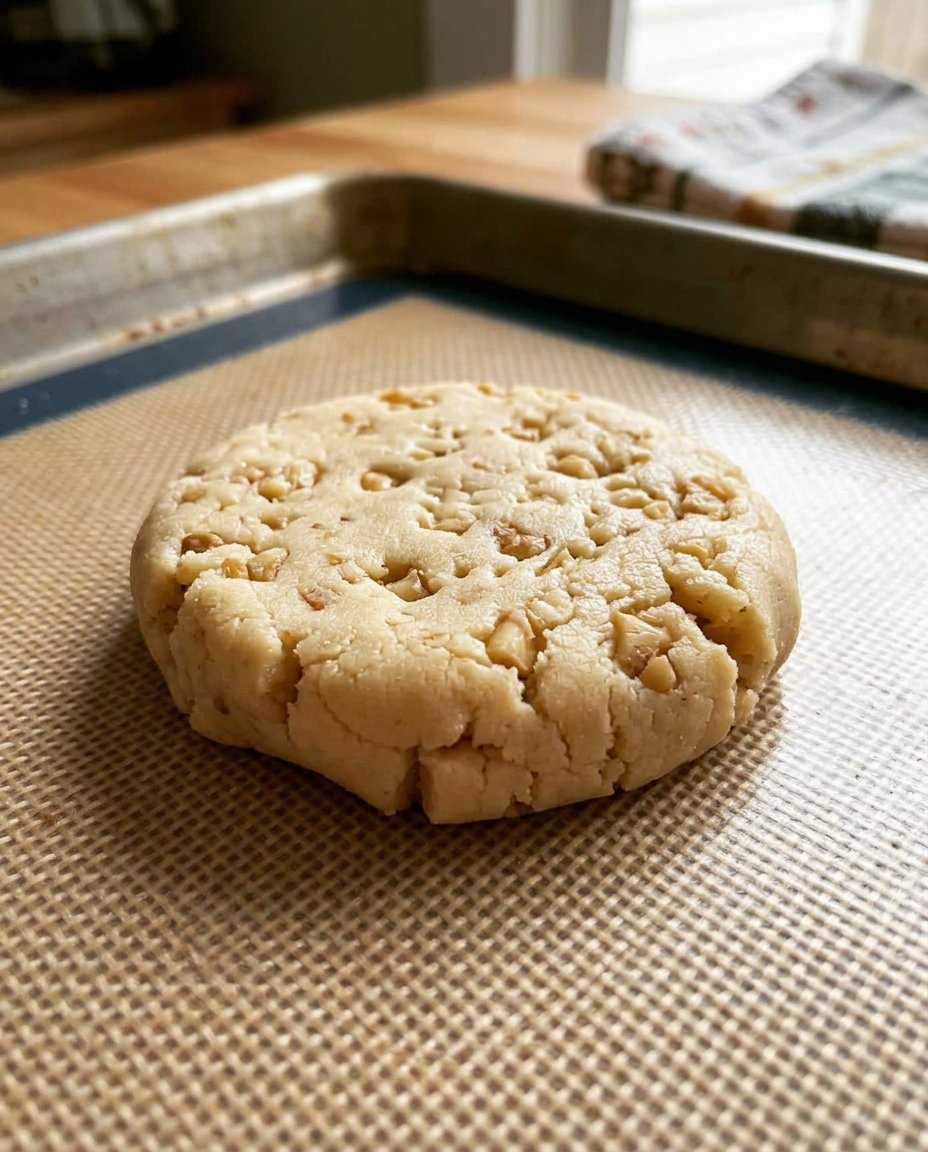
- Divide the dough into two portions and roll each into a firm log. Wrap in plastic and refrigerate for at least one hour.
- Using a serrated knife, slice the chilled logs into thick rounds and place them on the prepared baking tray.
- Bake for 25 to 30 minutes until the cookies are deep golden brown, then let them cool completely on a wire rack.
Notes
For an extra touch of decadence, try dipping half of each cooled cookie into melted dark chocolate. Ensure your butter is at room temperature before creaming to achieve the light, signature shortbread texture without overworking the dough.
- Prep Time: 20 mins
- Cook Time: 30 mins
- Category: Dessert
- Method: Baking
- Cuisine: American
Pantry Staples for a Perfect Batch
Creating these cookies doesn’t require a trip to a specialty store; everything you need is likely already waiting in your kitchen. We use simple, honest ingredients that have been the backbone of American baking for generations, focusing on quality and tradition.
- Toasted Walnuts: Toasting the nuts is a vital step that brings out their deep, roasted flavor and ensures they stay crunchy within the shortbread.
- Whole Wheat Flour: This provides a beautiful texture and a heritage feel that white flour alone simply lacks.
- Unsalted Butter: Use the best quality you can find, as the butter is the heart of any shortbread and provides that melt-in-your-mouth quality.
- Light Brown Sugar: This adds a hint of caramel sweetness and helps achieve a lovely, deep golden-brown color during baking.
- Cinnamon Powder: A gentle touch of warmth that makes the kitchen smell like a dream and rounds out the nutty notes.
- Milk: Just a tiny splash if your dough feels a bit shy about coming together into a cohesive log.
- Salt: A necessary pinch to balance the richness of the butter and the sweetness of the sugar.
The Classic Way to Bake Shortbread
Step 1: Toast and Prep the Walnuts
Preheat your oven to 340°F (170°C) and line your favorite baking sheet with a clean piece of parchment paper. Toast your walnuts in the oven or on the stove-top until they are fragrant and golden, taking care not to let them scorch. Once they have cooled, give them a rough pulse in your processor so the pieces are small enough to distribute evenly throughout the dough without being too large for little hands.
Step 2: Whisk Your Dry Ingredients
In a medium-sized mixing bowl, combine your whole wheat flour, cinnamon powder, and salt. Use a whisk to make sure everything is evenly distributed and the flour is aerated. This ensures that every single bite of your Walnut Shortbread has that perfect hint of spice and salt to balance the butter.
Step 3: Cream the Butter and Sugar
In a separate large bowl, beat your softened unsalted butter and light brown sugar together using an electric mixer or a sturdy wooden spoon. You want the mixture to be light and fluffy, which usually takes about 2 to 3 minutes of patient mixing. This step creates the foundation for that traditional shortbread texture we all adore.
Step 4: Combine and Fold the Dough
Slowly add the flour mixture to your creamed butter, mixing only until the white streaks disappear into the golden base. Gently stir in those lovely toasted walnuts using a spatula. If the dough feels a bit crumbly or dry, add a tablespoon or two of milk until it holds its shape when pressed between your fingers.
Step 5: Shape and Chill for Success
Divide your dough in half and roll each portion into a tidy, firm log on a lightly floured surface. Wrap them snugly in plastic wrap and let them rest in the refrigerator for at least one hour to firm up. This chilling time is a secret passed down through generations to ensure the cookies hold their shape and develop the best flavor.
Step 6: Slice into Rounds
Remove one log from the fridge and use a sharp serrated knife to cut thick, round coins. If the shape gets a little wonky while slicing, just gently pat the edges back into circles with your warm palms. Place them on the prepared tray and chill for another 10 minutes while the oven stays ready and hot.
Step 7: The Final Golden Bake
Bake for 25 to 30 minutes until the cookies reach a beautiful, deep golden brown across the top and bottom. This longer bake time is what gives them that signature crunch and the crumbly bite of a true Scottish-style shortbread. Let them cool completely on a wire rack before moving them to your favorite cookie jar.
Grandma’s Secrets for Shortbread Success
The most important thing I can tell you is to watch your oven carefully, as every stove has its own personality. Some bake faster than others, so start checking your cookies around the 15-minute mark to avoid over-browning. For more wisdom on keeping your kitchen traditions alive and flourishing, check out our Classic Cookie Recipes.
Always use room temperature butter for the best creaming results, but make sure it isn’t so soft that it’s oily or melting. If you find the dough too difficult to slice after chilling, let it sit on the counter for five minutes to take the chill off. For a deeper look at the traditional methods used in this specific style of baking, you might find this walnut shortbread guide helpful for your journey.
Heritage Twists on a Family Favorite
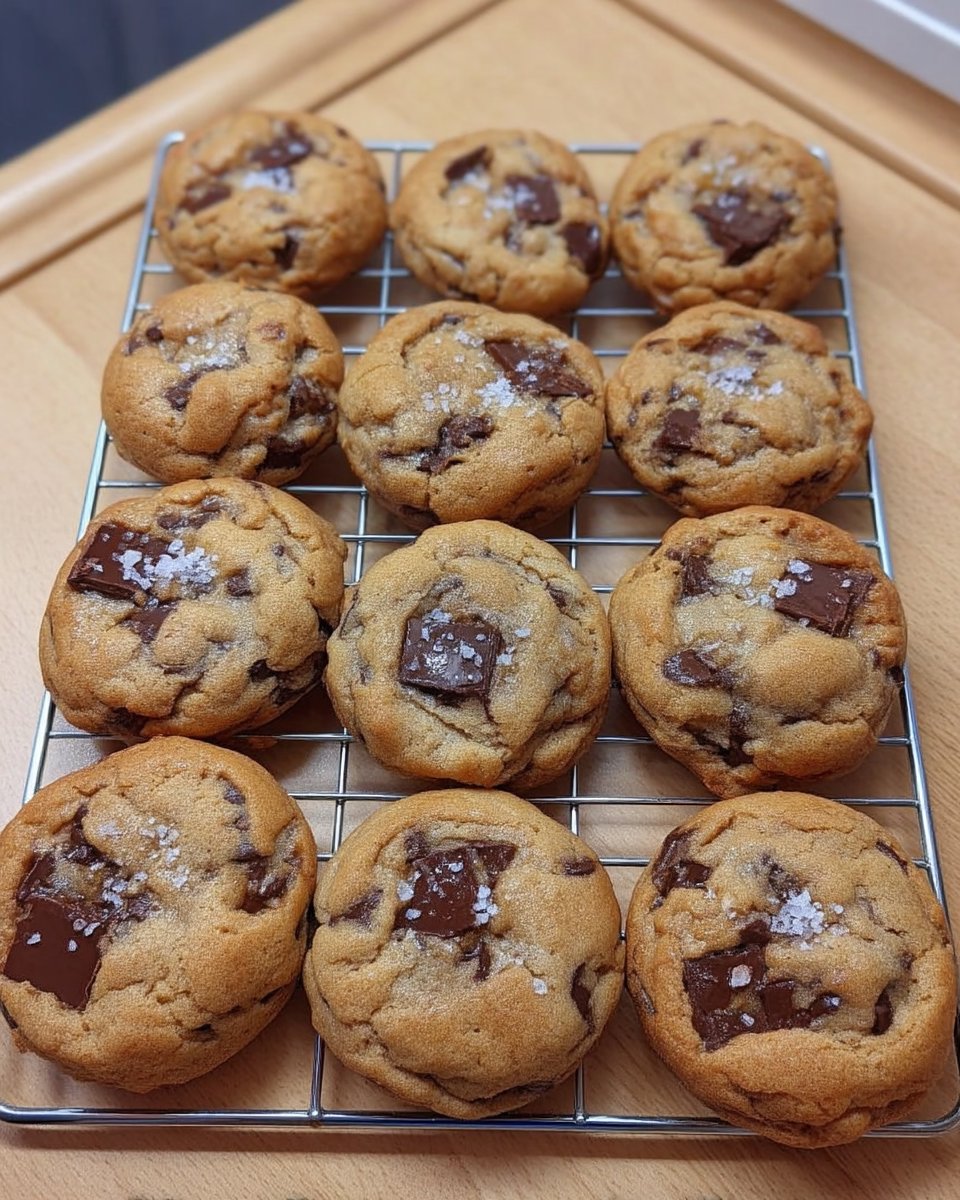
While we love the traditional recipe, there are many ways to make these your own based on what you have in the pantry. You can swap the walnuts for pecans or even chopped hazelnuts for a different nutty profile that still feels very classic. Some in our family like to dip half of the cooled cookie into melted dark chocolate for a bit of extra indulgence during the holidays.
If you are looking for something more festive, adding a bit of fresh orange zest to the dough creates a wonderful citrus aroma. For those who prefer a lighter bite or different flour blends, you can visit our Wholesome Cookie Options for more ideas. You might also try adding a pinch of cardamom instead of cinnamon for a more worldly, aromatic experience.
Sharing the Tradition with Loved Ones
These cookies belong in a sturdy glass jar on the kitchen counter, ready for whenever a friend or neighbor stops by for a chat. They are the perfect companion to a hot cup of Earl Grey tea or a cold glass of milk for the grandkids. Serving them on a vintage ceramic platter adds to the nostalgic charm of a slow afternoon.
If you’re planning a gathering, these shortbreads make a wonderful addition to a dessert spread alongside softer cakes. You can find more inspiration for your next party or family event in our Holiday Cookie Celebrations. They also stay fresh for over a week, making them ideal for mailing in a care package to loved ones far away.
Timeless Joy in Every Buttery Crumb
Baking is more than just following a recipe; it’s a way of connecting with those who came before us and sharing love with those here now. This Walnut Shortbread carries the warmth of many kitchens and the care of many hands. I hope these cookies find a permanent home in your cookie jar and bring a bit of peace to your busy days.
Be sure to visit our Quick & Easy Cookies section for more simple delights that don’t take all day. I would love to see your baking creations, so please share them with our growing community on Pinterest, Instagram, and Facebook. Happy baking, from my kitchen to yours, and may your home always smell of vanilla and warmth.
