Every time I pull my grandmother’s weathered, flour-dusted index card from her old tin box, I feel a rush of warmth that has nothing to do with the oven. This Gingersnap Cookies recipe has been a cornerstone of our family’s holiday tradition since the 1950s, back when my mother would stand on a wooden stool just to reach the counter. There is a specific kind of magic in the way these spices fill a home, creating a scent that lingers in the curtains and promises that something sweet is on the way.

These cookies are exactly what a classic treat should be: crisp around the edges with a gentle, chewy heart and a beautiful crinkled top. They are simple to make but carry a depth of flavor that modern recipes often miss, relying on the deep, earthy sweetness of dark molasses and the sharp bite of ground ginger. Whether you are filling a jar for your own family or gifting a tin to a neighbor, these Gingersnap Cookies offer a taste of pure, nostalgic comfort in every bite.
A Timeless Classic for Your Cookie Jar
There is a reason these cookies have remained a family favorite for over seventy years. In a world of complicated desserts and fleeting trends, the Gingersnap Cookies represent a return to honest, heritage baking. They are remarkably sturdy, making them the perfect companion for a cold glass of milk or a hot cup of tea, and they only seem to get better as they sit in the jar for a day or two.
You will love the texture of these treats, which achieve that iconic “snap” without being hard or dry. The secret lies in the careful balance of the molasses and the double-sifting of the dry ingredients. This process creates a light, airy crumb that still feels substantial. Because they use simple pantry staples, you can whip up a batch whenever the mood strikes, bringing the cozy atmosphere of a vintage kitchen into your own home. They are truly a treasure for any baker who values tradition and the simple joy of a well-made cookie.
Print
Gingersnap Cookies
- Total Time: 25 mins
- Yield: 36 cookies
Description
These timeless Gingersnap Cookies combine the deep warmth of dark molasses with the sharp bite of ginger for a perfectly balanced holiday treat. With their iconic crinkled tops and a satisfyingly crisp edge, they offer a nostalgic taste of home-baked comfort in every bite.
Ingredients
- 2 cups all-purpose flour, sifted
- 2 teaspoons ground ginger
- 1 teaspoon baking soda
- 1 teaspoon ground cinnamon
- 1/2 teaspoon salt
- 3/4 cup butter, softened
- 1 cup white sugar
- 1 large egg
- 1/4 cup dark molasses
- 1/3 cup cinnamon sugar (for coating)
Instructions
- Preheat your oven to 350 degrees F (175 degrees C) and prepare a small bowl with cinnamon sugar for rolling.
- In a large bowl, sift together the flour, ground ginger, baking soda, cinnamon, and salt; sift the mixture a second time for a light texture.
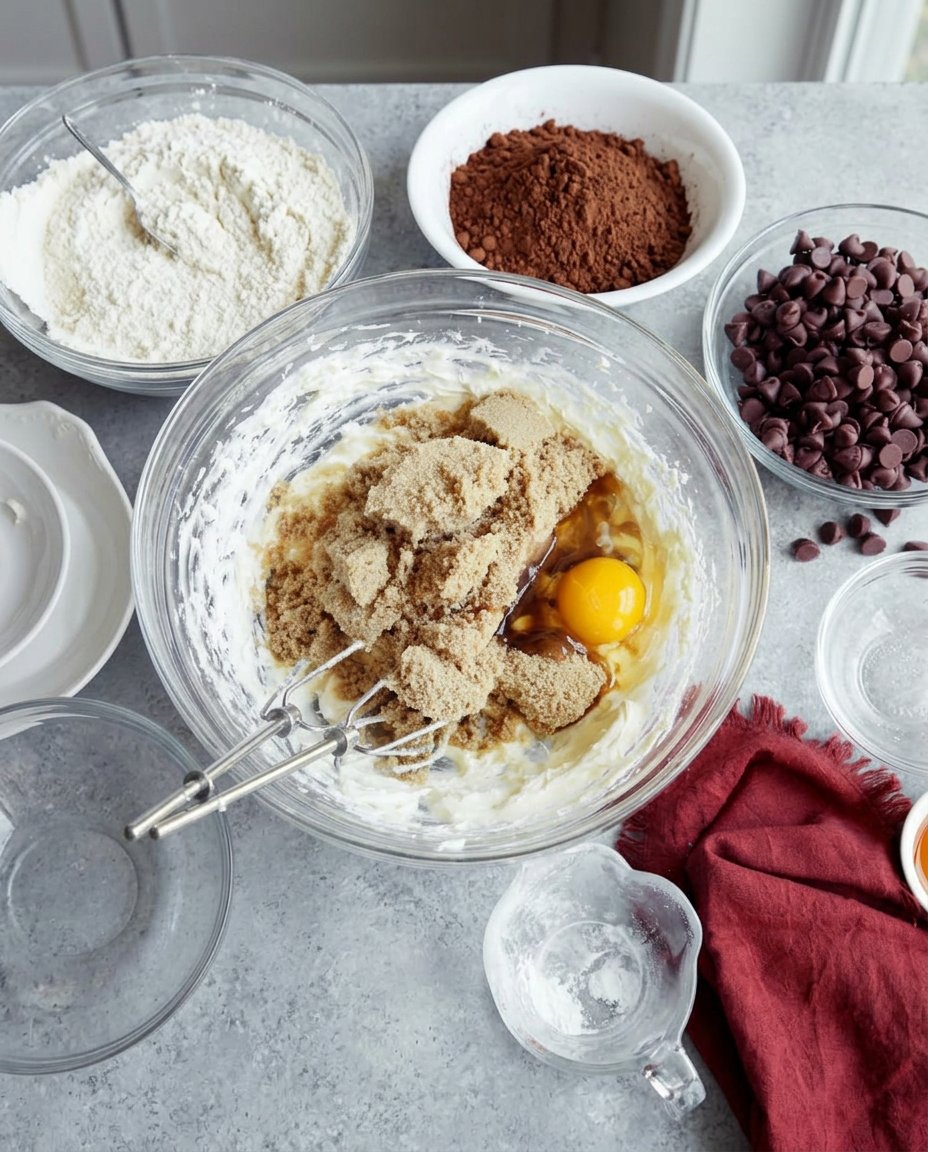
- In a separate bowl, cream the softened butter and white sugar with an electric mixer until light and pale.
- Beat the egg and dark molasses into the creamed butter until the mixture is light and fluffy.
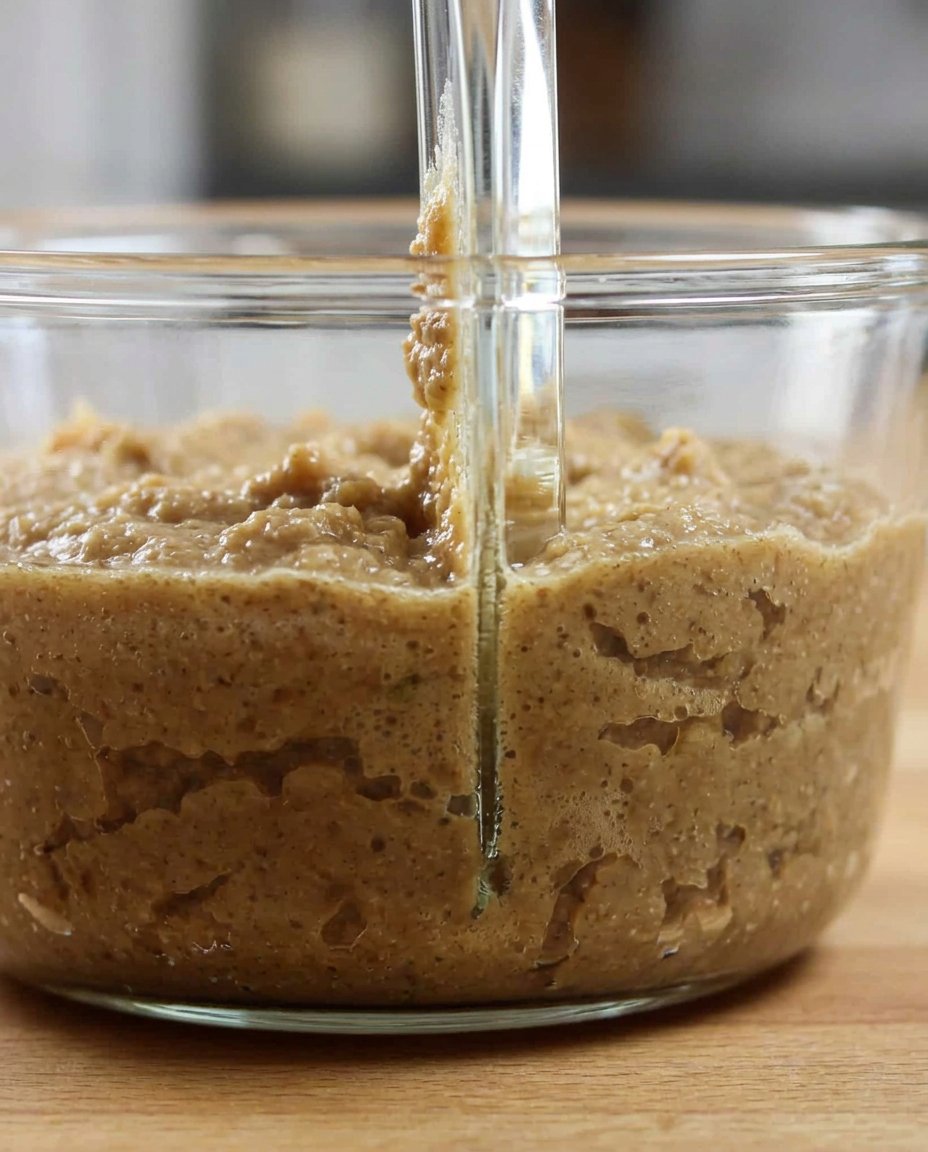
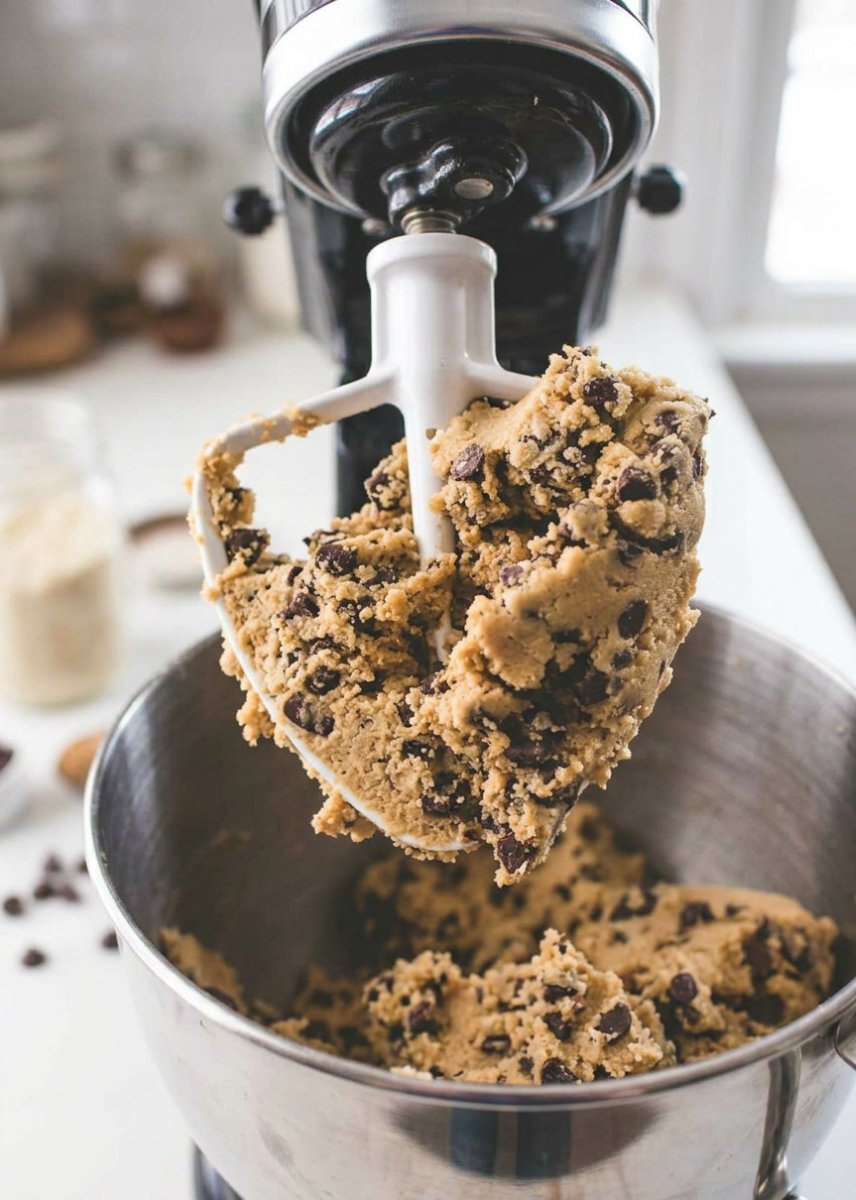
- Gradually add the dry flour mixture to the wet ingredients in three batches, stirring until just combined into a soft dough.
- Roll the dough into 1-inch balls and coat each one thoroughly in the cinnamon sugar mixture.
- Place the balls 2 inches apart on an ungreased baking sheet to allow for spreading.
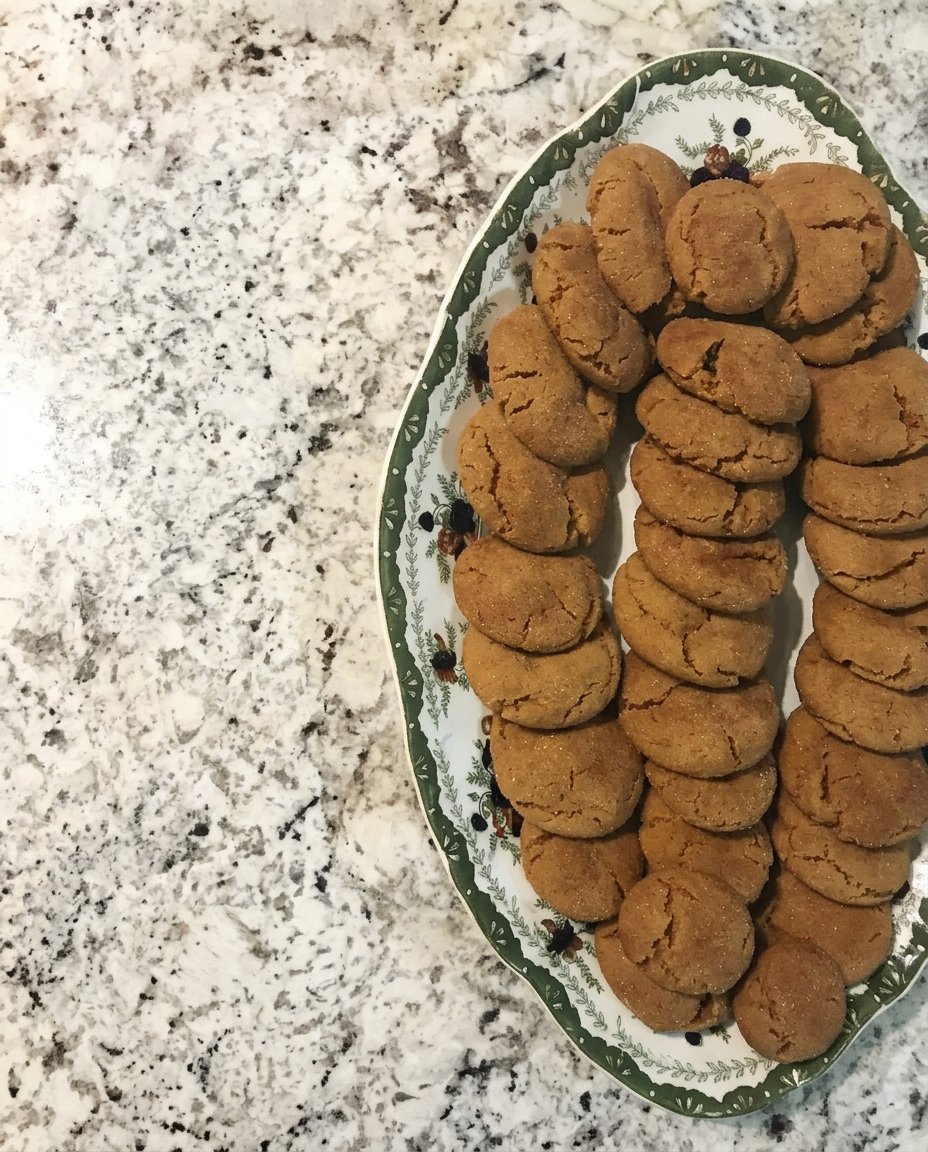
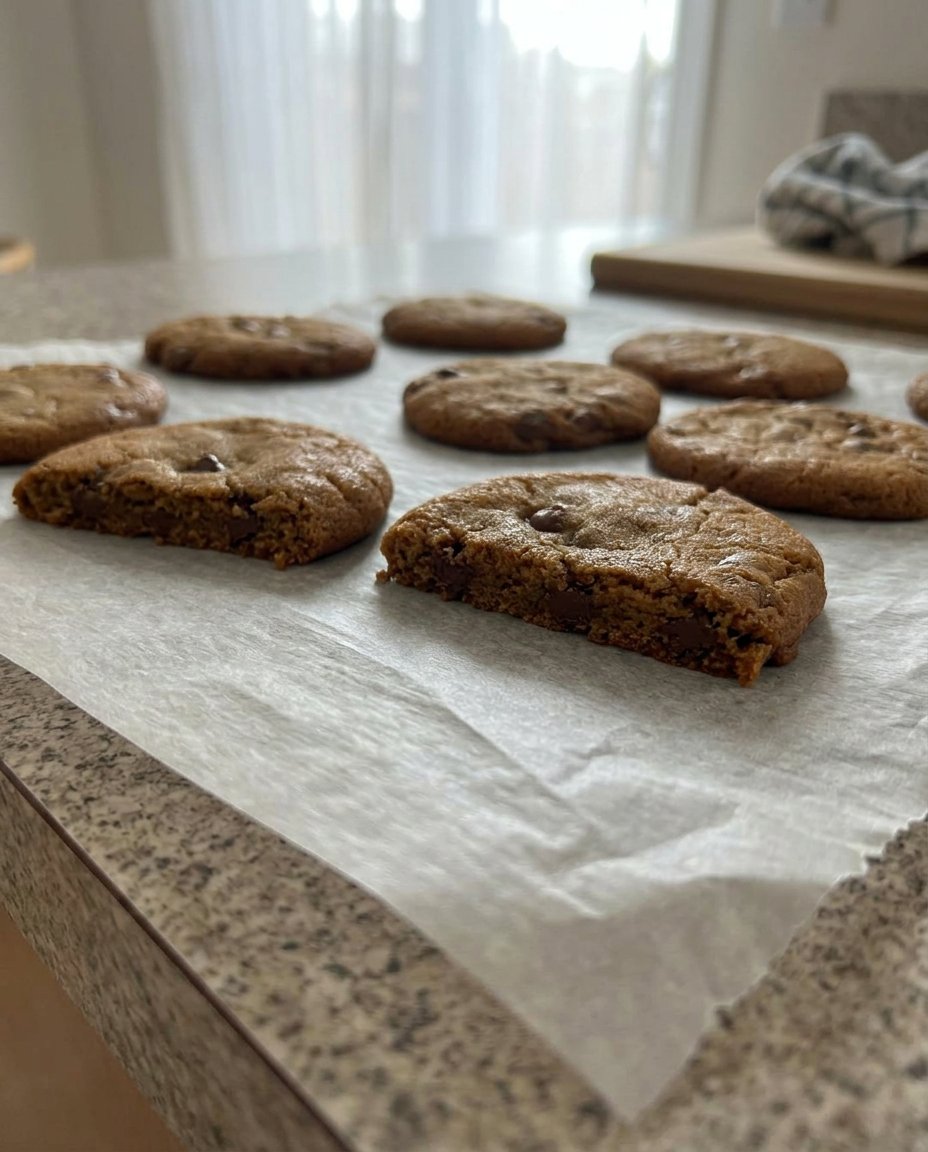
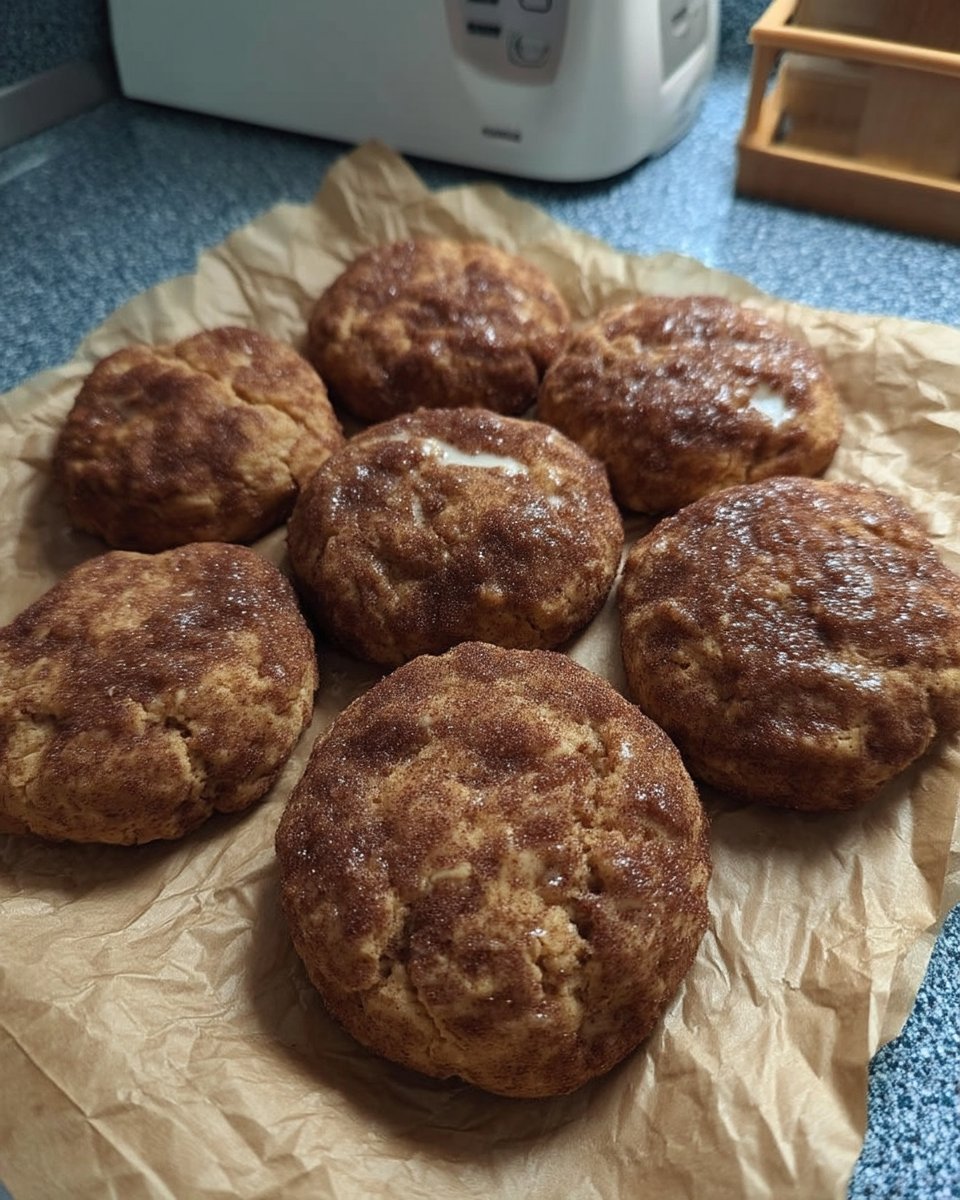
- Bake for approximately 10 minutes until the tops are cracked, then cool completely on a wire rack to allow the edges to firm up.
Notes
To ensure your cookies have the perfect snap, avoid overbaking them; they should look slightly soft when they come out of the oven as they will firm up while cooling. Using high-quality dark molasses rather than light or blackstrap will provide the most authentic, rich flavor profile without being overly bitter.
- Prep Time: 15 mins
- Cook Time: 10 mins
- Category: Dessert
- Method: Bake
- Cuisine: American
Simple Pantry Staples for Heritage Flavor
Creating these Gingersnap Cookies starts with a trip to your pantry. There are no fancy or hard-to-find items here—just the same ingredients my grandmother used in her sun-drenched kitchen. Each component plays a vital role in building the flavor profile and the perfect texture that we all remember from childhood.
- Sifted All-Purpose Flour: This provides the structure for our cookies. Sifting it twice is a step you shouldn’t skip, as it ensures the dough remains light.
- Ground Ginger: The star of the show. It provides that signature warmth and a slightly spicy kick that defines a true gingersnap.
- Dark Molasses: This is where the deep color and the chewy texture come from. Use a quality dark molasses for the best heritage flavor.
- Cinnamon and Salt: These pantry heroes work behind the scenes to balance the sweetness and highlight the ginger.
- Butter or Shortening: For the most nostalgic taste, I often use butter, though shortening will give you a slightly different, very traditional crispness.
- White Sugar: This sweetens the dough and, when mixed with cinnamon for rolling, creates that beautiful, sparkly crinkle top.
- Large Egg: A single egg binds everything together, adding just enough moisture to create a soft, workable dough.
- Baking Soda: This is our leavening agent, helping the cookies rise and then fall slightly to create those lovely cracks on top.
The Classic Way to Bake Gingersnaps
Step 1: Prepare Your Kitchen
Begin by preheating your oven to 350 degrees F (175 degrees C). While the oven warms, find a small, shallow bowl and mix your 1/3 cup of cinnamon sugar. Set this aside, as it will be the final touch that gives our Gingersnap Cookies their beautiful, glittering finish. Taking a moment to organize your space now makes the baking process feel like a peaceful ritual.
Step 2: Sift the Dry Ingredients
In a large mixing bowl, combine your sifted flour, ground ginger, baking soda, cinnamon, and salt. Use a whisk or a sifter to stir them until they are well combined. For the best results, sift the entire mixture a second time. This traditional technique was one of Grandma’s secrets for ensuring there were no lumps and that the spices were perfectly distributed throughout the dough.
Step 3: Cream the Butter and Sugar
In another large bowl, take your softened butter and beat it with an electric mixer until it is creamy and smooth. Gradually add in your white sugar, continuing to beat the mixture until it is light and pale. This step is where you build the foundation of the cookie’s texture, so take your time and don’t rush the process.
Step 4: Incorporate the Molasses and Egg
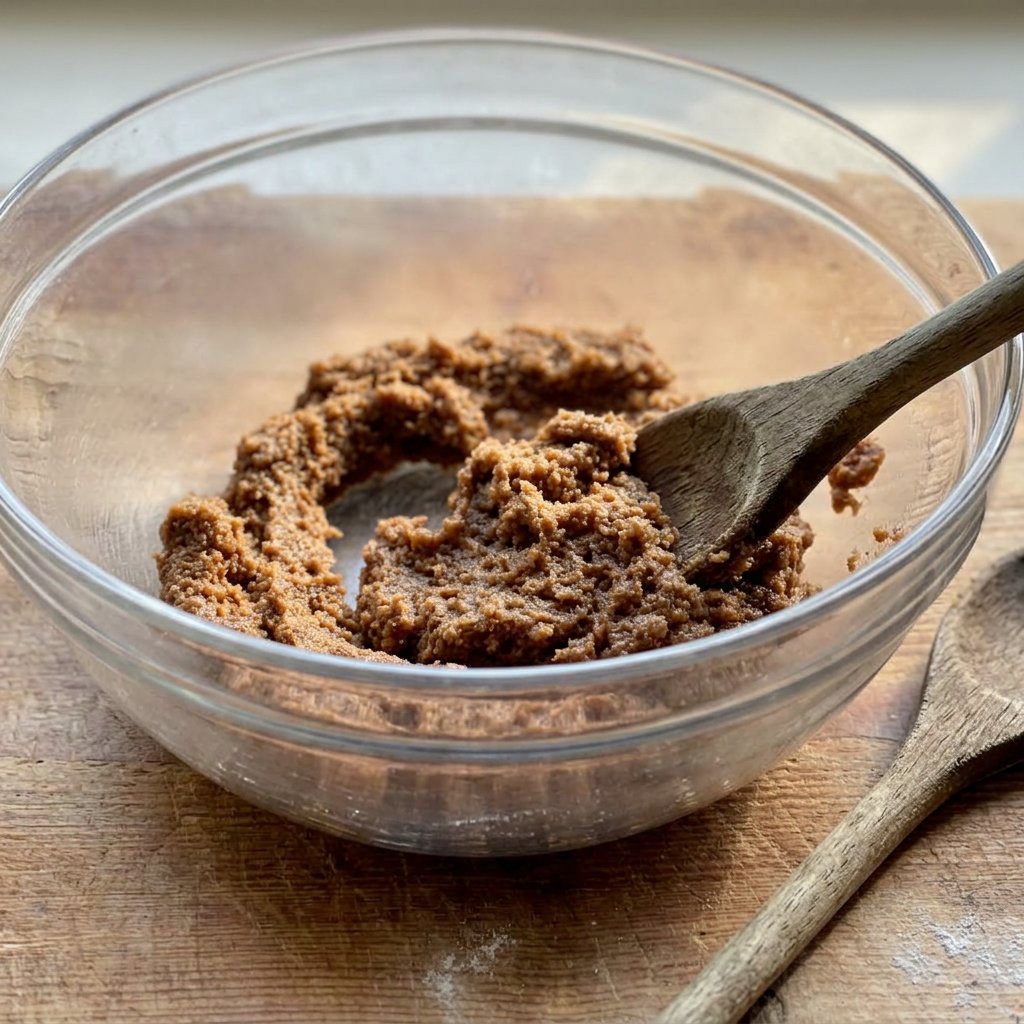
Add your egg and the dark molasses to the creamed butter mixture. Beat the ingredients together until the batter is light and fluffy. You will notice the color change to a rich, golden brown, and the aroma of the molasses will start to fill the air. This is the heart of the Gingersnap Cookies, providing that deep, soul-warming flavor we love.
Step 5: Combine the Mixtures
Sift about one-third of your flour mixture into the wet ingredients and stir until it is just combined. Continue adding the remaining flour in two more batches, stirring gently until a soft dough forms. Be careful not to overwork the dough; you want to maintain that delicate balance that leads to a perfect snap.
Step 6: Roll the Dough Balls
Using your hands, pinch off small pieces of the dough and roll them between your palms into 1-inch balls. This is a wonderful task for little helpers in the kitchen. Rolling the dough into uniform sizes helps the cookies bake evenly, ensuring that every piece in the jar is just as perfect as the last.
Step 7: The Cinnamon Sugar Coating
Take each dough ball and roll it through the cinnamon sugar mixture you prepared earlier. Make sure the ball is evenly coated in the sweet, spicy crystals. Place the balls about 2 inches apart on an ungreased baking sheet. The space is important because these cookies will spread slightly as they bake to create their iconic shape.
Step 8: Bake to Perfection
Place the baking sheets in your preheated oven. Bake for about 10 minutes, or until the tops are rounded and have developed those characteristic slight cracks. Halfway through the baking time, switch the racks to ensure an even bake. Once finished, move the cookies to a wire rack to cool completely. As they cool, the edges will firm up, giving you that satisfying snap.
Grandma’s Secrets for the Perfect Gingersnap
One of the most important lessons I learned from my grandmother was the value of patience. When making Gingersnap Cookies, let your butter sit on the counter until it reaches room temperature naturally rather than using the microwave. This creates a much better emulsion with the sugar. If you find your kitchen is particularly warm, you can chill the dough balls for fifteen minutes before rolling them in the sugar to help them hold their shape better in the oven. For those who enjoy a deeper spice profile, you can look at Classic Cookie Recipes to see how different spice ratios affect your bake.
Another wonderful piece of wisdom is to use fresh spices. Ginger loses its potency over time, so if your tin has been in the back of the pantry for more than a year, it might be time for a fresh one. If you want to see how other heritage bakers handle this recipe, the Allrecipes version of this recipe offers a slightly different sugar-to-cinnamon ratio for the coating that some families prefer. Always store your cooled cookies in an airtight glass jar to maintain that perfect texture for up to a week.
Heritage Twists on a Family Favorite
While the traditional Gingersnap Cookies are perfect as they are, every family has its own little twists. In some parts of the country, bakers like to add a half cup of finely chopped walnuts or pecans to the dough for an added crunch. This adds a lovely earthy note that complements the molasses beautifully. If you are looking for something more festive, you can find inspiration in our Holiday Cookie Celebrations section, where we talk about adding orange zest to the dough for a bright, citrusy finish.
Another popular variation is to substitute half of the white sugar in the dough for dark brown sugar. This results in a slightly softer, chewier cookie that borders on a ginger molasses treat. Some modern bakers even like to dip half of the cooled cookie into melted white chocolate for a beautiful contrast against the dark, crinkled surface. No matter how you choose to adapt it, the heart of the recipe remains the same—a celebration of warmth and heritage.
Filling the Jar with Love
There is nothing quite like the sight of a glass jar filled with Gingersnap Cookies sitting on the kitchen counter. For a true trip down memory lane, serve these cookies with a cold glass of whole milk. The way the spicy ginger interacts with the creamy milk is a sensory experience that never gets old. If you are hosting a small afternoon gathering, these cookies also pair wonderfully with a robust black tea or a steaming cup of coffee. For more ideas on presenting your treats, browse through our Quick & Easy Cookies tips.
When gifting these cookies, I like to place them in a vintage-style tin lined with parchment paper. It preserves the ‘snap’ and makes the recipient feel like they’ve received a piece of history. These cookies are also excellent when crumbled over a bowl of high-quality vanilla bean ice cream, providing a spicy crunch that cuts through the richness of the dairy. Sharing these treats is about more than just food; it is about sharing a piece of your heart and your family’s story.
The Sweet Heritage of Home Baking
Baking these Gingersnap Cookies is a way to keep the past alive in our modern kitchens. It is a reminder that the best things in life don’t have to be complicated; they just need to be made with care and shared with those we love. I hope this recipe finds a permanent place in your own family’s recipe box, just as it has in mine. If you find yourself in a creative mood, you might also enjoy our guide on Cookie Decorating Traditions to see how to make your holiday spreads even more special. Please share your baking photos with me—I love seeing these traditions continue in your homes! You can find us on Pinterest, Instagram, and Facebook. Happy baking, from my kitchen to yours.

