I still remember the satisfying click of Grandma’s vintage cookie press echoing through the kitchen every December. Finding her original, handwritten index card for these Butter Spritz Cookies 2 brought a wave of pure, sweet nostalgia right back to my heart. This treasured heritage recipe relies on just a handful of simple pantry staples to create something truly magical.

These tender, buttery bites melt in your mouth and look absolutely beautiful straight from the jar. With a soft vanilla and almond flavor profile, they are incredibly easy to press and bake in just minutes. You will love how this traditional dough holds its shape perfectly, making your holiday baking traditions a breeze.
Why Butter Spritz Cookies 2 Are a Timeless Jar Favorite
There is a reason this recipe has been a cherished family tradition for generations. They boast that classic, melt-in-your-mouth texture that only real butter can provide, reminiscent of the treats always waiting in Grandma’s vintage cookie jar.
The dough comes together quickly and presses beautifully, meaning you spend less time fussing and more time enjoying the warmth of your kitchen. Plus, they stay fresh and tender for a full week, making them the perfect make-ahead treat for sharing with loved ones.
Print
Butter Spritz Cookies 2
- Total Time: 50 mins
- Yield: 60 cookies
- Diet: Vegetarian
Description
Bring a touch of nostalgia to your kitchen with these heirloom-quality butter spritz cookies. Their delicate vanilla-almond flavor and tender, melt-in-your-mouth texture make them the perfect choice for holiday gifting or filling a classic cookie jar.
Ingredients
- 1 cup Unsalted Butter, room temperature
- 2/3 cup Granulated Sugar
- 1 Large Egg
- 1 teaspoon Vanilla Extract
- 1/2 teaspoon Almond Extract
- 2 1/4 cups All-Purpose Flour
- 1/4 teaspoon Salt
- Gel icing colors (optional)
- Assorted sprinkles (optional)
Instructions
- Preheat your oven to 350°F (180°C) and line your baking sheets with silicone mats; avoid using parchment paper so the dough sticks properly when pressed.
- In a large mixer bowl, cream the room-temperature butter and granulated sugar together on medium speed for 3 to 4 minutes until light and fluffy.
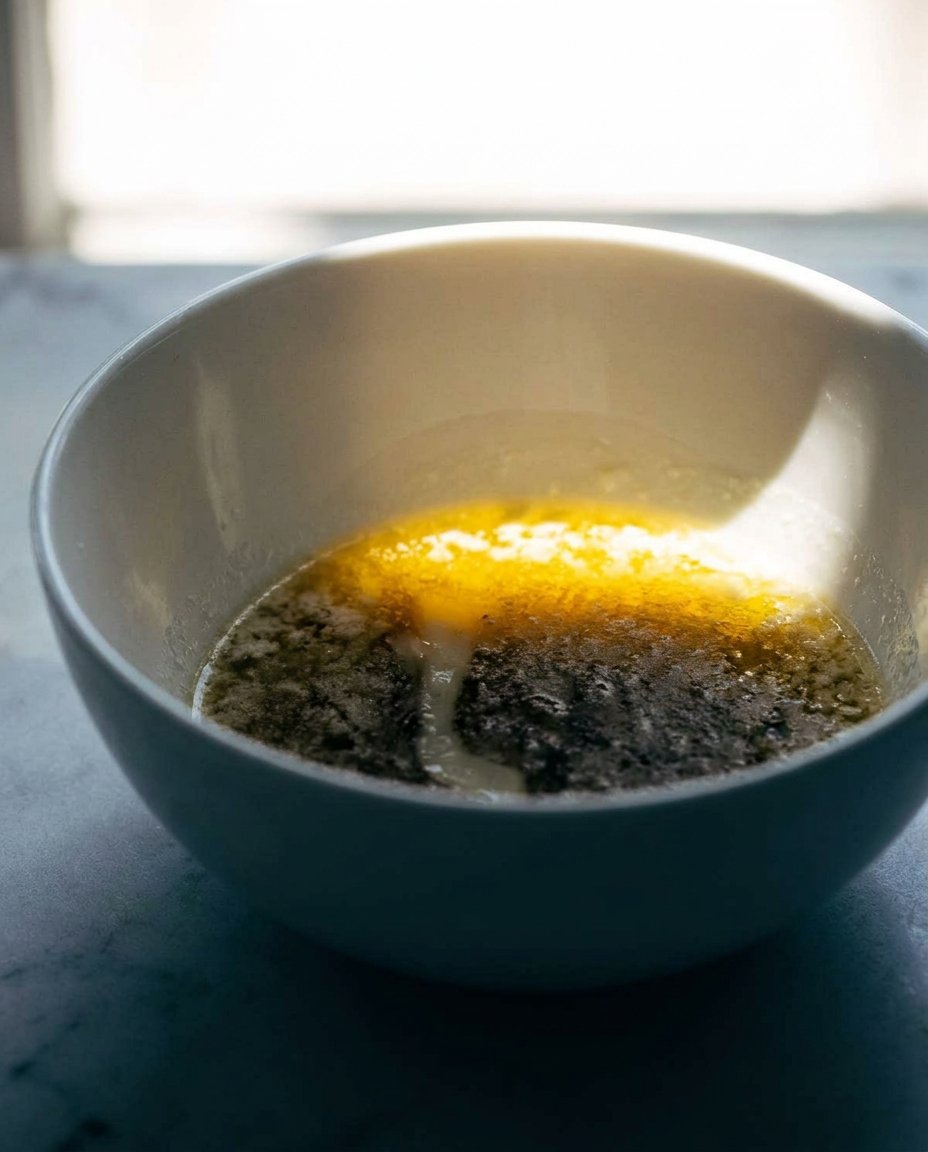
- Add the egg, vanilla extract, and almond extract, mixing until well combined and scraping down the bowl as needed.
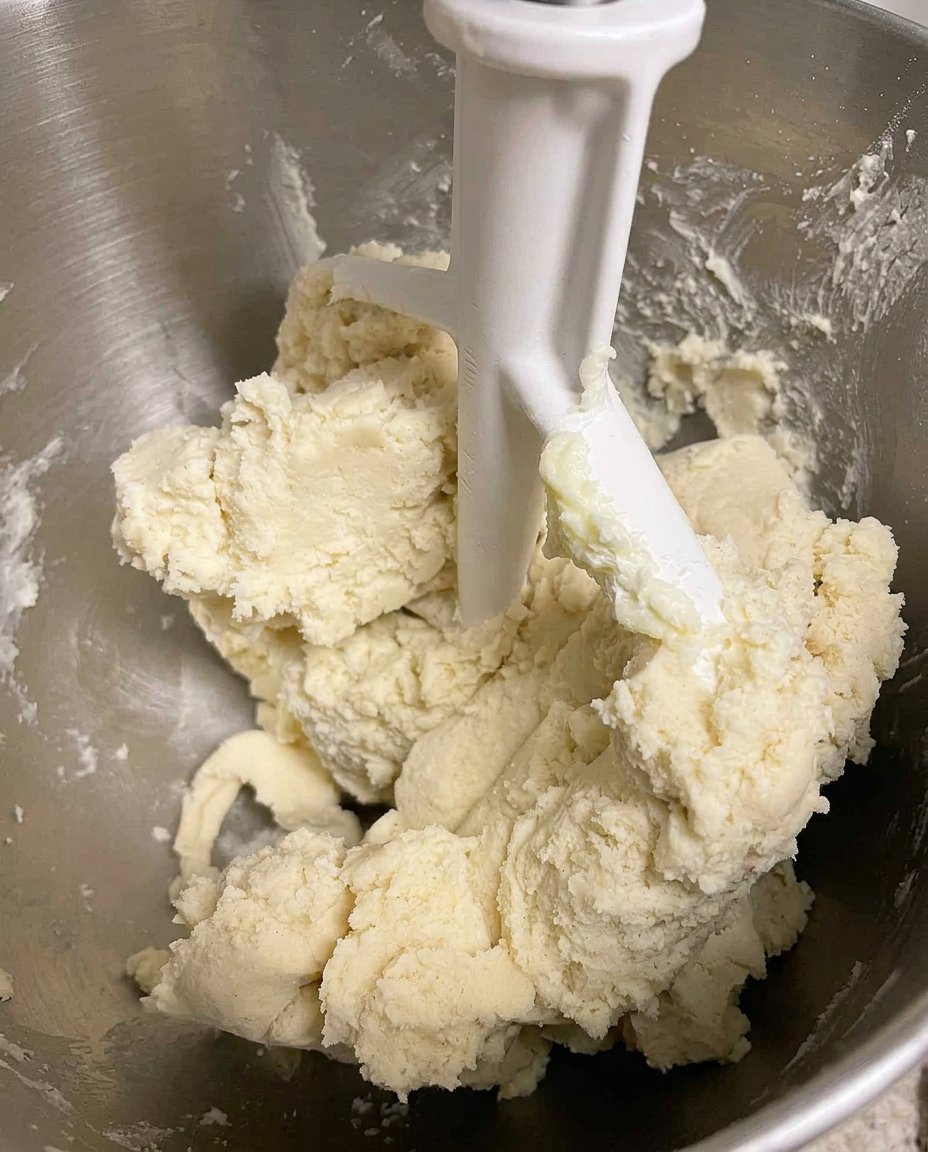
- Add the flour and salt, then mix on low speed just until the dough comes together, taking care not to overmix.
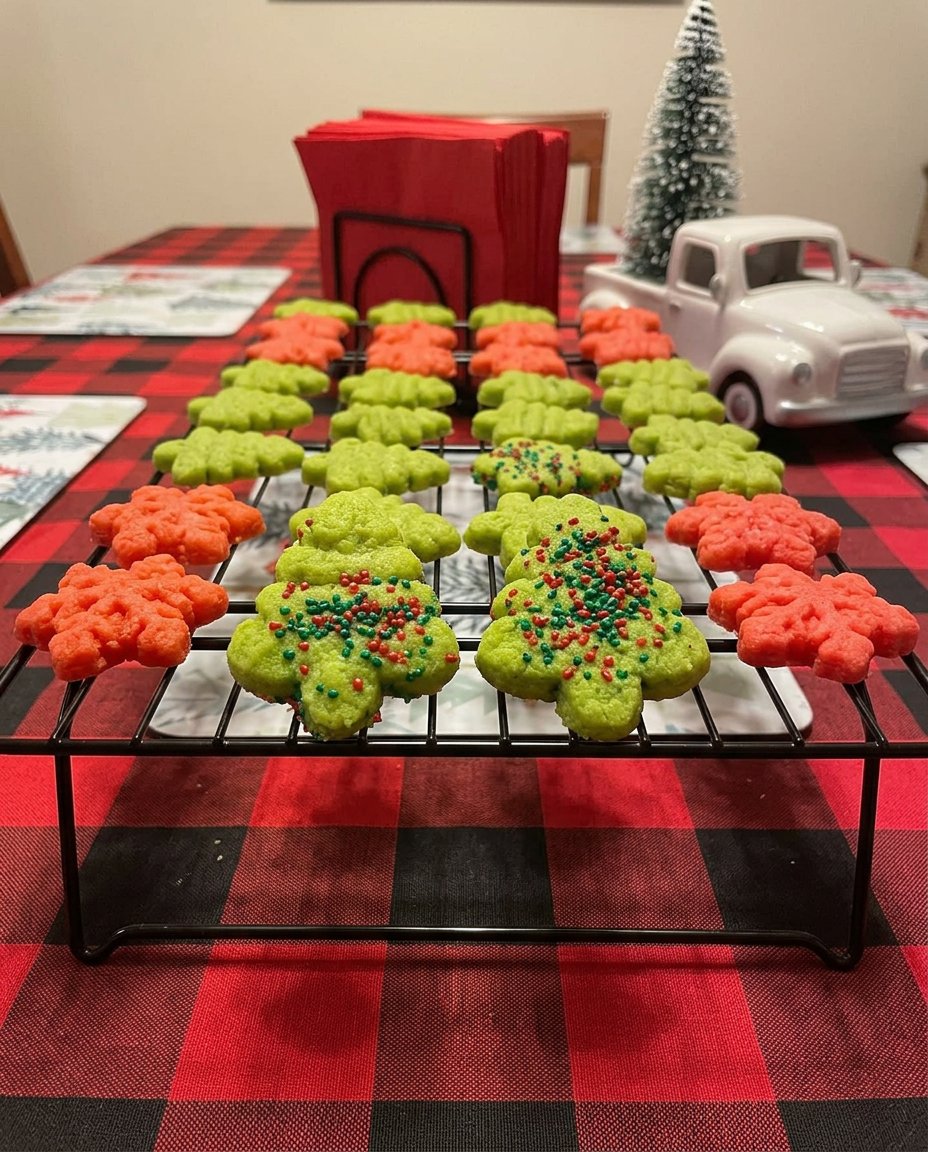
- If using colors, divide the dough into separate bowls and gently fold in a small amount of gel icing color with a toothpick.
- Load the dough into a cookie press and press the shapes onto the prepared baking sheets, placing them close together as they do not spread much.
- Bake for 5 to 8 minutes until set, then let the cookies rest on the sheets for 5 minutes before transferring to a wire rack to cool completely.
Notes
Using a silicone mat is a key heritage trick for this recipe because it provides the necessary surface tension for the dough to release perfectly from the cookie press. To ensure your shapes remain sharp, make sure your butter is at room temperature but not beginning to melt. If your kitchen is warm, chilling the loaded cookie press for five minutes can help maintain the integrity of the designs.
- Prep Time: 20 mins
- Cook Time: 8 mins
- Category: Dessert
- Method: Baking
- Cuisine: American
Simple Pantry Staples
The secret to authentic, old-fashioned flavor lies in keeping things incredibly simple. You do not need anything fancy to make a memorable treat—just good, honest ingredients that have stood the test of time.
- Unsalted Butter: The absolute heart of this recipe. It must be at room temperature for that perfect, creamy consistency.
- Granulated Sugar: Just enough sweetness to balance the rich butter without making the cookies spread in the oven.
- Large Egg: Binds the dough together beautifully and adds a touch of necessary richness.
- Vanilla & Almond Extracts: This classic duo provides that unmistakable bakery-fresh aroma that fills the house.
- All-Purpose Flour: A humble staple that gives the cookies their tender, melt-in-your-mouth crumb.
- Salt: Just a tiny pinch to bring out the pure buttery flavor.
- Gel Icing Colors & Sprinkles (Optional): For a festive touch, just like the colorful treats at the church bake sales of my childhood.
The Heritage Method
Step 1: Prepare Your Baking Sheets
Preheat your oven to 350°F (180°C). Line your baking sheets with silicone baking mats. Skip the parchment paper for this particular heirloom recipe; the dough needs a slightly grippy surface to stick to when pressed, and parchment is just a bit too non-stick.
Step 2: Cream the Butter and Sugar
In a large mixer bowl, beat the room-temperature butter and granulated sugar together on medium speed. Let it mix for about 3 to 4 minutes until it becomes light in color, fluffy, and beautifully pale. This step creates the tender texture we cherish.
Step 3: Add the Egg and Extracts
Add your large egg and mix until well combined, pausing to scrape down the sides of the bowl. Pour in the pure vanilla extract and almond extract, mixing gently to blend those lovely, nostalgic flavors into the dough.
Step 4: Blend the Dry Ingredients
Add the all-purpose flour and salt. Mix on a low speed just until the dough comes together. Finish folding it gently with a rubber spatula to keep the cookies tender—overmixing makes for a tough cookie!
Step 5: Tint the Dough
If you want to add festive colors, divide your dough evenly into bowls. Use a tiny toothpick drop of gel icing color for red and green, mixing gently. Go slowly with the color; too much liquid can thin out the dough.
Step 6: Press and Decorate
Load your colored dough into a vintage or modern cookie press according to its directions. Hold the press completely perpendicular to the baking sheet and press out your lovely shapes. They do not spread much, so you can place them close together. Add your favorite traditional sprinkles now.
Step 7: Bake and Cool
Bake for 5 to 8 minutes. I love taking them out at the 5-minute mark so they stay soft and tender. Let them rest on the warm baking sheets for about 4 to 5 minutes before moving them to a wire rack to cool completely. Store them in a tightly sealed tin or jar for up to a week.
Grandma’s Secrets for Perfect Spritz
For the most beautiful shapes, temperature is absolutely everything. If your kitchen is very warm and the dough gets too soft, pop it in the refrigerator for just five minutes before loading your press. You want the butter pliable but not melting.
Also, remember to wash and completely dry your cookie press between color changes to keep your festive shapes looking sharp and pure. When you want to mix things up, consider checking out some of our Classic Cookie Recipes to fill the rest of your holiday tins.
Lastly, never skip the almond extract; it is the traditional flavor note that makes these taste truly authentic. For a lovely read on how others approach this traditional treat, you might enjoy this beautiful take on buttery classic spritz cookies.
Family Favorites and Twists
While the classic vanilla-almond flavor holds a special place in my heart, this versatile dough welcomes a few gentle tweaks. You can omit the almond extract and substitute an equal amount of pure lemon extract or orange zest for a bright, citrusy note that tastes wonderful with afternoon tea.
If you love a richer treat, dip the cooled edges of your baked cookies into melted semi-sweet chocolate, then roll them in finely chopped walnuts—a staple in many heritage cookbooks. We also have wonderful ideas in our Cookie Decorating Traditions section for those who want to get creative with sweet glazes.
Cookie Jar Time
Nothing beats setting a brimming plate of these tender treats on the table with a cold glass of milk or a steaming mug of black coffee. I love to arrange them in a vintage tin lined with wax paper when giving them as heartfelt gifts to neighbors and teachers.
They are a beloved staple during festive gatherings, always drawing bright smiles from kids and grandparents alike. If you are building a larger holiday platter, these pair wonderfully with the sweet treats found in our Holiday Cookie Celebrations guide.
The Sweet Heritage Keeps Baking
Preserving these simple, heartwarming recipes is what baking is truly all about. Filling your cookie jar with these tender bites connects us to the generations who baked before us, spreading joy one sweet morsel at a time. I hope these become a treasured staple in your own kitchen, creating memories for your family just as they have for mine.
For more timeless treats, be sure to browse our Quick & Easy Cookies. I would absolutely love to see your beautiful cookie shapes! Please share your baking moments with me on Facebook, pin your favorites on Pinterest, or tag me in your photos on Instagram.
