Many vintage cookies look beautiful on a plate but turn into dry, crumbly pucks after just a single night in the jar. I remember my grandmother’s spice cookies having that incredible caramelized aroma but losing their soft heart far too quickly in the dry afternoon air. This recipe solves that age-old problem by using modern texture science to keep those warm, spiced notes tucked inside a cookie that stays soft and chewy for days.

These Biscoff Cookies are massive, bakery-style treats that hide a molten, fudgy center of spiced cookie butter. By browning the butter and incorporating an extra egg yolk, we create a moisture-rich dough that honors heritage flavors while ensuring every bite is as tender as the first. This is the secret to a cookie that tastes just as fresh on day four as it does the moment it leaves the oven.
The Secret to Lasting Softness and Perfect Chew
You will love these cookies because they finally end the cycle of stale, rock-hard treats that lose their appeal within hours. Most stuffed cookies suffer from a dough that dries out to compensate for the wet filling, but this recipe balances moisture through a high brown sugar ratio and the inclusion of cornstarch. The result is a cookie with a slightly crisp, golden edge and a center that remains incredibly fudgy and soft.
The deep caramel notes of the Biscoff spread are mirrored in the browned butter, creating a sophisticated flavor profile that isn’t just sweet, but rich and toasted. These are large, substantial cookies that feel like a special occasion treat every time you open the jar. Because we use a 12-hour chilling period, the flour fully hydrates, leading to a more consistent bake and a texture that won’t fall apart. It is a reliable, proven method for anyone who treasures a cookie that stays moist and satisfying.
Print
Biscoff Cookies
- Total Time: 15 hours
- Yield: 8 large cookies
- Diet: Vegetarian
Description
These massive, bakery-style cookies feature a molten Biscoff spread center encased in a spiced brown butter dough. Engineered for lasting softness, they combine a crispy golden edge with a fudgy, decadent heart that stays fresh for days.
Ingredients
- 280g Biscoff spread
- 225g unsalted butter
- 3/4 cup brown sugar
- 1/2 cup caster sugar
- 1 large egg, room temperature
- 1 large egg yolk
- 1 tsp vanilla extract
- 3 cups all-purpose flour
- 3 tsp cornstarch
- 1 tsp baking powder
- 1/2 tsp baking soda
- 1/2 tsp salt
- 1 tsp ground cinnamon
- 1/2 tsp ground allspice
- 1/2 tsp ground ginger
- 1 cup white chocolate chips
Instructions
- Dollop 8 portions of Biscoff spread (approx. 35g each) onto a parchment-lined tray and freeze for at least one hour until firm.
- Melt the butter in a light-colored saucepan over medium-high heat, stirring until it becomes nutty and amber-colored; pour into a bowl and cool for 45 minutes.
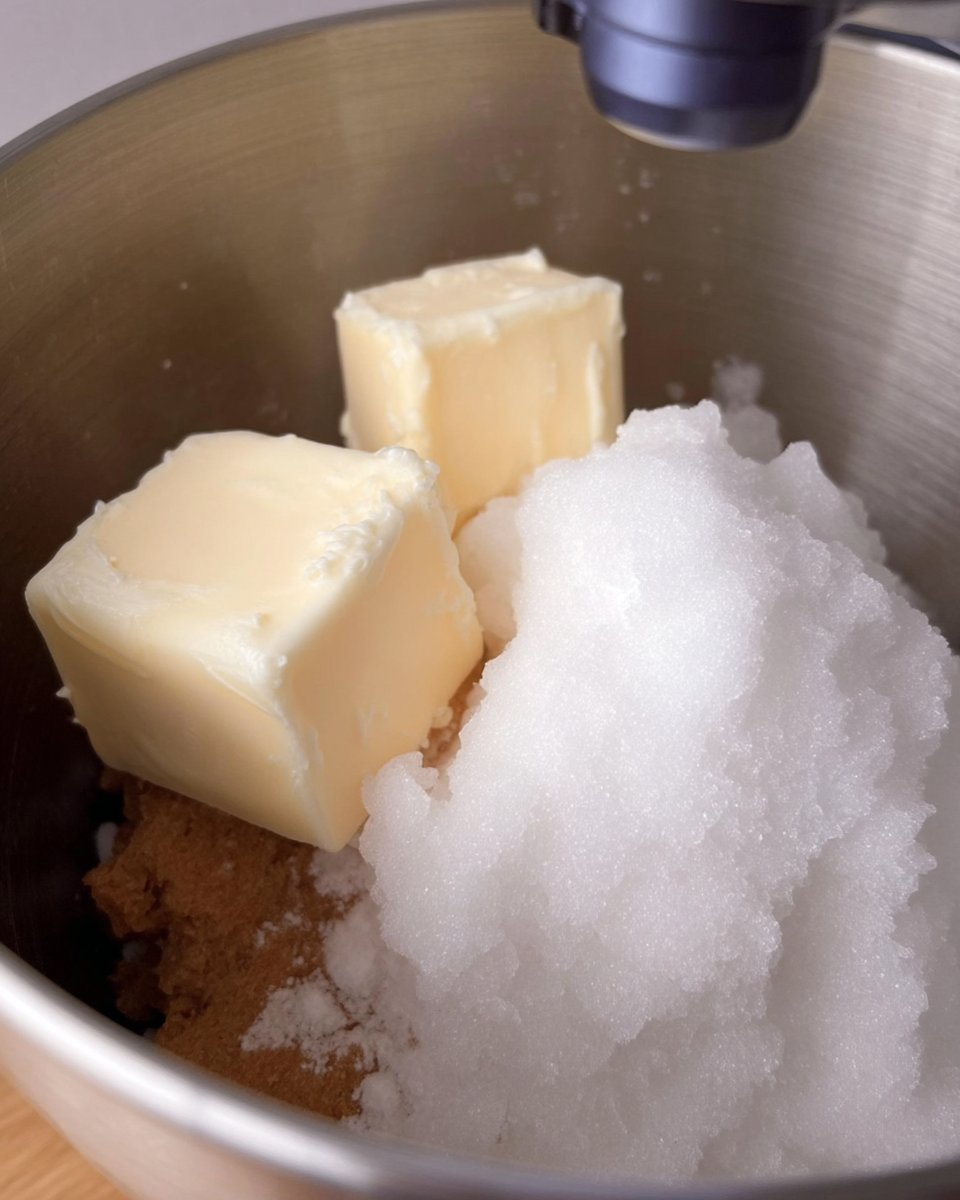
- Stir the brown sugar and caster sugar into the cooled butter, then mix in the egg, extra yolk, and vanilla until the mixture is smooth and glossy.
- In a separate bowl, whisk together the flour, cornstarch, baking powder, baking soda, salt, and spices.
- Fold the dry ingredients and white chocolate chips into the wet base until just combined and a thick dough forms.
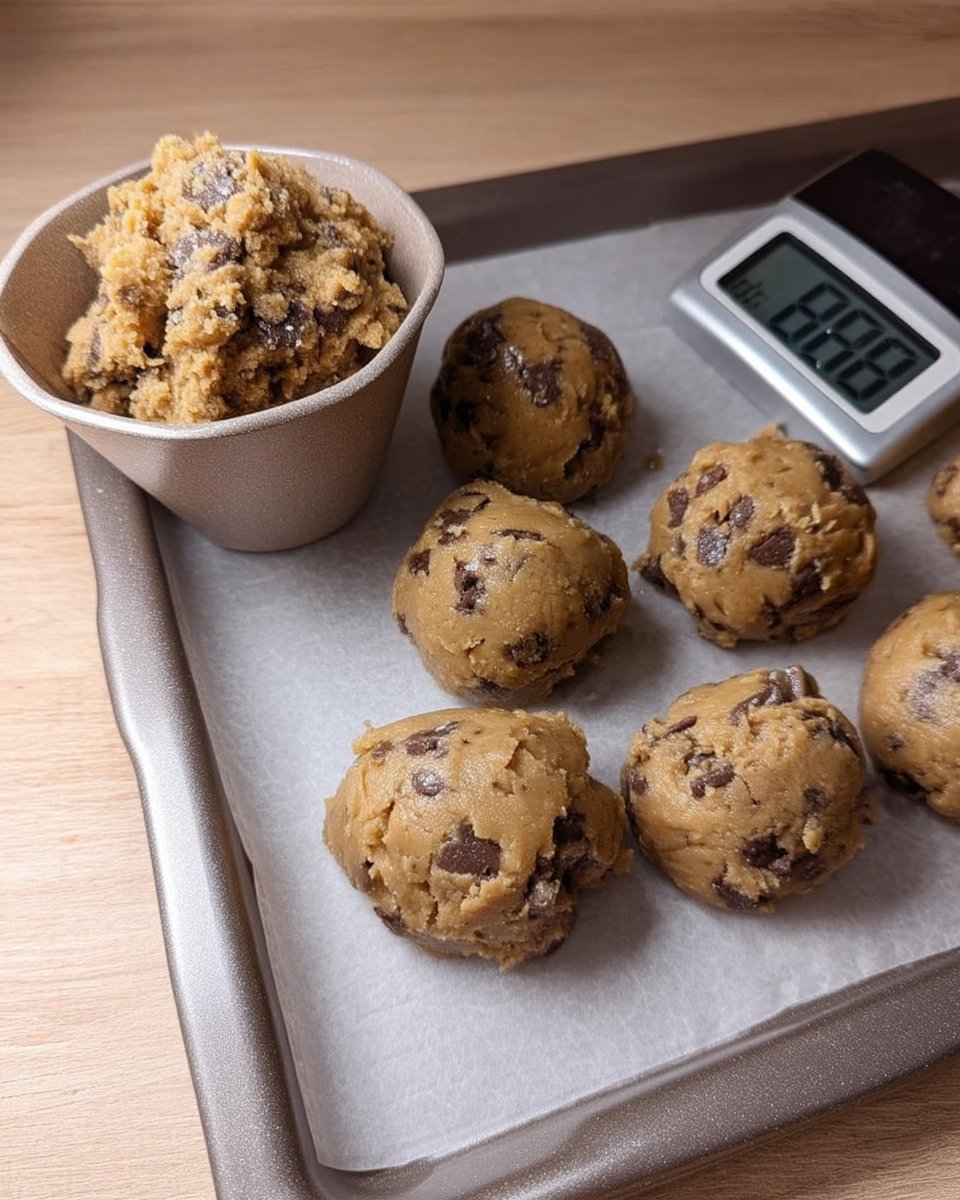
- Divide the dough into 8 portions (125g each), flatten them, place a frozen Biscoff disc in the center, and wrap the dough tightly to seal.
- Refrigerate the shaped dough balls in an airtight container for 12 to 24 hours to allow the flour to hydrate.
- Preheat oven to 180°C (350°F) and bake the cold dough balls for 18–19 minutes, then let them rest on the tray for 20 minutes before serving.
Notes
Always use a kitchen scale to measure your ingredients for the most consistent results, particularly for the Biscoff centers and the flour. For an extra touch of perfection, press a few additional chocolate chips onto the warm tops immediately after baking and use a large circular cutter to ‘scoot’ the edges into a perfect round shape.
- Prep Time: 1 hour
- Cook Time: 19 mins
- Category: Dessert
- Method: Baking
- Cuisine: European
Understanding the Building Blocks of Texture
To achieve a cookie that stays jar-fresh for days, we must look at how each ingredient contributes to moisture retention. Using the right fats and sugars is not just about flavor; it is about the science of a soft crumb.
- Biscoff Spread (280g): This is the star of the show. We freeze dollops of this smooth spread so they can be encased in dough without making a mess. Its high oil content keeps the center of the cookie from drying out during the bake.
- Unsalted Butter (225g): We brown this butter to remove water and concentrate the toasted, nutty milk solids. This adds depth and a chewy texture that standard creamed butter cannot match.
- Brown Sugar (3/4 cup): Brown sugar is hygroscopic, meaning it attracts and holds onto moisture. This is the primary reason these cookies stay soft for nearly a week.
- Cornstarch (3 tsp): This helps soften the proteins in the all-purpose flour, creating a tender, melt-in-your-mouth feel that prevents the cookie from becoming tough.
- Egg Yolk (1 extra): The extra yolk adds fat and lecithin, which acts as a natural emulsifier. It creates a richer, more cohesive dough that yields a superior chew.
- Warm Spices: Cinnamon, allspice, and ginger are added to the dough to bridge the flavor between the cookie base and the speculoos filling, ensuring a cohesive taste experience.
Using a kitchen scale for these measurements is the best way to guarantee success. When you measure flour by volume, it is easy to pack too much into the cup, which leads to a dry, cakey cookie instead of the chewy masterpiece we are aiming for.
The Proven Method for Stuffed Perfection
Step 1: Prepare the Spiced Center
Begin by dolloping 8 generous tablespoons (about 35g each) of Biscoff spread onto a parchment-lined tray. Spread them into rough discs about half an inch thick and place them in the freezer for at least one hour. They must be firm enough to handle so they don’t dissolve into the dough when you are shaping the balls.
Step 2: Brown the Butter for Depth
Place your butter in a light-colored saucepan over medium-high heat. As it melts and begins to simmer, stir occasionally. You will notice it foaming and then developing little golden specks at the bottom. Once it smells nutty and the specks are a deep amber, pour it into a heatproof bowl immediately. Let this cool for about 45 minutes until it is room temperature but still liquid.
Step 3: Mix the Wet Base
In your bowl of cooled brown butter, add the brown sugar and caster sugar. Stir with a wooden spoon until combined. Add the room-temperature egg, the extra yolk, and the vanilla extract. Mix until the texture looks like smooth, glossy caramel. This step ensures the sugars are beginning to dissolve, which leads to a better surface texture.
Step 4: Incorporate Dry Ingredients
Whisk your flour, cornstarch, baking powder, baking soda, salt, and spices in a separate bowl. Fold these into the wet ingredients until the flour is mostly gone. Add the white chocolate chips and stir until everything is fully incorporated. The dough will be thick and fragrant.
Step 5: Stuff and Shape the Cookies
Divide the dough into 8 equal portions (about 125g each). Flatten a portion of dough in your hand, place a frozen Biscoff disc in the center, and wrap the dough around it. Roll it into a tall ball with a flat base, ensuring there are no cracks where the filling could leak out. This thick wall of dough is what protects the soft center during the long bake.
Step 6: The Essential Chill
Place the shaped dough balls in an airtight container and refrigerate for 12 to 24 hours. This patience is what creates the perfect texture; it allows the starch to settle and the flavors to concentrate. If you bake them immediately, they will spread too much and lose that fudgy heart.
Step 7: Bake to Golden Perfection
Preheat your oven to 180°C (350°F). Place the fridge-cold cookies on a lined tray, giving them plenty of space. Bake for 18 to 19 minutes. The edges should be golden, but the tops should still look slightly pale and soft. Press a few extra chocolate chips onto the tops as soon as they come out of the oven.
Step 8: The Cooling Period
Let the cookies rest on the hot baking tray for at least 20 minutes. This is a critical part of the cooking process where the residual heat finishes the center without drying out the edges. This patience ensures a cookie that is structurally sound but incredibly tender.
Mehmet’s Wisdom for Jar-Fresh Cookies
To keep your cookies soft for a full week, never overbake them. The cookies should look slightly underdone in the center when you pull them out; they will firm up as they cool on the tray. If you find your cookies have lost their initial softness after a few days, placing a small slice of white bread in the cookie jar will help maintain the humidity levels needed to keep them chewy. For more advice on maintaining the perfect crumb, you can look through our Classic Cookie Recipes to see how moisture levels vary across different styles. Another secret is the ‘pan bang’ or ‘scoot’—if your cookies come out slightly irregular, use a large round cutter or a spatula to gently push the edges inward while they are still hot to create a perfectly thick, circular shape. This helps concentrate the fudgy center even further.
Texture Tweaks and Flavor Shifts
While the white chocolate chips provide a lovely creamy contrast to the spice, you can easily swap them for dark chocolate chunks if you prefer a less sweet profile. If you want an even more intense crunch on the outside, you can roll the dough balls in crushed Biscoff biscuit crumbs before the final chill. This creates a textured exterior while the inside remains soft and moist. For those who enjoy preparing for the holidays, these can be adapted into smaller sizes for Holiday Cookie Celebrations by using tablespoon-sized portions of dough and smaller frozen dollops of spread. Just remember to reduce the baking time to about 13 minutes for smaller cookies to prevent them from drying out. You can also add a pinch of sea salt to the top after baking to balance the richness of the cookie butter.
How to Enjoy Your Biscoff Treasures
These cookies are best enjoyed about 30 minutes after baking when the center is still warm and molten. If you are eating them on day three or four, a quick 10-second zap in the microwave will revive that fresh-baked, fudgy texture perfectly. They pair wonderfully with a cold glass of milk or a strong cup of black coffee, which helps cut through the richness of the brown butter. For those who need a treat in a hurry without the 12-hour wait, check out our Quick & Easy Cookies for faster options, though the depth of flavor in these Biscoff beauties is truly worth the time. Always store these in an airtight glass jar at room temperature; refrigeration can actually cause the starch to recrystallize and make the cookies feel stale faster.
The Final Word on Freshness
Baking these cookies is a way to bridge the gap between the heritage recipes we grew up with and the modern textures we crave today. By focusing on moisture retention and proper chilling times, we can ensure that every batch is a reliable success that brings comfort and joy to the home. For more inspiration on making your bakes look as good as they taste, see our guide on Cookie Decorating Traditions. We would love to see your results and hear about your own texture breakthroughs. Please share your baking photos with us and join our community on Facebook, Instagram, or Pinterest. You can also find more detailed video techniques on our YouTube channel. Happy baking, and may your cookie jar always stay full and fresh.

