Growing up, Sunday afternoons always smelled like rich cocoa and toasted sugar. My grandmother would spend hours at the kitchen counter, meticulously chilling dough and stirring caramel with a heavy wooden spoon. While I treasure those memories, my modern schedule doesn’t always allow for a half-day baking project, so I’ve updated her classic method for the busy home baker.

These cookies deliver that same deep, fudgy chocolate base and buttery caramel center in a fraction of the time. By using a few simple shortcuts like parchment paper and an electric mixer, we can keep the heritage flavor alive without the long wait. They are the perfect way to bring a bit of vintage warmth to your weeknight routine.
Why This Recipe is a Keeper
You are going to love these because they offer a sophisticated flavor profile with very little fuss. The contrast between the soft, brownie-like chocolate cookie and the chewy, silky caramel is truly special. It is a wonderful treat that looks much more difficult to make than it actually is.
Another reason to adore this method is how reliable it is for busy families. Since the dough uses standard pantry staples, you likely have everything you need in your kitchen right now. There is no need for a trip to a specialty grocery store. These cookies provide that cozy, homemade feeling that reminds everyone of simpler times, even when your calendar is packed. They are a true modern classic that respects where we came from while keeping up with where we are going.
Print
Caramel Thumbprint
- Total Time: 1 hour 27 mins
- Yield: 24 cookies
Description
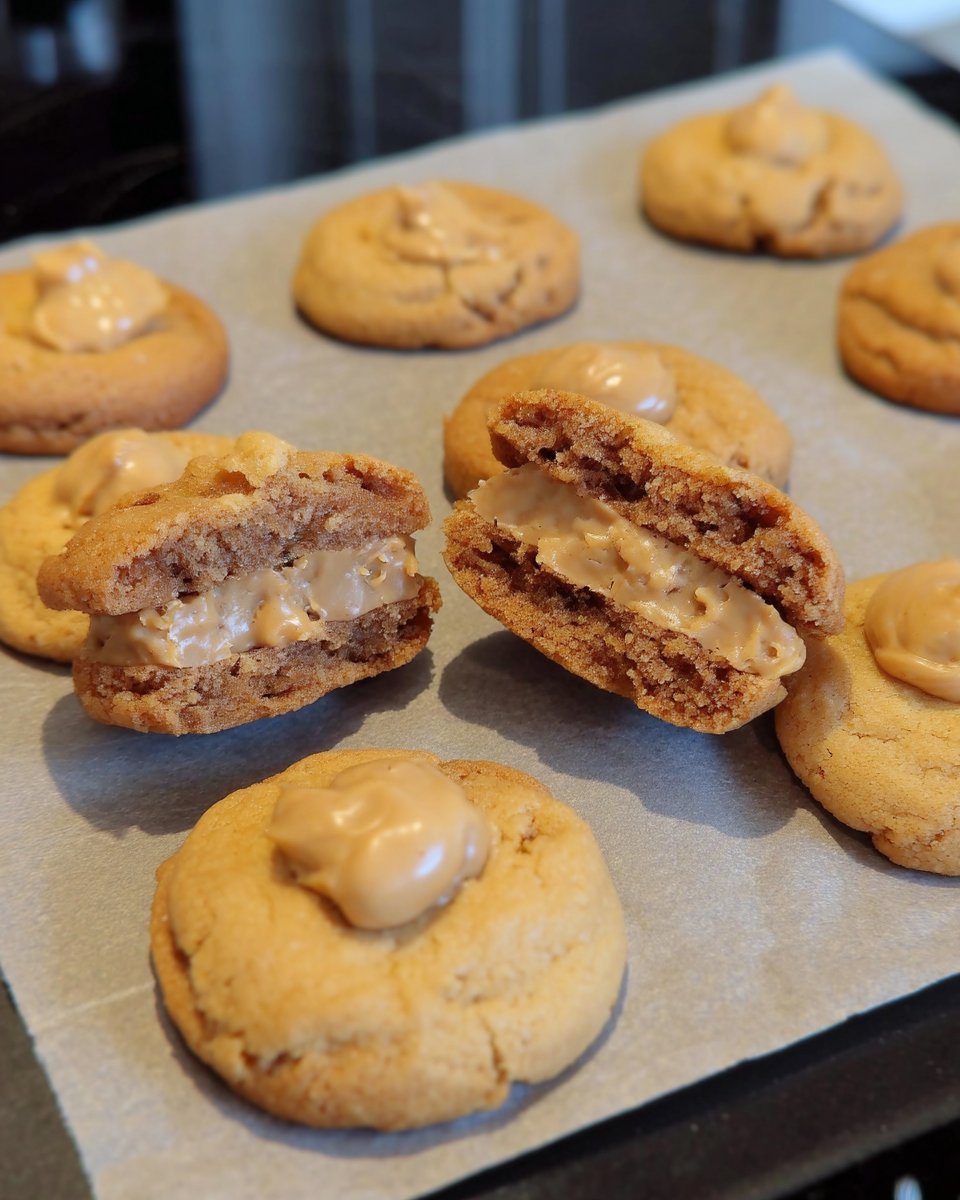
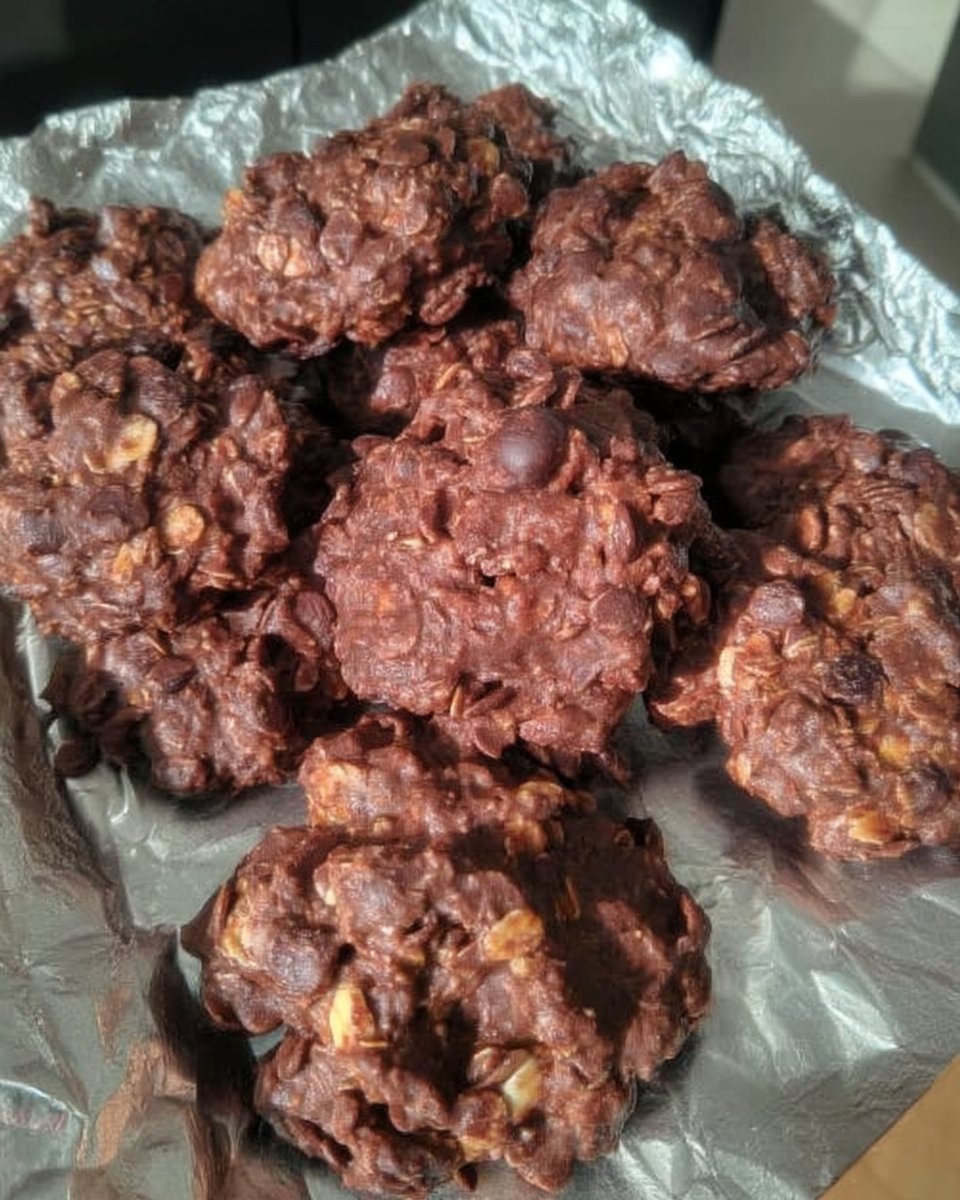
These decadent chocolate thumbprint cookies feature a soft, brownie-like base filled with a silky, homemade salted caramel center. Topped with a touch of flaky sea salt, they offer a perfect balance of sweet and savory in every bite.
Ingredients
- 1 cup Unsalted Butter, softened
- 1 cup Granulated Sugar
- 1 large Egg
- 2 teaspoons Vanilla Extract
- 2 cups All-Purpose Flour
- 1/2 cup Cocoa Powder
- 1 teaspoon Baking Powder
- 1/2 teaspoon Salt
- 1/2 cup Heavy Cream
- 1 cup White Sugar
- 1/4 cup Water
- Flaky Sea Salt
Instructions
- In a large bowl, cream together the softened butter and granulated sugar with an electric mixer until light and fluffy, about five minutes.
- Add the egg and vanilla extract to the mixture and beat until fully incorporated.
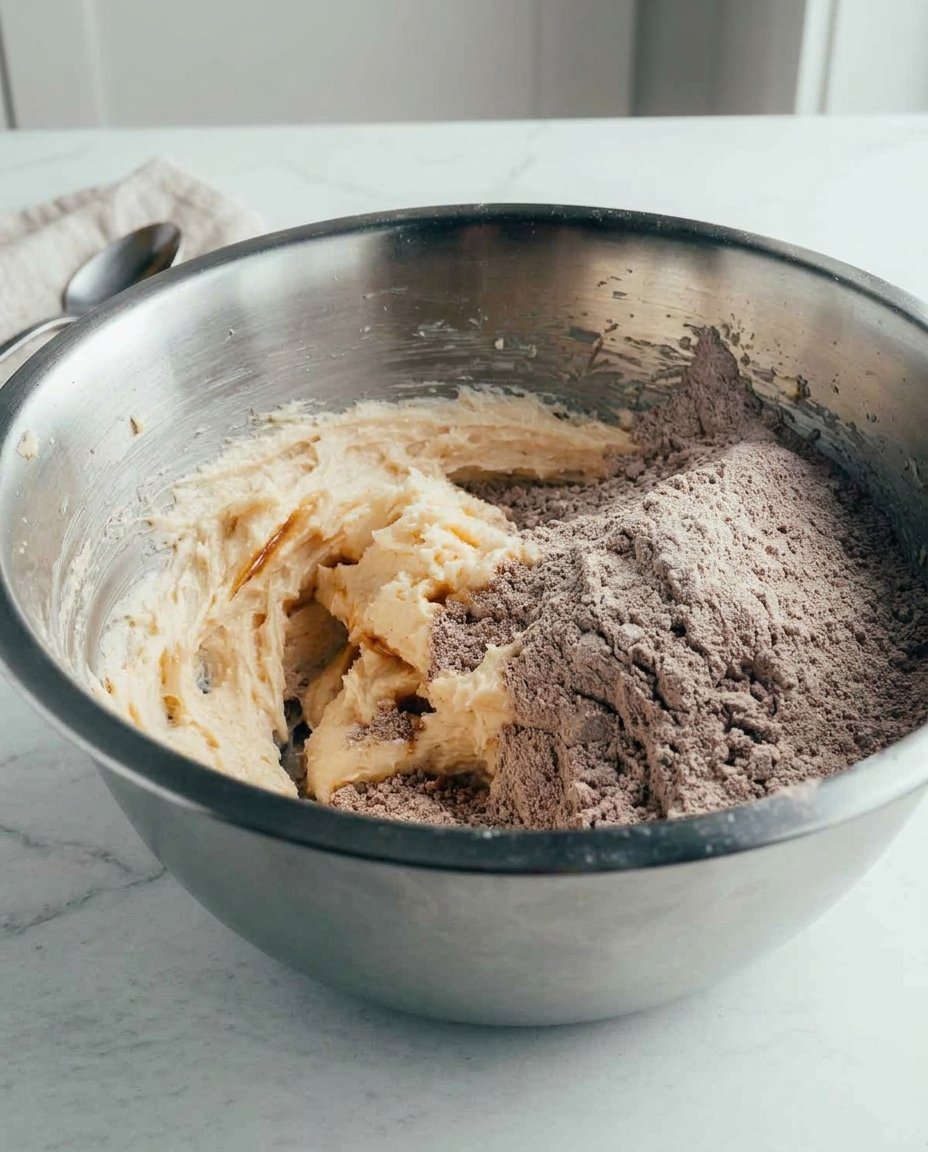
- In a separate bowl, whisk together the flour, cocoa powder, baking powder, and salt, sifting if necessary to remove lumps.
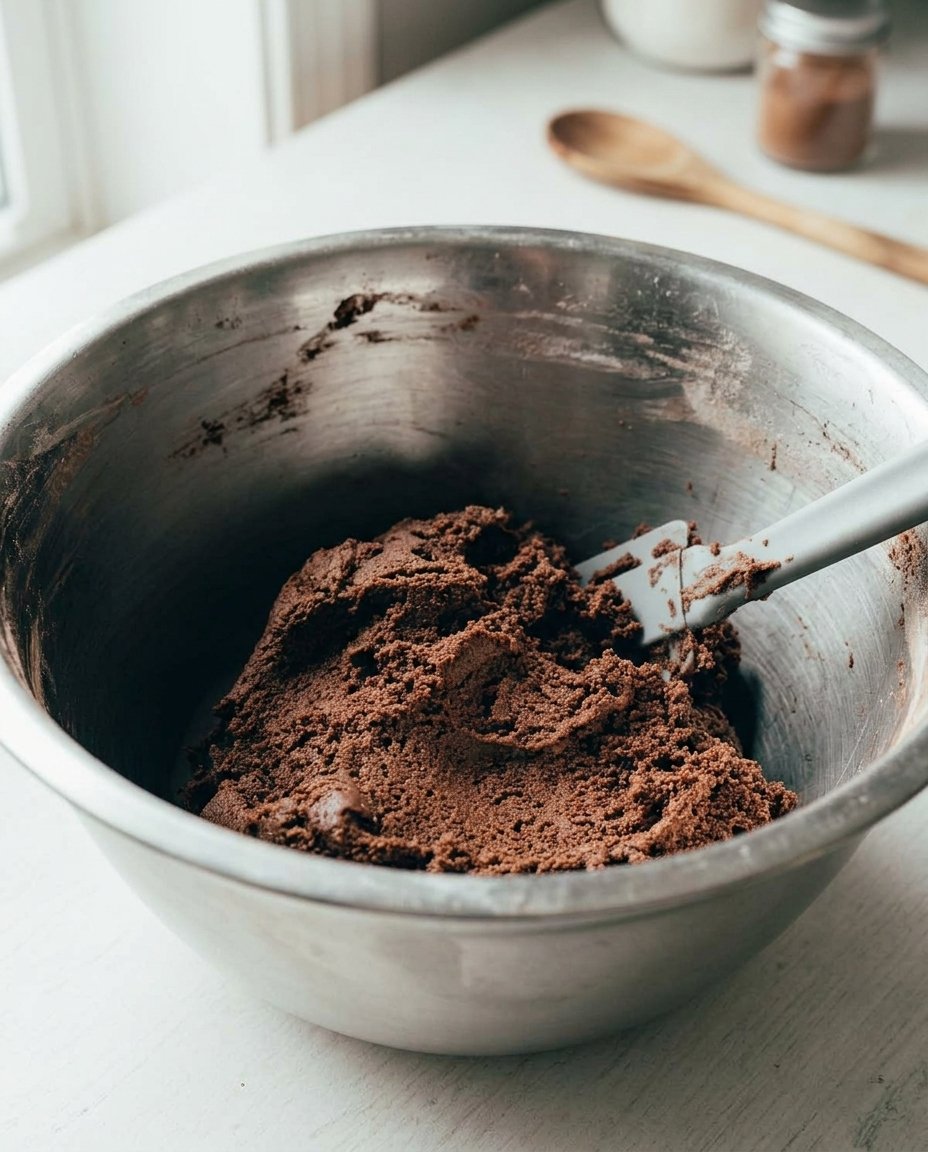
- Gradually add the dry ingredients to the wet ingredients, mixing on low speed until the dough just comes together.
- Roll the dough into one-tablespoon balls and place on a parchment-lined baking sheet.
- Press a deep indentation into the center of each ball using your thumb or a small spoon.
- Chill the prepared tray in the refrigerator for one hour to help the cookies maintain their shape.
- Preheat the oven to 350°F (175°C) and bake the cookies for 10 to 12 minutes.
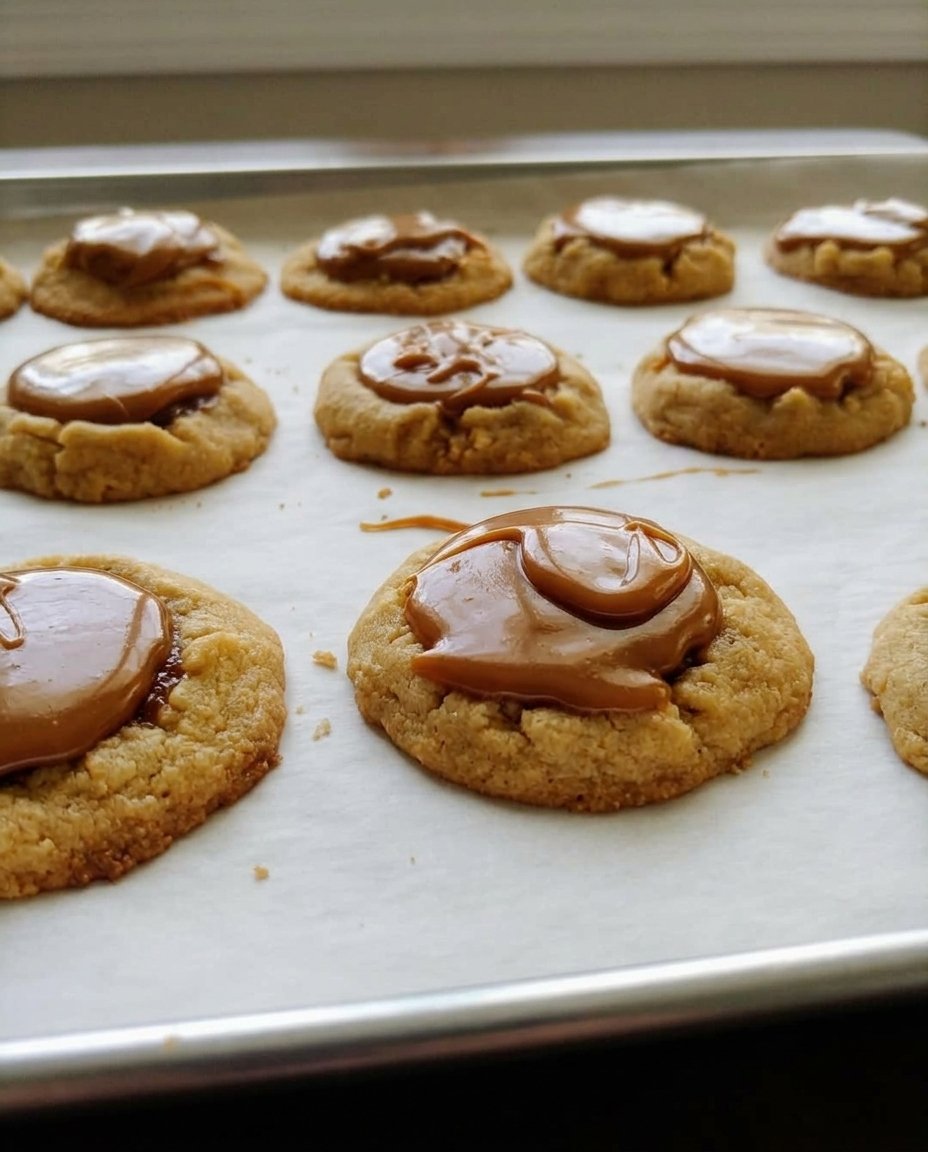
- Immediately press the centers down again while hot, then move to a wire rack to cool completely.
- Combine white sugar and water in a heavy-bottomed pot over medium heat, cooking without stirring until it reaches a golden amber color.
- Remove from heat and carefully whisk in the heavy cream, butter, vanilla, and a pinch of salt.
- Once cooled slightly, fill each cookie indentation with the caramel and finish with a sprinkle of flaky sea salt.
Notes
To ensure the best texture for your caramel, avoid stirring the sugar and water while they boil, as this can lead to unwanted crystals forming. If your dough feels too sticky to roll easily, lightly flour your hands or chill the dough for 15 minutes before shaping into balls.
- Prep Time: 1 hour 15 mins
- Cook Time: 12 mins
- Category: Dessert
- Method: Baking
- Cuisine: American
Simple Pantry Essentials
To get started, gather these basic ingredients that you likely already have on hand. This recipe relies on high-quality basics to create a deep, complex flavor.
- Unsalted Butter: Make sure your butter is softened to room temperature so it creams easily with the sugar. This creates the light, tender structure of the cookie base.
- Granulated Sugar: This provides sweetness and helps the cookies achieve a slightly crisp edge.
- Egg: Use a room temperature egg to help the dough emulsify perfectly.
- Vanilla Extract: A good quality extract adds that essential nostalgic aroma.
- All-Purpose Flour: This is the sturdy foundation for our cookie structure.
- Cocoa Powder: Using a good cocoa powder is key for that dark, rich chocolate appearance and taste.
- Baking Powder and Salt: These small additions manage the lift and balance the sweetness of the caramel.
- Heavy Cream: This is the secret to a pourable, smooth caramel that won’t turn rock-hard when it cools.
By keeping the ingredients simple, we let the natural flavors of the chocolate and butter shine through. This is exactly how Grandma would have wanted it, just updated for a faster workflow.
How to Make It
Step 1: Cream the Butter and Sugar
Start by placing your softened butter and granulated sugar in a large bowl. Using an electric mixer, cream them together until the mixture is light, fluffy, and pale in color. This usually takes about five minutes. Once it is creamy, add the egg and vanilla extract, mixing until fully incorporated. This step is vital for a soft cookie texture.
Step 2: Mix the Dry Ingredients
In a separate bowl, whisk together the all-purpose flour, cocoa powder, baking powder, and salt. I recommend sifting these together to remove any cocoa lumps. Gradually add the dry mixture to the wet ingredients in three batches, mixing on low speed until the dough just comes together. Do not overmix, or the cookies will be tough.
Step 3: Shape and Chill
Scoop about one tablespoon of dough and roll it into a smooth ball. Place the balls on a parchment-lined baking sheet. Using your thumb or the back of a small measuring spoon, press a deep indentation into the center of each ball. Put the entire tray in the refrigerator to chill for one hour. This helps the cookies keep their shape and prevents spreading.
Step 4: Bake to Perfection
Preheat your oven to 350 F (175 C). Bake the cookies for 10 to 12 minutes. When you take them out, they will look puffed up. Immediately use your measuring spoon to gently press down the centers again while they are still hot. This makes plenty of room for that delicious caramel. Let them cool completely on a wire rack.
Step 5: Prepare the Homemade Caramel
In a heavy-bottomed pot, combine the white sugar and water. Cook over medium heat without stirring. Watch it closely as it turns from clear to a beautiful amber color. Once it reaches that golden hue, remove it from the heat. Carefully whisk in the heavy cream and butter—it will bubble up, so be cautious. Stir in the vanilla and a pinch of salt, then let it cool slightly until it is thick but still pourable.
Step 6: Fill and Finish
Once both the cookies and the caramel are cool, use a small spoon to fill each indentation with the caramel sauce. For a final touch of style, sprinkle a few grains of flaky sea salt on top. This brings out the depth of the chocolate and makes the caramel pop.
Meagan’s Time-Saving Wins
To make these cookies even faster, you can prepare the dough a day in advance and leave it in the fridge until you are ready to bake. This is a great way to manage your time if you are hosting a gathering. When you are ready, just scoop, press, and bake.
One of the best ways to keep your kitchen tidy is using parchment paper. It prevents sticking and makes cleanup a breeze, which is a big help when you are working with sticky caramel. For more advice on making baking fit into your life, check out our Quick & Easy Cookies section. Also, make sure your heavy cream is at room temperature before adding it to the hot sugar; this helps prevent the caramel from seizing or splashing too much.
Quick Twists for Every Occasion
You can easily change the flavor profile of these cookies by swapping out the filling. If you aren’t in the mood for caramel, try using a high-quality jam or even a chocolate ganache. For a festive look during the holidays, check out our Holiday Cookie Celebrations for more inspiration.
You might also enjoy adding a bit of crunch by rolling the dough balls in crushed pecans or walnuts before making the thumbprint. For a different take on the chocolate base, you can find similar ideas at chocolate thumbprint cookies. Another fun modern twist is to add a half teaspoon of espresso powder to the dough to make the chocolate taste even more intense.
Modern Sharing Ideas
These cookies look beautiful when served on a simple wooden board or a vintage cake stand. They are a wonderful addition to a dessert spread for a baby shower or a graduation party. If you are looking for more ways to present your treats, browse through our Classic Cookie Recipes page for styling tips.
For a cozy evening, serve these warm with a cold glass of milk or a hot cup of coffee. The salt on top of the caramel makes them a hit with adults, while the sweet chocolate base is always a favorite with kids. They also pack well in lunchboxes if you place a small square of parchment paper between the layers to prevent the caramel from sticking.
The Sweet Balance
Baking doesn’t have to be a stressful event to be meaningful. By taking a few steps to simplify these traditional favorites, we can enjoy the tastes of the past without sacrificing our present. I hope these cookies bring a bit of joy and nostalgia to your home this week. For more wholesome baking ideas, visit our Wholesome Cookie Options. Don’t forget to share your baking wins with us on Pinterest and Instagram. Happy baking!
