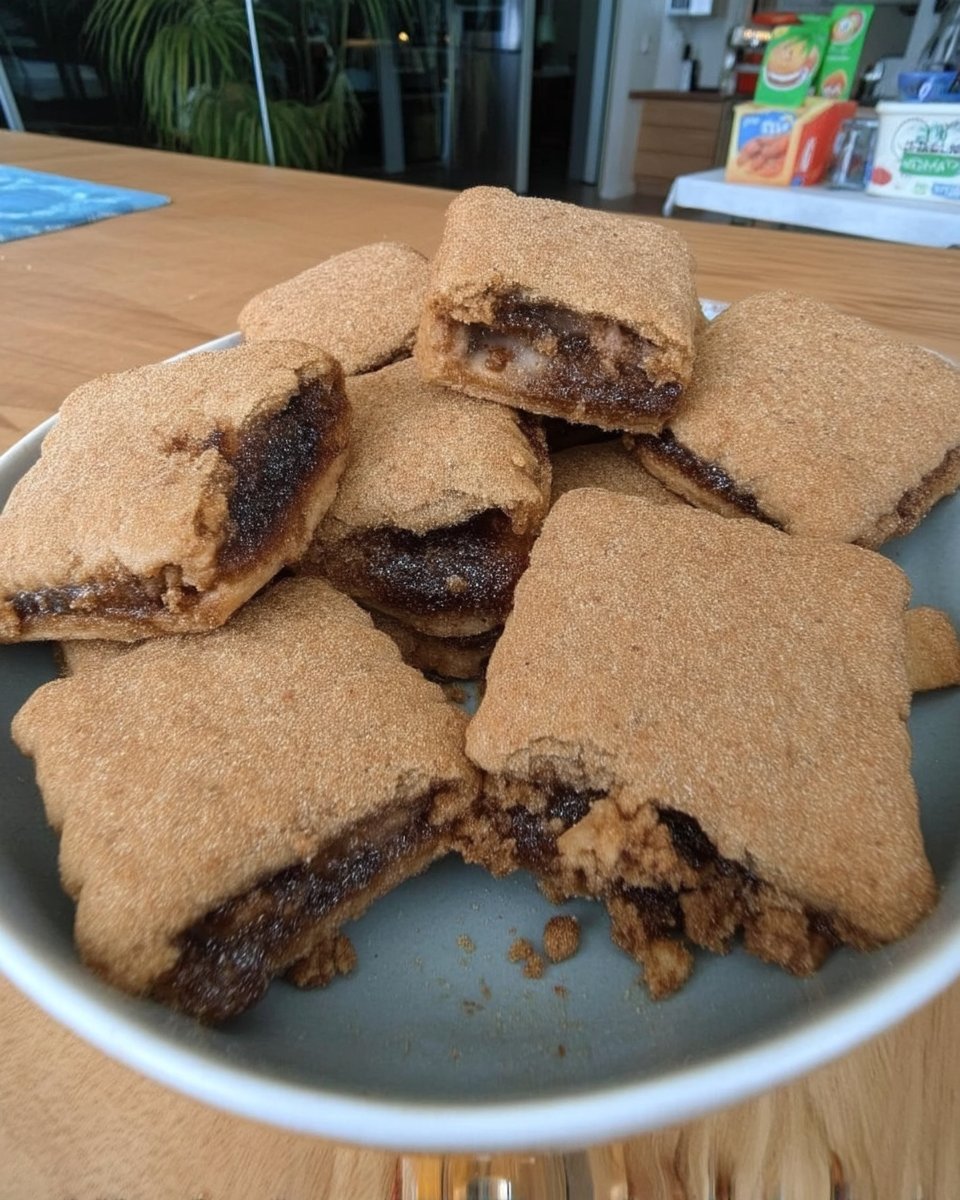
Many vintage cookie recipes look beautiful in photos but turn into brittle, dry disks the moment they hit the cookie jar. I remember the frustration of baking a batch of traditional Linzers only to find them rock-hard by the second day. This Chocolate Hazelnut Linzer recipe solves that problem by focusing on moisture retention and a tender, shortbread-like crumb that stays soft for days.

These cookies are a rich, cocoa-infused update to the classic sandwich cookie, filled with a creamy chocolate-hazelnut spread that adds a wonderful chew. By balancing the Dutch-process cocoa with the right amount of butter and a careful chilling process, we create a treat that honors the past while embracing modern texture secrets. You will find that these stay perfectly jar-fresh, making them a reliable favorite for any season.
A Perfect Balance of Texture and Taste
You will love these cookies because they finally solve the mystery of the dry sandwich cookie. While many versions use a dough that is too lean, this recipe uses a specific ratio of fats and sugars to guarantee a soft, satisfying bite every single time. The deep, earthy notes of the Dutch-process cocoa pair perfectly with the nutty sweetness of the hazelnut filling, creating a flavor profile that feels sophisticated yet nostalgic.
Another reason to adore this recipe is its incredible longevity. Unlike standard sugar cookies that lose their appeal within twenty-four hours, these actually seem to improve as the flavors meld. The moisture from the hazelnut spread seeps slightly into the cookie layers, creating a unified texture that is soft in the center with just a hint of a snap at the edges. It is the ultimate solution for anyone tired of stale treats.
Finally, the visual appeal of the cutout centers makes these a showstopper for any gathering. Whether you use a classic heart shape or a simple circle, the contrast between the dark cocoa dough and the glistening sparkling sugar is striking. They look like they came from a high-end bakery, but they have the soul and softness of a homemade treasure that stays fresh for a full week in your jar.
Print
Chocolate Hazelnut Linzer
- Total Time: 2 hours 10 mins
- Yield: 24 cookies
- Diet: Vegetarian
Description
Indulge in these decadent Chocolate Hazelnut Linzer cookies, designed specifically to remain soft and tender long after baking. Featuring deep Dutch-process cocoa and a luscious hazelnut filling, they offer a sophisticated yet nostalgic flavor profile perfect for gifting or holiday trays.
Ingredients
- 1.5 cups all-purpose flour
- 0.75 cup Dutch-process cocoa powder
- 0.75 cup unsalted butter, softened
- 1 cup granulated sugar
- 1 large egg
- 1 teaspoon vanilla extract
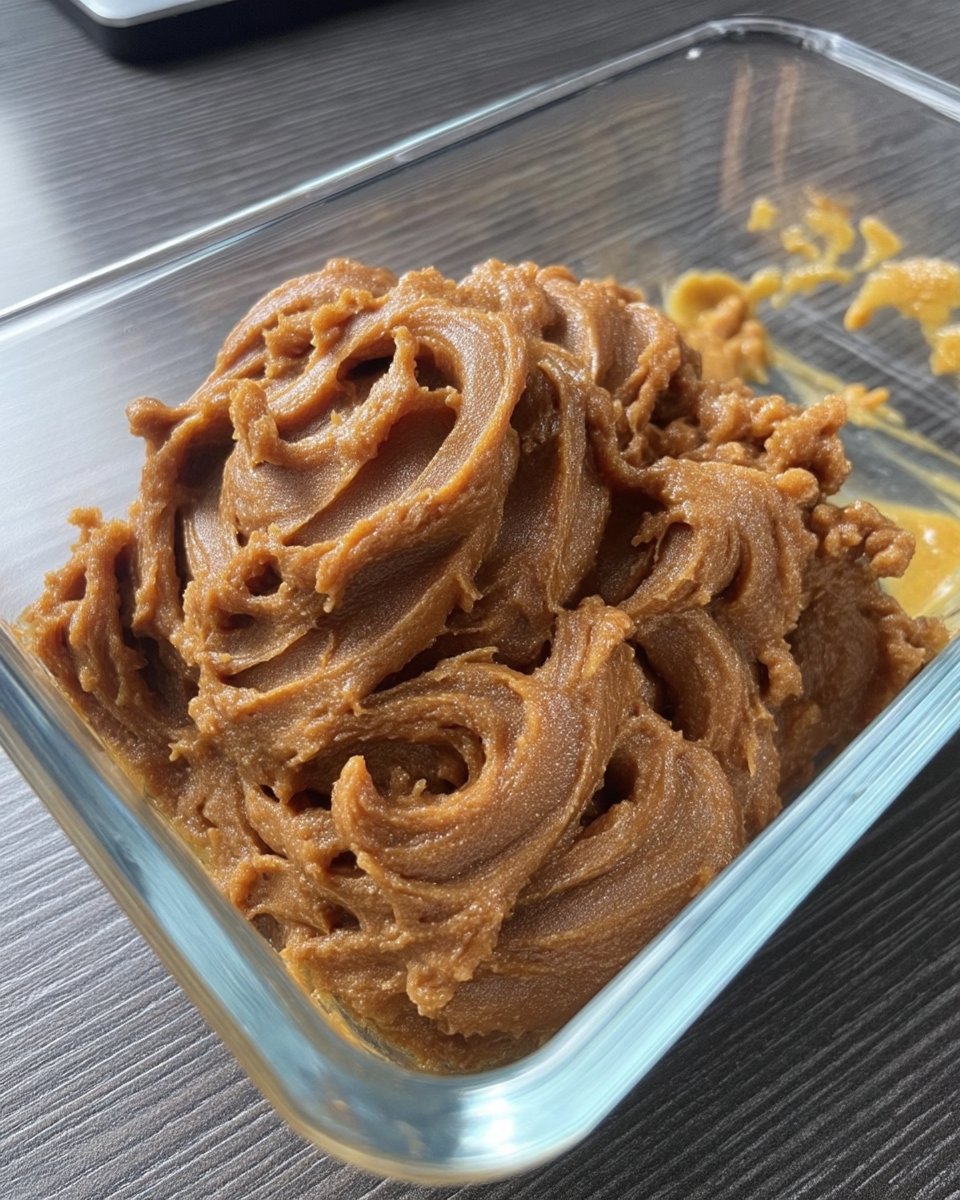
- 0.5 cup chocolate-hazelnut spread
- 0.5 teaspoon baking powder
- 0.25 teaspoon salt
- Optional: sparkling sugar for topping
Instructions
- In a large bowl, cream together the softened butter and granulated sugar with an electric mixer for 3 to 4 minutes until the mixture is light and fluffy.
- Beat in the egg and vanilla extract until the mixture is smooth and just combined.
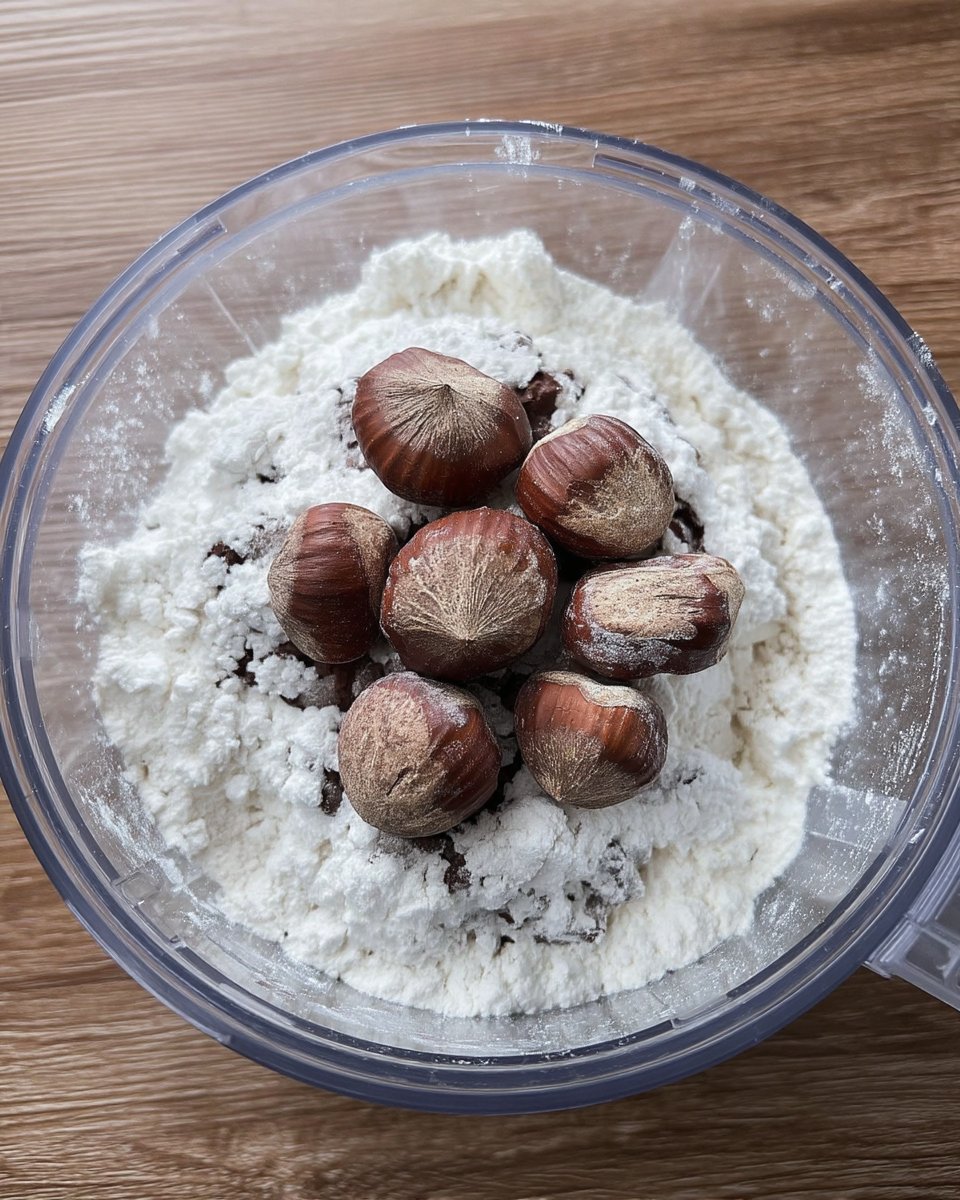
- In a separate medium bowl, whisk together the flour, cocoa powder, salt, and baking powder.
- Gradually add the dry ingredients to the wet ingredients on low speed, stirring only until the dough comes together and no streaks remain.
- Divide the dough into two disks, wrap tightly in plastic, and refrigerate for 30 to 60 minutes.
- Roll each disk between two sheets of parchment paper to 1/8-inch thickness, then stack and refrigerate for another hour.
- Preheat your oven to 350°F (175°C) and cut cookies with a 2-inch cutter, removing centers from half the batch.
- Bake for 7 to 10 minutes until the edges are set, then let them cool completely on the baking sheet.
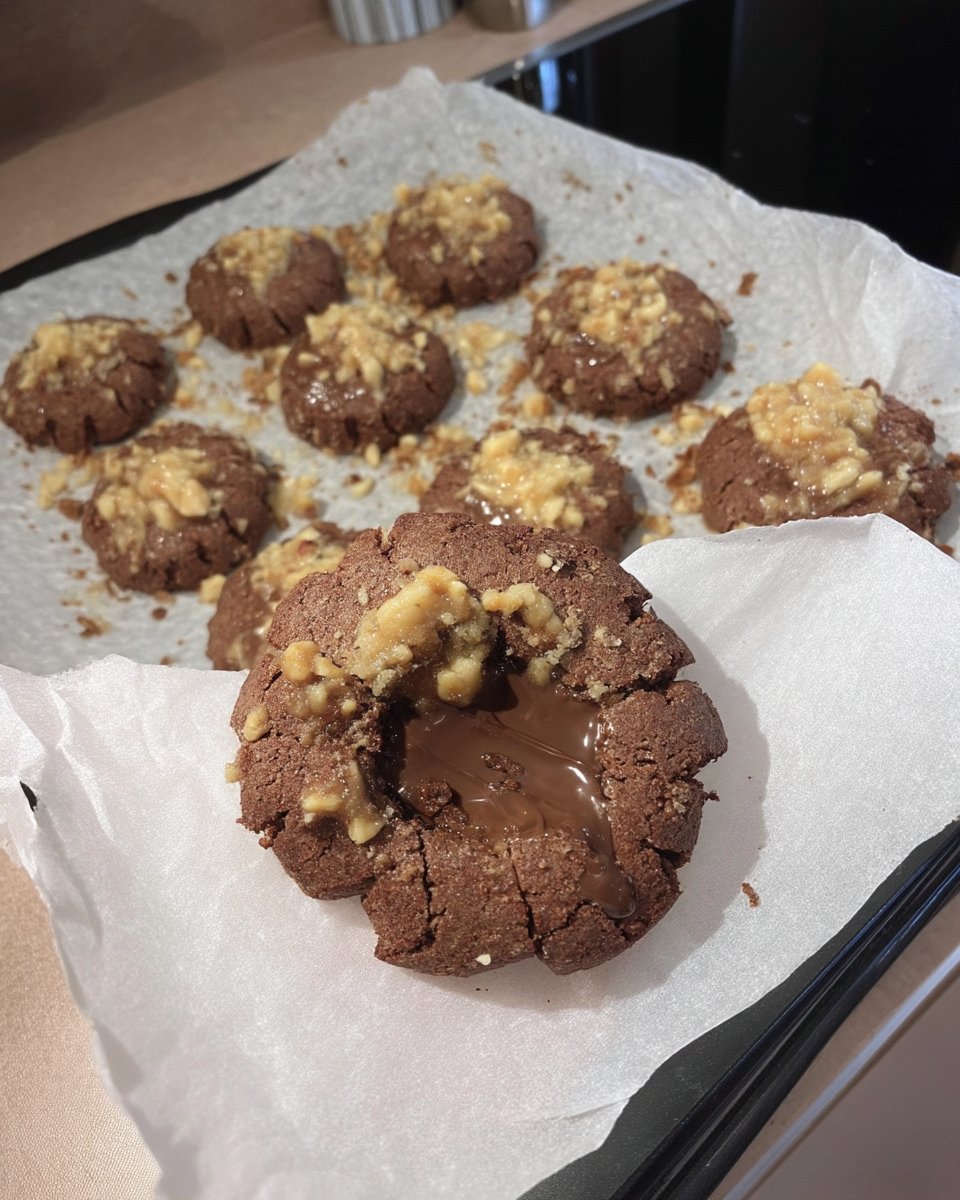
- Flip the solid cookies, spread a teaspoon of hazelnut spread in the center, and top with a cutout cookie to finish.
Notes
To ensure your cookies stay perfectly soft for an entire week, avoid over-baking; the dark dough won’t show browning, so trust the timer and the set edges. If your kitchen is warm, work with one dough disk at a time while keeping the other refrigerated to maintain the sharp edges of your cutouts.
- Prep Time: 2 hours
- Cook Time: 10 mins
- Category: Dessert
- Method: Baking
- Cuisine: European
The Secrets to a Soft Chocolate Dough
To achieve that elusive soft-yet-sturdy texture, every ingredient plays a specific role in moisture management and structure. We are not just making a chocolate cookie; we are building a foundation that supports a creamy filling without becoming soggy or crumbling apart.
- All-Purpose Flour (1.5 cups): This provides the necessary structure. Using a moderate amount prevents the dough from becoming too heavy or cake-like.
- Dutch Process Cocoa Powder (0.75 cup): I prefer Dutch-process because it is treated to reduce acidity, resulting in a smoother, darker, and more moist crumb compared to natural cocoa.
- Unsalted Butter (0.75 cup): Softened butter is the heart of the tender texture. When creamed with sugar, it creates tiny air pockets that keep the cookie light.
- Granulated Sugar (1 cup): Beyond sweetness, sugar helps with the ‘short’ texture of the dough, ensuring it breaks cleanly when you take a bite.
- Egg (1): A single egg provides the protein needed to bind the dough, adding a layer of chewiness that keeps the cookies from being too brittle.
- Vanilla Extract (1 teaspoon): A high-quality vanilla acts as a flavor bridge between the bitter cocoa and the sweet hazelnut.
- Nutella or Chocolate-Hazelnut Spread (0.5 cup): This is the moisture anchor. It stays creamy even after the cookies are assembled, keeping the sandwich soft.
- Baking Powder and Salt: These are small but mighty. The powder offers a tiny lift for tenderness, while the salt balances the richness of the chocolate.
How to Make It
Step 1: Cream the Butter and Sugar
In a large bowl, combine your softened unsalted butter and granulated sugar. Use an electric mixer on medium-high speed to beat them together for at least 3 to 4 minutes. You are looking for a light, fluffy consistency. This step is vital because the air you whip into the butter now will determine how tender the final cookie feels.
Step 2: Incorporate the Wet Ingredients
Add the egg and the vanilla extract to the creamed mixture. Beat these in until they are just combined. You want to avoid over-mixing at this stage to keep the proteins in the egg from becoming too tough. The mixture should look smooth and pale yellow.
Step 3: Blend the Dry Ingredients
In a separate medium bowl, whisk together the flour, Dutch-process cocoa powder, salt, and baking powder. This ensures that the leavening agent and salt are evenly distributed. Turn your mixer to a low speed and gradually add the dry ingredients to the wet. Stir only until the dough just comes together and no white streaks remain. Over-working the dough at this point is the fastest way to a hard cookie, so stay gentle.
Step 4: Chill for Texture Control
Divide the dough into two even disks and wrap them tightly in plastic wrap. Place them in the refrigerator for 30 minutes to an hour. This chilling period allows the flour to fully hydrate and the butter to firm up, which makes the dough much easier to handle without adding excess flour that would dry out the cookies.
Step 5: Roll and Second Chill
Roll each disk out between two sheets of parchment paper to about 1/8-inch thickness. By using parchment instead of a floured surface, you keep the moisture levels perfect. Once rolled, stack the sheets and refrigerate for another hour. Cold dough is the secret to getting clean, sharp edges on your cutouts.
Step 6: Cut and Bake
Heat your oven to 350°F (175°C). Use a 2-inch cutter for the base cookies and a smaller cutter to remove the centers from half of them. Place them on parchment-lined sheets. If you like a little sparkle, sprinkle the cutout tops with sparkling sugar. Bake for 7 to 10 minutes. The edges should be set, but the centers will still look slightly soft. Let them cool completely on the baking sheet to firm up naturally.
Step 7: Assemble the Sandwiches
Flip the solid bottom cookies over and spread about a teaspoon of chocolate-hazelnut spread in the center. Gently press a cutout cookie on top. The filling will peek through the center, creating that beautiful Linzer look. Allow them to sit for about an hour before serving so the filling can set against the cookie walls.
Mehmet’s Tips for Everlasting Softness
The biggest mistake home bakers make with Linzers is over-baking. Since the dough is dark from the cocoa, it is hard to see ‘golden brown’ edges. Trust the timer and the ‘set’ look of the edges; if you wait until they feel hard in the oven, they will be like crackers once cooled. To maintain that jar-fresh feel, I always suggest storing these with a small piece of parchment between layers. If you find your cookies have firmed up more than you like, placing a single slice of white bread in the container overnight will act as a moisture reservoir, softening the cookies beautifully. For more advice on keeping your bakes perfect, see our guide on Classic Cookie Recipes. For a different take on this cocoa-heavy technique, you might also find inspiration from this chocolate nutella linzer approach which emphasizes a similar rich filling.
Texture Tweaks and Flavor Options
If you prefer a cookie with a bit more snap, you can replace the Dutch-process cocoa with natural cocoa powder, though this will result in a slightly drier crumb. For those who want an even deeper heritage flavor, try adding a half-teaspoon of cinnamon to the dry ingredients. This mimics some of the very old European recipes I have found in my collection. You can also experiment with the filling; while hazelnut is traditional for this chocolate version, a thick raspberry jam provides a tart contrast that keeps the dough feeling moist. For more festive ideas, check out our Holiday Cookie Celebrations section where we explore different seasonal fillings and shapes that maintain that signature soft texture.
Serving Your Jar-Fresh Treats
These cookies are best served at room temperature where the hazelnut center is at its creamiest. I love to serve them alongside a warm cup of coffee or a dark tea, as the bitterness of the drink highlights the richness of the Dutch cocoa. If you are preparing these for a gift, wait at least four hours after assembly before stacking them to ensure the filling has bonded with the cookie layers. For those who enjoy a bit of extra flair, a light dusting of powdered sugar over the tops (before adding the filling) adds a professional touch. If you are looking for more ways to present your bakes, check out our tips on Cookie Decorating Traditions to see how simple additions can change the whole look of your cookie tray.
The Final Texture Truth
Creating a Chocolate Hazelnut Linzer that stays soft for days is all about respecting the balance between the cocoa and the fats. By following this method, you are not just making a dessert; you are preserving a tradition of quality that refuses to accept a stale, dry cookie. I hope these become a staple in your kitchen just as they have in mine. For more ways to fill your home with the scent of fresh baking, look through our Quick & Easy Cookies for your next project. Don’t forget to share your results with our community on Instagram, Pinterest, and Facebook. Happy baking, and may your cookie jar always be full of something soft and wonderful.

