I remember sitting in Grandma’s sun-drenched kitchen, watching her pull a heavy, worn index card from her oak recipe box. The card was stained with vanilla and dusted with flour, a silent witness to decades of Sunday afternoons spent filling the old ceramic cookie jar. This particular Copycat Crumbl Chocolate Chip 2 recipe reminds me so much of those oversized treasures she used to bake for the church bake sale, where every child hoped to find one of her golden, thick cookies tucked in a wax paper bag. There is a specific kind of magic in a cookie that feels substantial in your hand, carrying the weight of tradition and the sweetness of home.

These cookies are a beautiful bridge between the heritage baking of my youth and the modern bakery favorites we see today. By using simple pantry staples like real butter and pure vanilla, we can recreate that famous, thick texture and rich milk chocolate flavor right in our own kitchens. The secret lies in the gentle handling of the dough and the patience of letting them cool on a wire rack until they reach perfection. This Copycat Crumbl Chocolate Chip 2 recipe is designed to bring that same sense of wonder back to your kitchen, creating cookies that are as much a treat for the eyes as they are for the soul.
A Timeless Jar Favorite
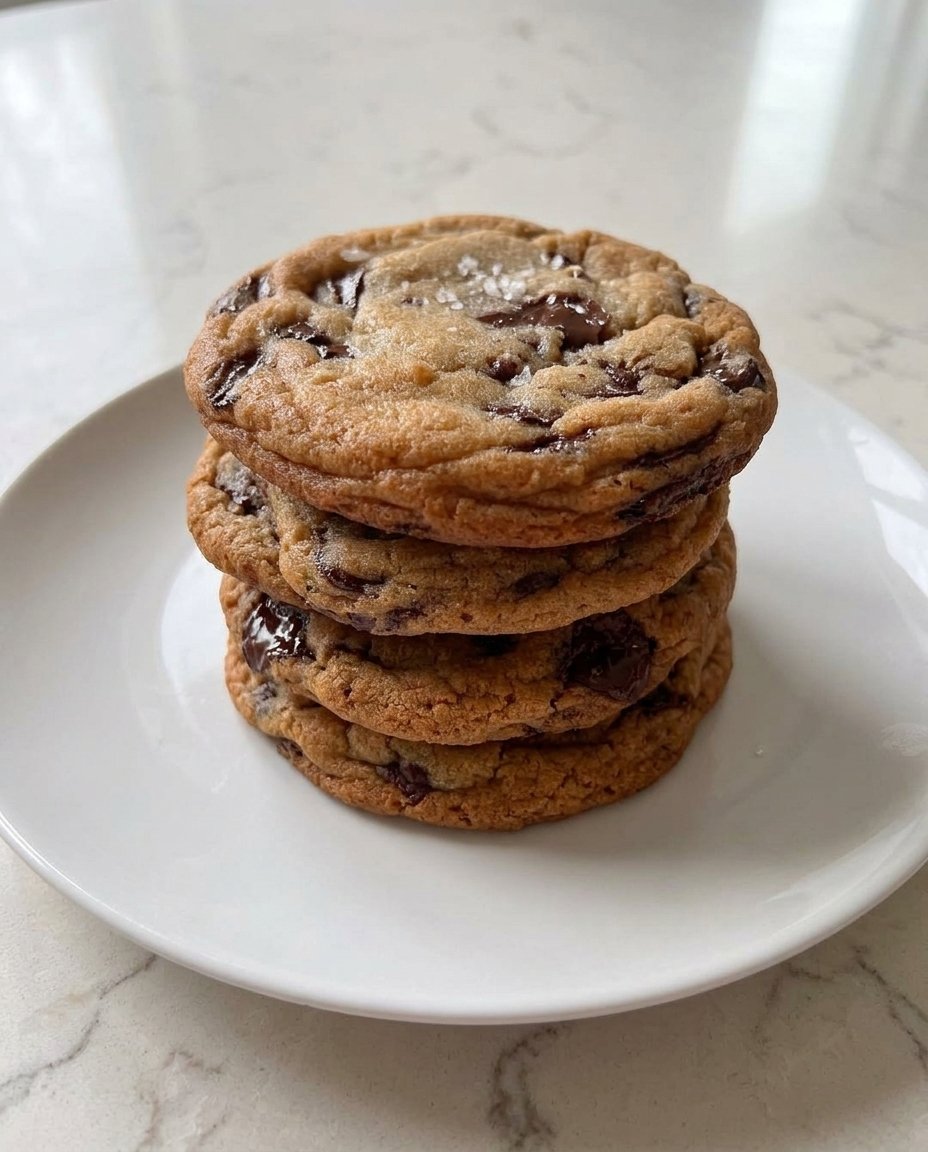
There is something deeply comforting about a cookie that doesn’t just crumble away, but offers a soft, tender bite that stays with you. You will love this recipe because it captures the essence of a bakery-style treat while maintaining the honest, simple heart of a home-baked classic. These are not your thin, crispy wafers; these are thick, pillowy mounds of golden dough studded with generous amounts of milk chocolate that melts just right. The Copycat Crumbl Chocolate Chip 2 brings a sense of abundance to the table, making every batch feel like a special occasion even on a quiet Tuesday afternoon.
Another reason to cherish this recipe is the unique topography of the cookie itself. By using a simple technique to create a “craggily” top, we invite those little pockets of golden-brown goodness to form, catching the light and making the milk chocolate chips stand out like buried treasure. It is a recipe that celebrates the joy of the process—from the rhythmic sound of the mixer to the heavenly scent of vanilla that fills every corner of the house. These cookies stay fresh and soft in the jar for days, ensuring that the comfort of a home-baked treat is always within reach for your family and friends.
Print
Copycat Crumbl Chocolate Chip Cookies
- Total Time: 31 mins
- Yield: 12 cookies
- Diet: Vegetarian
Description
Recreate the iconic, thick, and doughy bakery favorite right in your own kitchen with this heritage-inspired recipe. These substantial cookies feature a signature craggily top and are packed with rich milk chocolate chips for a truly indulgent treat.
Ingredients
- 1 cup butter, softened
- 1 1/4 cups light brown sugar
- 1/2 cup granulated sugar
- 2 teaspoons pure vanilla extract
- 2 large eggs, room temperature
- 1 tablespoon cornstarch
- 3 cups all-purpose flour
- 2 1/4 cups milk chocolate chips
- 1 teaspoon baking soda
- 1/2 teaspoon salt
Instructions
- Preheat oven to 375°F (190°C) and line a large baking sheet with parchment paper.
- In a stand mixer with a paddle attachment, cream the softened butter, brown sugar, and granulated sugar for 3 minutes until pale and fluffy.
- Add the eggs one at a time, followed by the vanilla, baking soda, salt, and cornstarch, then mix for another minute and scrape the bowl.
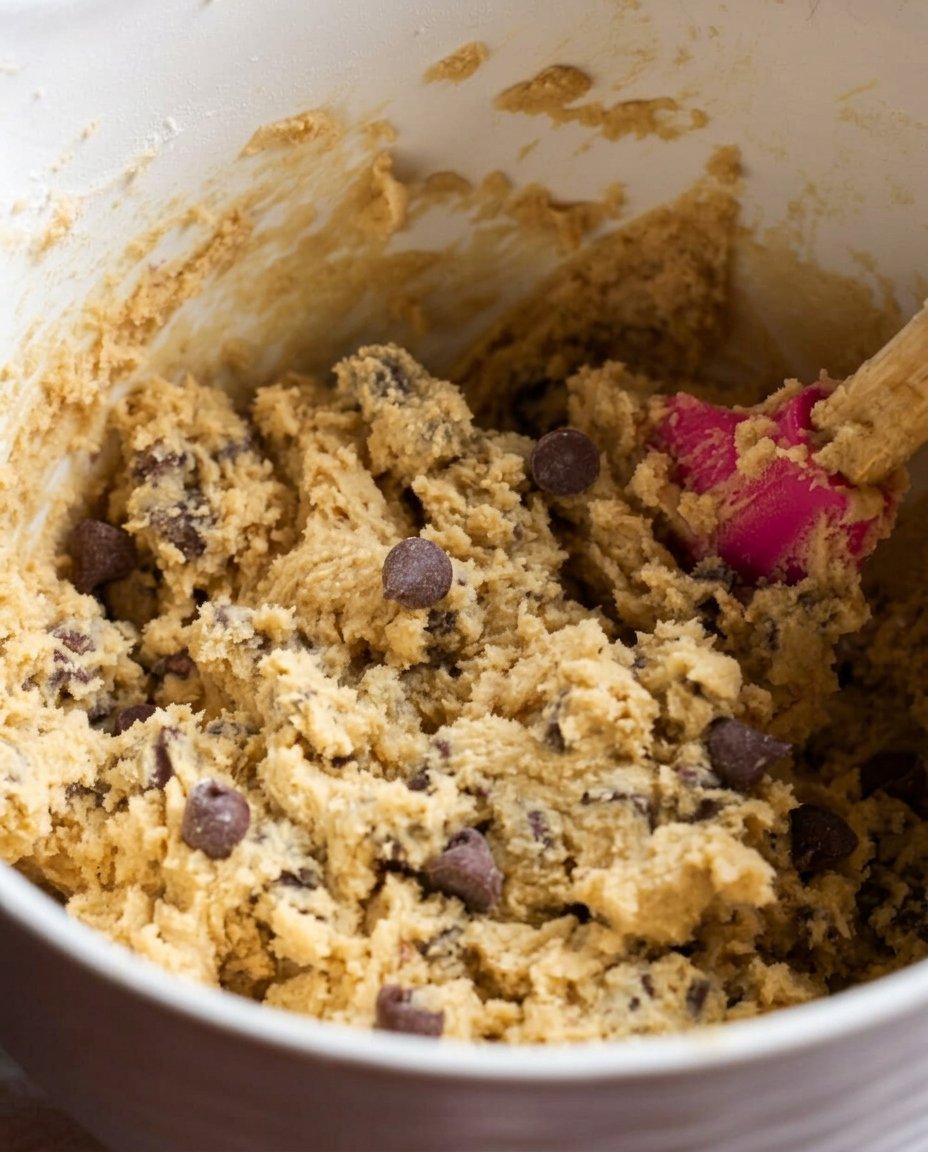
- Turn the mixer to low, add the flour, and mix only until just combined before folding in the milk chocolate chips by hand.
- Portion 1/3 cup of dough into balls, break them in half, and press the pieces back together with the jagged edges facing up for a rustic texture.
- Place 5-6 dough balls on the sheet and bake for 10 to 11 minutes until edges are golden but centers remain soft.
- Press a few extra chips into the warm tops and let the cookies cool on the pan for 5 minutes before moving them to a wire rack.
Notes
To ensure your cookies remain soft for days, store them in an airtight container once they have cooled completely. For the most authentic texture, avoid over-baking even if the centers look slightly underdone, as they will finish setting on the warm pan.
- Prep Time: 15 mins
- Cook Time: 11 mins
- Category: Dessert
- Method: Baking
- Cuisine: American
Simple Pantry Staples for Heritage Flavor
When we look into our cupboards, we find the humble building blocks of all great memories. This recipe relies on the honesty of simple ingredients, handled with care and respect for the tradition of baking.
- Real Butter: We use one cup of butter, softened to room temperature. Butter is the soul of the cookie, providing that rich, creamy foundation that margarine simply cannot match. It carries the flavor of the sugars and creates a tender crumb that feels like a warm hug.
- Light Brown and Granulated Sugars: The combination of 1 1/4 cups of light brown sugar and 1/2 cup of granulated sugar creates the perfect balance. The brown sugar brings a hint of molasses and moisture, while the white sugar helps those edges reach a beautiful honey-gold color.
- Pure Vanilla Extract: Two teaspoons of the good stuff make all the difference. Vanilla is the quiet hero of the kitchen, bridging the gap between the sweetness of the sugar and the richness of the chocolate.
- Large Eggs: Room temperature eggs are essential. They incorporate more smoothly into the creamed butter and sugar, helping to build the structure that keeps these cookies tall and proud.
- Cornstarch: This is a little secret passed down through generations of bakers who wanted a softer, more delicate bite. A single tablespoon helps the flour create a cookie that stays tender long after it has left the oven.
- All-Purpose Flour: Three cups of simple flour provide the strength. We treat it gently, mixing only until combined to keep the texture light and airy.
- Milk Chocolate Chips: The choice of milk chocolate brings a nostalgic sweetness that reminds many of us of our first favorite candy bars. We use 2 1/4 cups to ensure every single bite is filled with chocolatey joy.
The Classic Way to Bake Memories
Step 1: Prepare the Kitchen
Begin by preheating your oven to 375°F (190°C). This higher temperature is part of the secret to getting those edges golden while keeping the center soft and thick. Line a large, heavy baking sheet with parchment paper. This simple step protects the cookies and allows them to slide off easily, just like the ones Grandma used to set out on the counter to cool.
Step 2: Creaming the Foundation
In the bowl of your stand mixer, fitted with the paddle attachment, combine the room temperature butter with the light brown and granulated sugars. Set the mixer to medium speed and let it run for a full 3 minutes. This isn’t just mixing; it’s aerating. You want the mixture to look pale and fluffy, creating a light base that will support the heavy chocolate chips later on.
Step 3: Incorporating the Heart
Add your eggs one at a time, followed by the vanilla extract, baking soda, salt, and cornstarch. Let the mixer run for another minute on medium speed. Take a moment to scrape down the sides of the bowl with a rubber spatula. This makes sure every bit of butter and sugar is introduced to the leavening agents, ensuring an even rise across the whole batch.
Step 4: Adding the Flour Gently
Turn your mixer down to the lowest setting. Carefully pour in the all-purpose flour. Watch closely and stop the mixer the very moment you see the last streaks of white disappear. Over-mixing at this stage can make the cookies tough, and we want them to be as tender as a childhood memory. Fold in the milk chocolate chips by hand with a sturdy spoon.
Step 5: Shaping the Craggily Top
Portion out a rounded 1/3 cup of dough for each cookie—they should be about 4.2 ounces each. Roll the dough into a smooth ball in your palms. Now, for the special touch: break the ball in half with your hands. Turn the pieces so the jagged, broken edges face upward, and then press them back together. This creates a beautiful, rustic top that looks just like a professional bakery treat.
Step 6: The Golden Bake
Place only five or six dough balls on your prepared sheet at a time, leaving at least 3 inches of space between them. Bake for 10 to 11 minutes. You are looking for the edges to turn a light golden brown while the tops stay pale and set. Do not wait for the centers to look fully dry; they will continue to firm up as they rest on the hot pan.
Step 7: The Final Touch and Cooling
As soon as you pull the tray from the oven, press a few extra milk chocolate chips into the warm tops of the cookies. This gives them that classic, inviting look. Let them rest on the baking sheet for 5 minutes before gently moving them to a wire rack. Cooling completely is the hardest part, but it allows the texture to set perfectly.
Teresa’s Wisdom for the Perfect Batch

One of the most important things I have learned over the years is that the temperature of your ingredients truly matters. When a recipe calls for room temperature butter and eggs, it is not just a suggestion; it is the way to ensure a smooth, stable emulsion. If your butter is too cold, it won’t cream properly with the sugar, and if your eggs are straight from the fridge, they can cause the butter to seize up. For more advice on keeping your kitchen running smoothly, you might enjoy reading through our Classic Cookie Recipes for more timeless techniques.
Another tip for achieving that signature look is to handle the dough as little as possible once the flour is added. The more you work the dough, the more gluten develops, which can take away from the softness we crave. If you find your kitchen is particularly warm, you can chill the portioned dough balls for ten minutes before baking to help them hold their height. For a different perspective on this modern favorite, some bakers also look at this version for inspiration on proportions and timing.
Heritage Twists and Family Favorites
While the milk chocolate version is the standard for the Copycat Crumbl Chocolate Chip 2, there is always room for a little creativity in a heritage kitchen. If you prefer a deeper flavor, you can substitute the milk chocolate chips with dark chocolate chunks or even a mixture of semi-sweet and white chocolate. During the colder months, adding a half-cup of chopped toasted walnuts or pecans can provide a wonderful crunch that feels very traditional. For those who love to celebrate the changing seasons with their baking, our Holiday Cookie Celebrations page offers many ideas for adapting classic bases into festive treats.
Another lovely variation is to brown the butter before starting the recipe. This adds a nutty, toasted aroma that brings a sophisticated depth to the cookie. Simply melt the butter in a pan until it foams and turns a light amber color, then let it solidify back to room temperature before creaming it with the sugars. This little extra effort honors the ingredients and creates a cookie that tastes like it came from an old-world patisserie.
Sharing the Tradition with Loved Ones
Serving these cookies is an act of love, and the presentation should reflect that warmth. I love to place them on a vintage pedestal stand or inside a clear glass jar where the golden edges and chocolate chips can be seen by everyone who walks into the kitchen. They are the perfect accompaniment to a cold glass of milk for the children or a steaming cup of coffee for the adults. If you are looking for ways to share these quickly during a busy week, our Quick & Easy Cookies guide has wonderful ideas for gifting and serving.
For a special Sunday afternoon treat, you can serve these cookies slightly warm with a small scoop of vanilla bean ice cream on the side. The heat from the cookie softens the ice cream, creating a simple but elegant dessert that feels like a true heritage celebration. Always keep a stack of linen napkins nearby, as these cookies are generous in size and meant to be enjoyed slowly and thoroughly.
The Sweet Heritage of Home Baking
Bringing a batch of these cookies into your home is about more than just satisfying a sweet tooth; it is about continuing a legacy of comfort and care. Whether you are baking them for a family gathering or just to fill the jar for the week ahead, the Copycat Crumbl Chocolate Chip 2 recipe serves as a reminder that the best things in life are often the simplest ones. We invite you to explore our Wholesome Cookie Options for more ways to bring goodness to your table. We would love to see your beautiful creations, so please share your baking journey with us on Pinterest, Instagram, and Facebook. Happy baking, from my kitchen to yours.
