Grandma always kept a handwritten card for these three-ingredient wonders tucked inside her favorite cookbook. While she stirred them by hand for what felt like hours, I have found that a quick whisk delivers that same melt-in-your-mouth magic in a fraction of the time. It is the ultimate proof that you do not need a full pantry to create a core childhood memory.

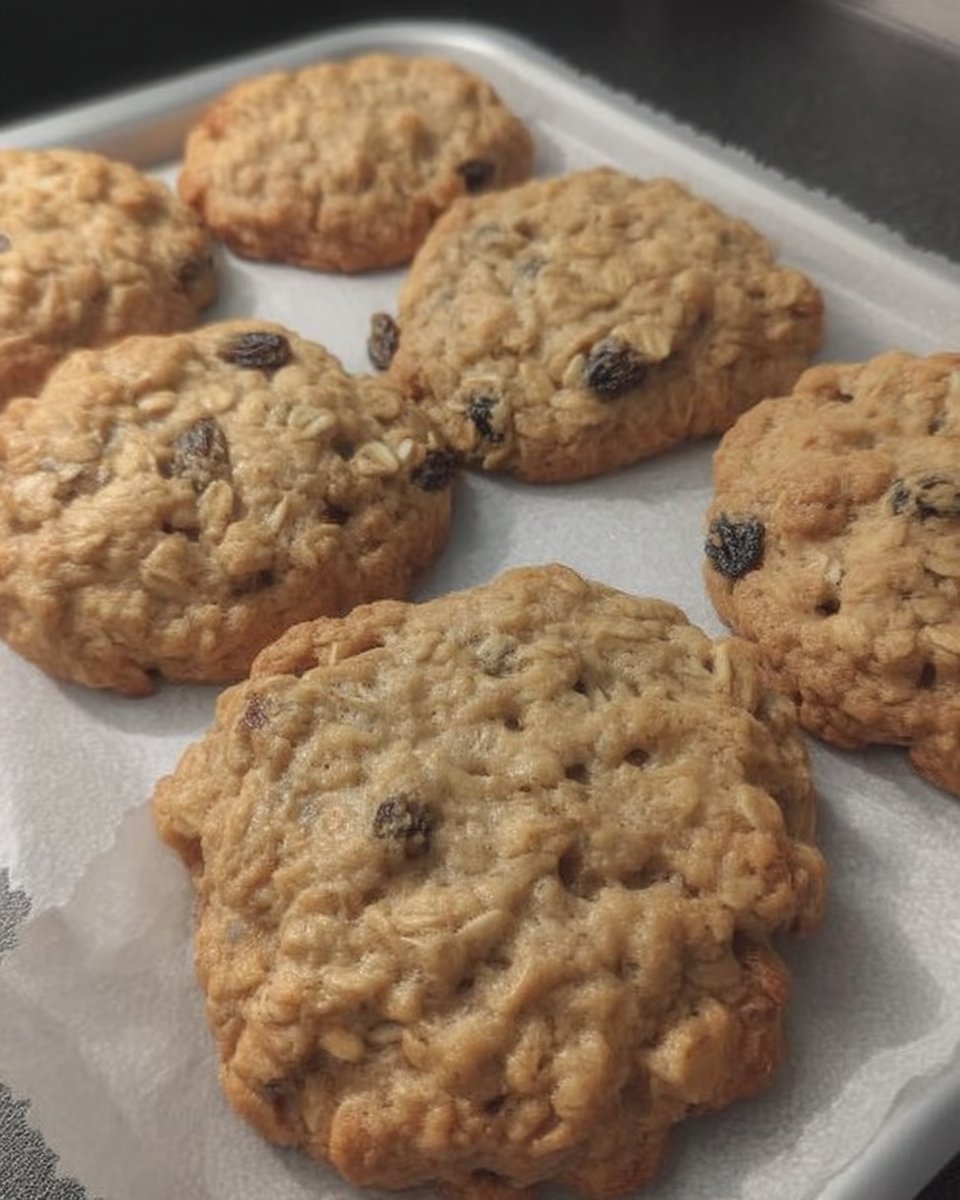
These flourless peanut butter cookies are a miracle of modern efficiency meeting vintage simplicity. With just peanut butter, sugar, and a single egg, you get a rich, chewy treat that satisfies every nostalgic craving without the mess of flour or heavy equipment. This is Grandma’s flavor in 20 minutes flat, adapted for the pace of our busy modern lives.
A Modern Take on a Three-Ingredient Classic
You will fall in love with these cookies because they represent the ultimate shortcut without sacrificing an ounce of tradition. In a world of complicated desserts, there is something deeply comforting about a recipe that relies on three basic items you likely already have in your cupboard. This method is incredibly fast, taking you from a craving to a warm cookie in less time than it takes to preheat the oven.
Another reason to adore this recipe is its naturally gluten-free status. Long before specialty flours were common, home bakers used this clever ratio to create a dense, fudgy texture that flour-based cookies simply cannot match. It is a reliable go-to for school bake sales or last-minute guests because it works every single time. You get that signature peanut butter punch with a delicate, sugary crunch on the outside that feels like a warm hug from the past.
Print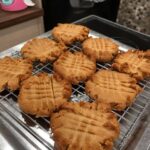
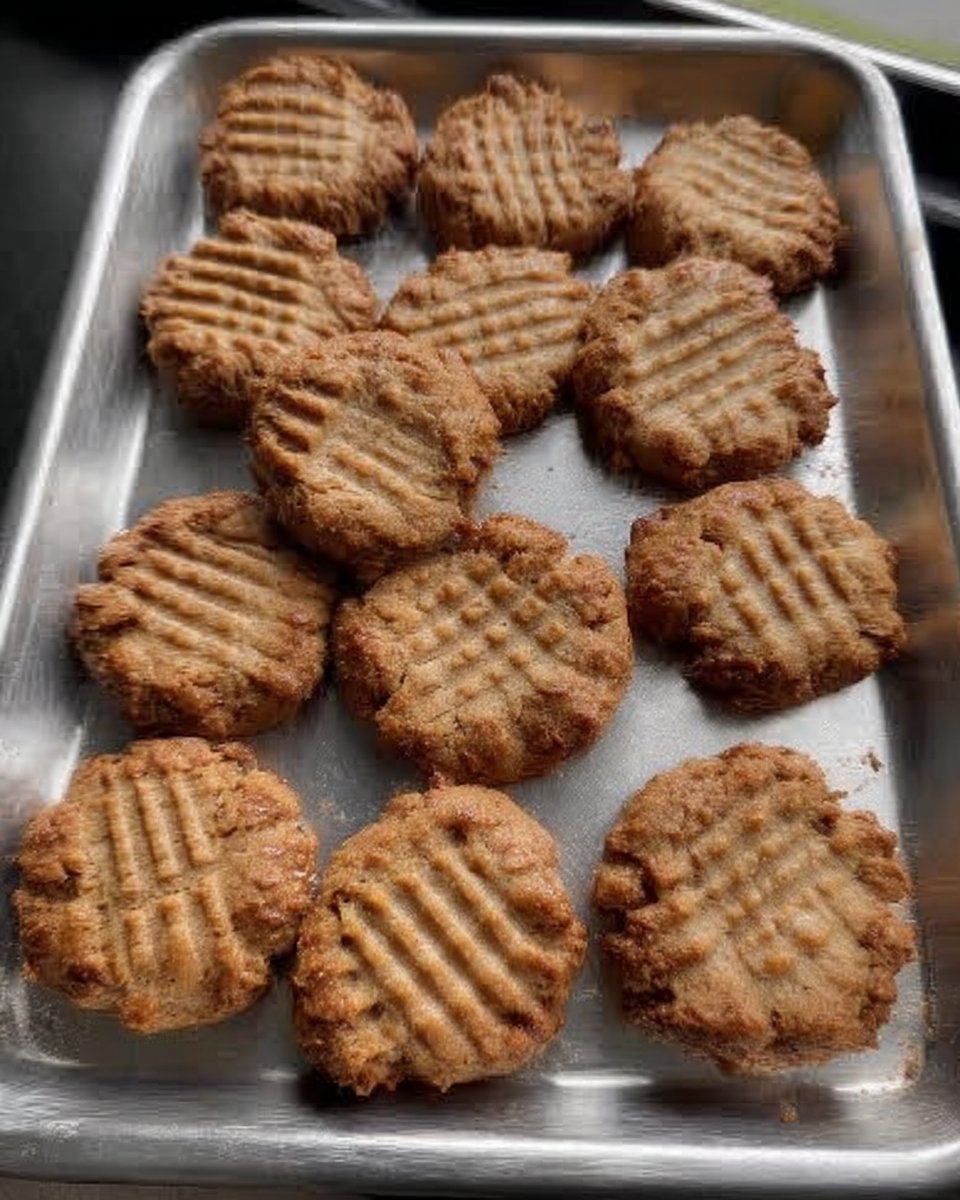
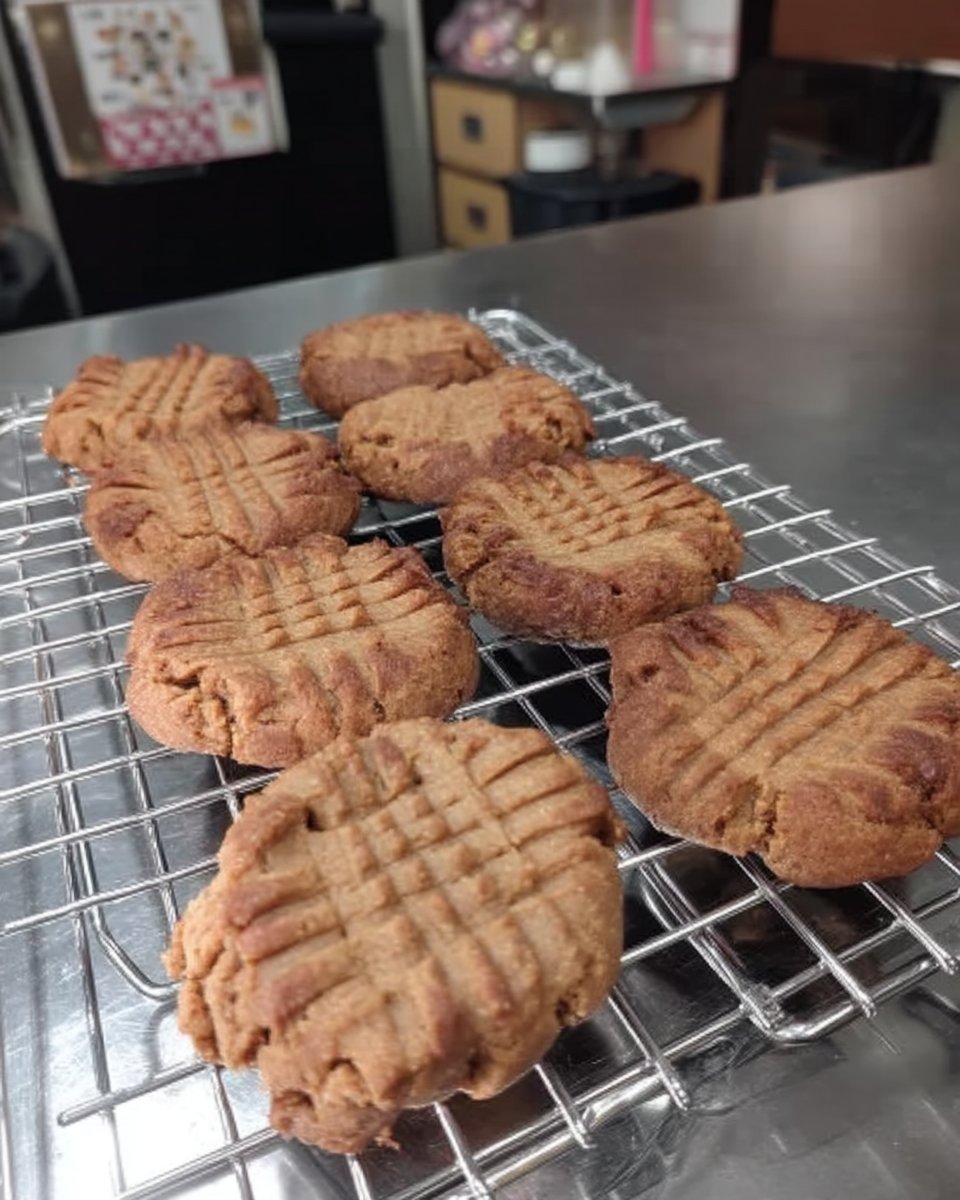
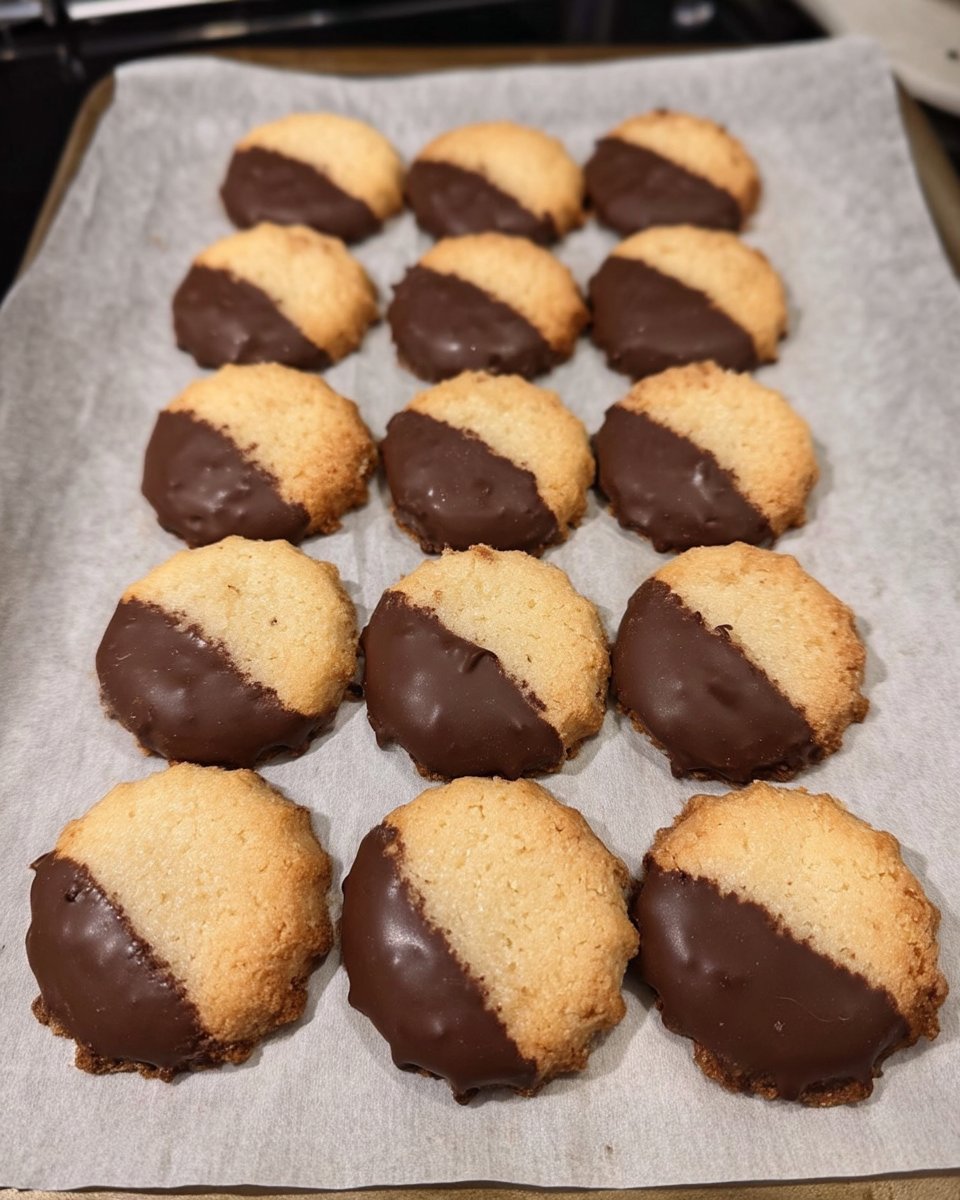
Flourless Peanut Butter Cookies
- Total Time: 20 mins
- Yield: 12 cookies
- Diet: Gluten-Free
Description
These quick and easy three-ingredient peanut butter cookies offer a rich, chewy texture without the need for flour. Perfect for last-minute baking, they deliver a nostalgic, gluten-free treat that captures the essence of tradition in under twenty minutes.
Ingredients
- 1 cup creamy peanut butter
- 1 cup granulated sugar
- 1 large egg
Instructions
- Preheat your oven to 350 degrees F (180 degrees C) and line a cookie sheet with parchment paper.
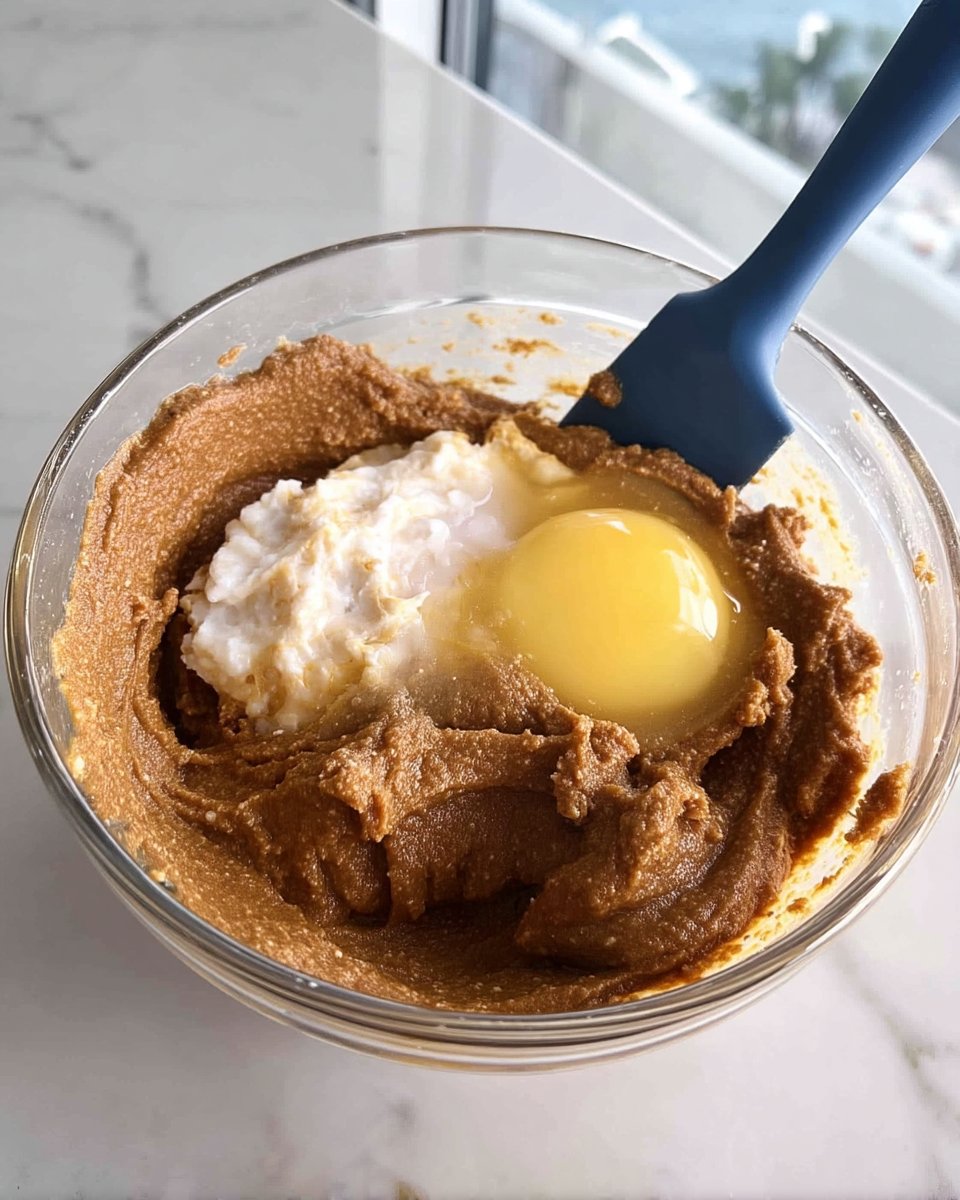
- In a medium bowl, combine the peanut butter, sugar, and egg; mix until the dough is smooth and fully incorporated.
- Using a small cookie scoop or teaspoon, drop rounded mounds of dough onto the prepared baking sheet, spacing them about two inches apart.
- Use a fork to press a cross-hatch pattern into the top of each dough ball, slightly flattening the cookie.
- Bake for 8 minutes, then remove from the oven and allow the cookies to firm up on the sheet for 5 to 10 minutes before transferring to a wire rack.
Notes
Ensure your egg is at room temperature to help the dough incorporate smoothly without the fats in the peanut butter seizing. For a cleaner finish and uniform baking, use a spring-loaded cookie scoop and always allow the cookies to cool completely on the pan to set their delicate structure.
- Prep Time: 12 mins
- Cook Time: 8 mins
- Category: Dessert
- Method: Baking
- Cuisine: American
Simple Pantry Staples
To make these flourless peanut butter cookies 2, you only need three items. Keeping things simple is the key to maintaining that heritage flavor while keeping your kitchen clean and your schedule on track.
- Peanut Butter: I recommend using a standard creamy brand like Jif or Skippy for the most consistent results. These brands have the right balance of oil and solids to hold the cookie together without the need for flour.
- Granulated Sugar: This provides the sweetness and the structural integrity. As it bakes, the sugar melts and then sets, creating that wonderful crisp edge.
- Large Egg: The egg acts as the sole binding agent here. It provides the protein needed to lock the fats and sugars together into a cohesive dough.
You do not need salt or vanilla, though a tiny splash of vanilla can be a nice touch if you have an extra ten seconds. The beauty of this recipe is that the peanut butter is the star, providing all the fat, salt, and flavor required for a perfect bite.
Simple Steps for Busy Bakers
Step 1: Prep the Oven and Pans
Start by preheating your oven to 350 degrees F (180 degrees C). While the oven warms up, line a cookie sheet with parchment paper. This modern shortcut is much better than greasing the pan, as it prevents sticking and makes cleanup a breeze.
Step 2: Mix the Three Ingredients
In a medium bowl, combine the one cup of peanut butter, one cup of sugar, and the single egg. You can use a wooden spoon, but a hand mixer on low speed makes this even faster. Mix until the dough is smooth and the sugar is fully incorporated. The dough will be thick and slightly oily, which is exactly what you want.
Step 3: Scoop and Drop
Using a small cookie scoop or a teaspoon, drop rounded mounds of dough onto your prepared baking sheet. Since this recipe makes about a dozen cookies, space them about two inches apart. They do not spread excessively, but they need a little room to breathe.
Step 4: The Classic Fork Press
If you want to honor the vintage look, use a fork to press a cross-hatch pattern into the top of each dough ball. This slightly flattens the cookie, helping it bake evenly. If you are in a rush, you can skip this, but the ridges catch the light and look beautiful.
Step 5: Bake and Cool
Place the sheet in the center of the oven and bake for exactly 8 minutes. Do not overbake! They will look very soft when you pull them out, but they will firm up as they cool. Let them rest on the baking sheet for at least 5 to 10 minutes before moving them to a wire rack. This patience is vital for the structure of a flourless cookie.
Meagan’s Time Savers
To get the best results every time, make sure your egg is at room temperature before you start. A cold egg can cause the peanut butter fats to seize up slightly, making the dough harder to mix by hand. If you are using natural peanut butter, give it a very thorough stir to incorporate all the oils before measuring, as noted in similar flourless peanut butter cookies techniques.
Another quick win is using a spring-loaded cookie scoop. It keeps the cookies uniform in size, which means they all finish baking at the exact same moment. For more ways to save time in the kitchen, check out our favorite Quick & Easy Cookies that don’t require any dough chilling.
Quick Flavor Twists
While the original recipe is a masterpiece of simplicity, you can easily adapt it for different moods. For a bit of texture, try using extra-crunchy peanut butter instead of creamy. If you want a more decadent treat, press a few semi-sweet chocolate chips into the top of each cookie immediately after they come out of the oven.
You can also browse our Classic Cookie Recipes for ideas on how to incorporate these into a larger dessert tray. Another lovely variation is to roll the dough balls in a little bit of extra sugar before pressing them with the fork to give them a sparkling, bakery-style finish. These small changes keep the heritage spirit alive while letting you get creative with what is in your pantry.
Modern Sharing Ideas
These cookies are the perfect after-school snack because they provide a nice hit of protein along with the sweetness. Serve them with a tall glass of cold milk or a warm cup of coffee for a nostalgic afternoon break. If you are feeling extra playful, use two cookies to sandwich a scoop of vanilla bean ice cream for a quick weekend dessert.
For those looking for lighter options to pair with these treats, our Wholesome Cookie Options guide offers great suggestions for balanced snack plates. They also pack beautifully in lunchboxes because they are sturdy enough not to crumble into pieces by noon.
Heritage Rediscovered in Minutes
Baking doesn’t have to be a multi-hour production to be meaningful. This recipe proves that you can honor the flavors of the past while respecting the demands of your current schedule. It is a quick way to bring a little bit of Grandma’s kitchen into your own home, creating a warm, sweet atmosphere in less than half an hour. For more seasonal inspiration, take a look at our Holiday Cookie Celebrations to see how we modernize other traditional favorites.
I would love to see your 3-ingredient creations! Share your photos and tag us on Pinterest, Instagram, or Facebook. Happy baking!
