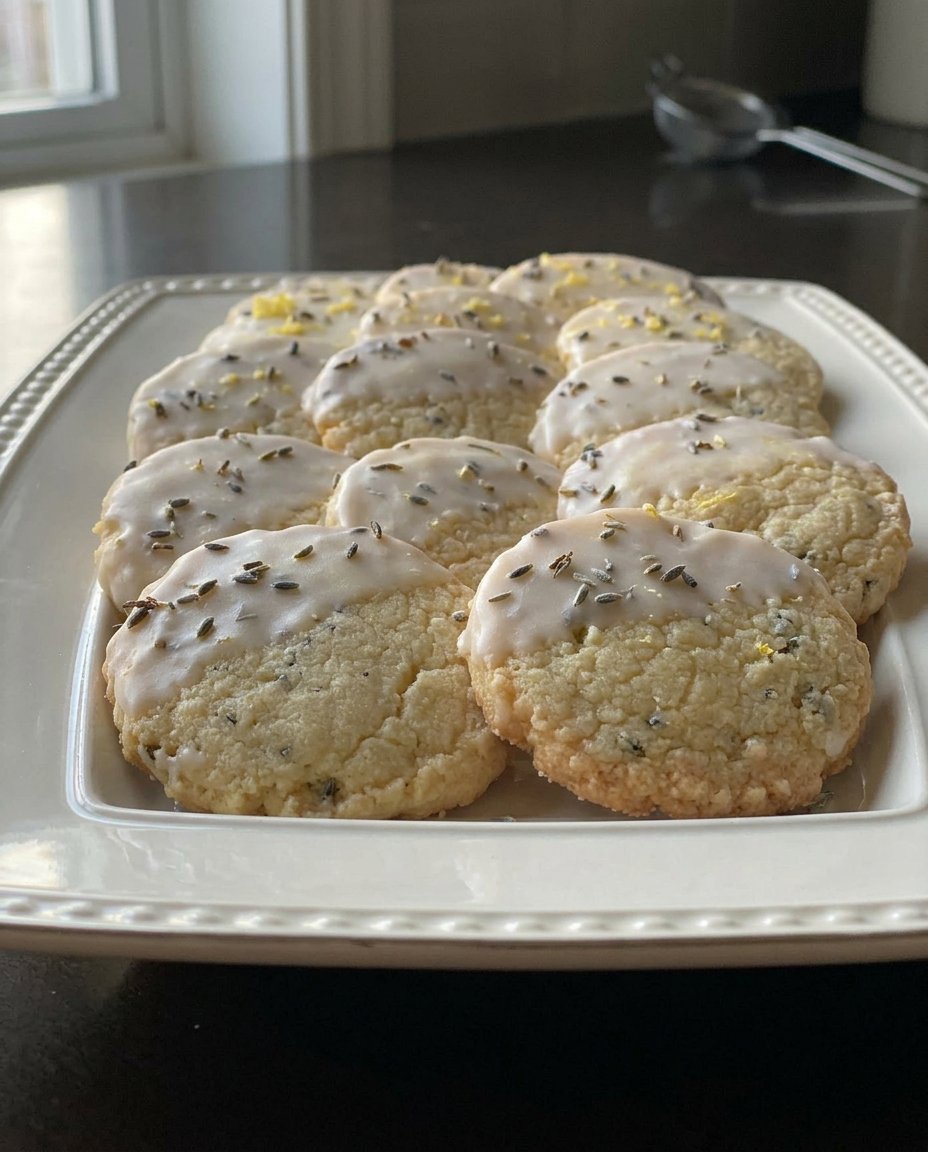
Many lemon cookies lose their vibrant zing and turn into dry, crumbly pucks after just one afternoon in the cookie jar. I spent weeks refining this recipe to ensure that the bright, citrusy goodness stays locked in alongside a tender, buttery crumb that won’t go stale. This is my solution to the age-old problem of citrus treats losing their moisture and becoming unpleasantly hard by day two.

By carefully balancing the fat-to-sugar ratio, these Lemon Glazed Cookies 2 offer a melt-in-your-mouth experience that requires no chilling time in the fridge. The addition of a thick, tart glaze acts as a natural seal, keeping the cookie beneath it soft and fresh for several days. It is a vintage-inspired recipe that uses modern texture science to provide a reliable, jar-fresh result every single time.
A Perfect Treat for Any Occasion
You will love these cookies because they strike the perfect balance between a rich, buttery shortbread and a soft, tangy sugar cookie. Unlike many citrus recipes that rely on artificial extracts, this version uses a heavy hand of fresh lemon zest to provide a deep, authentic flavor that permeates the entire dough. The texture is intentionally designed to be soft in the center with just a whisper of a golden crisp at the very edges.
Another reason to adore this recipe is its speed and simplicity. In less than thirty minutes, you can have a batch of bakery-quality cookies ready for your family. There is no need to wait hours for the dough to chill, making this the ultimate choice for those sudden cravings or last-minute guests. Because I focus on moisture retention, these cookies remain just as satisfying on day three as they were the moment they cooled.
Print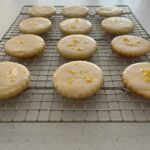
Lemon Glazed Cookies
- Total Time: 29 mins
- Yield: 24 cookies
- Diet: Vegetarian
Description
These vibrant lemon cookies combine a buttery, tender crumb with a tangy citrus glaze that locks in moisture for lasting freshness. They are an effortless, no-chill treat that delivers bakery-quality texture and a bright, zesty flavor in under thirty minutes.
Ingredients
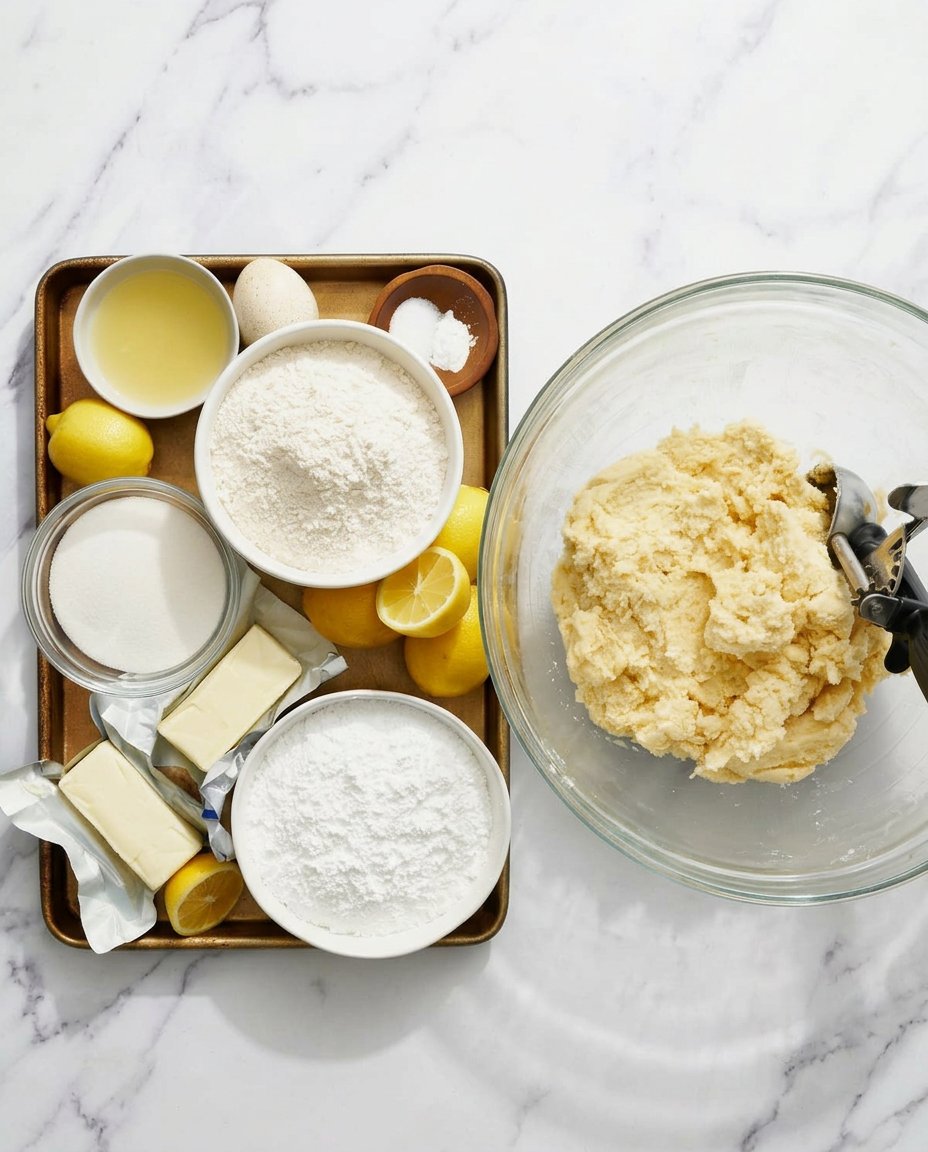
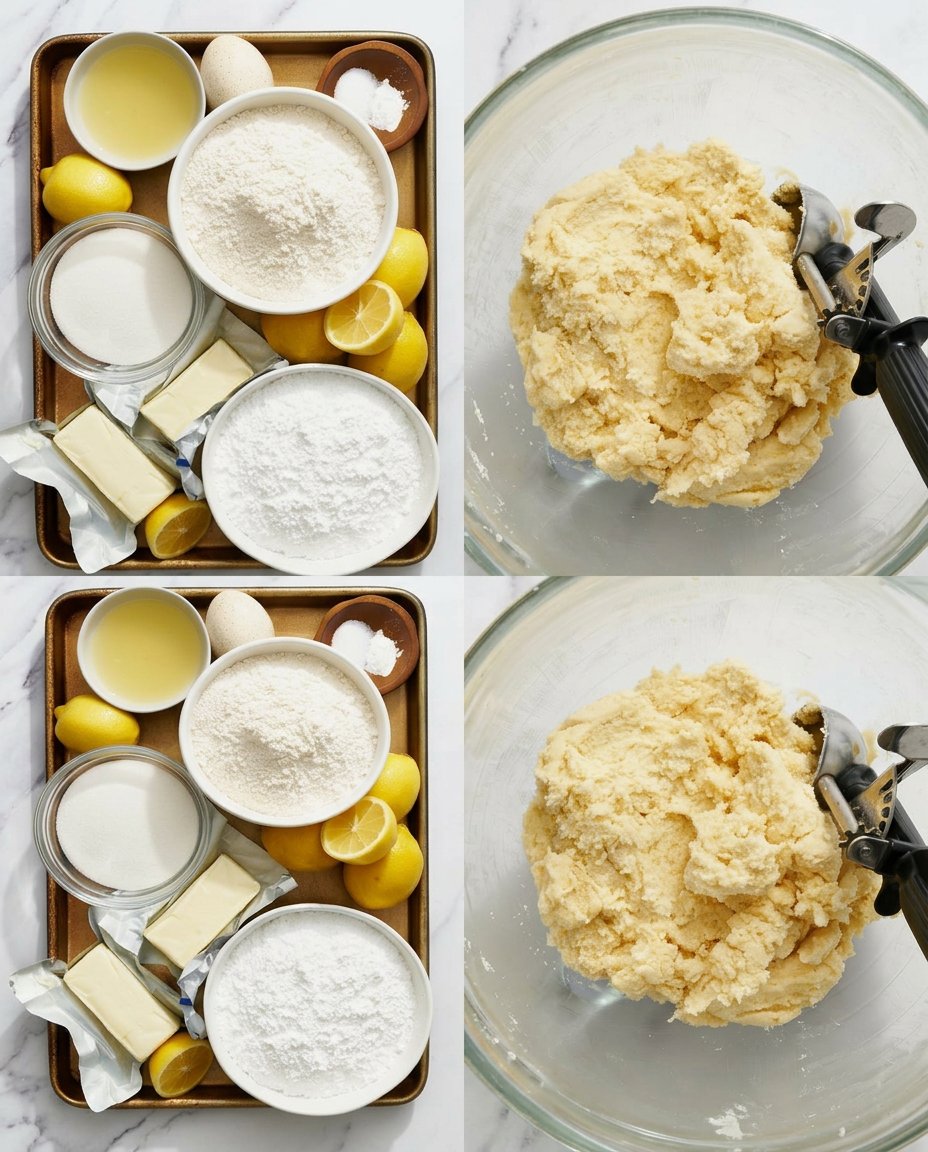
- 286 grams All-Purpose Flour
- 227 grams Unsalted Butter, cool room temperature
- 150 grams Granulated Sugar
- Fresh zest of 3 medium lemons
- 1 large egg, cool room temperature
- 1 teaspoon Baking powder
- 1/2 teaspoon Fine sea salt
- 1 cup Powdered sugar, for glaze
- 2–3 tablespoons Fresh lemon juice, for glaze
Instructions
- Preheat your oven to 350°F (177°C) and line two heavy-duty baking sheets with parchment paper or silicone mats.
- In a medium-sized bowl, whisk together the all-purpose flour, baking powder, and fine sea salt to aerate the mixture.
- Using an electric mixer with a paddle attachment, beat the cool room temperature butter, granulated sugar, and lemon zest for 3 to 4 minutes until pale and fluffy.
- Add the large egg and beat for about 1 minute until the mixture is smooth, scraping down the sides of the bowl as needed.
- Turn the mixer to the lowest speed and gradually add the flour mixture, blending until just incorporated and no white streaks remain.
- Portion dough into balls using a 1.5-tablespoon scoop, roll them smooth, and place on sheets 2 inches apart.
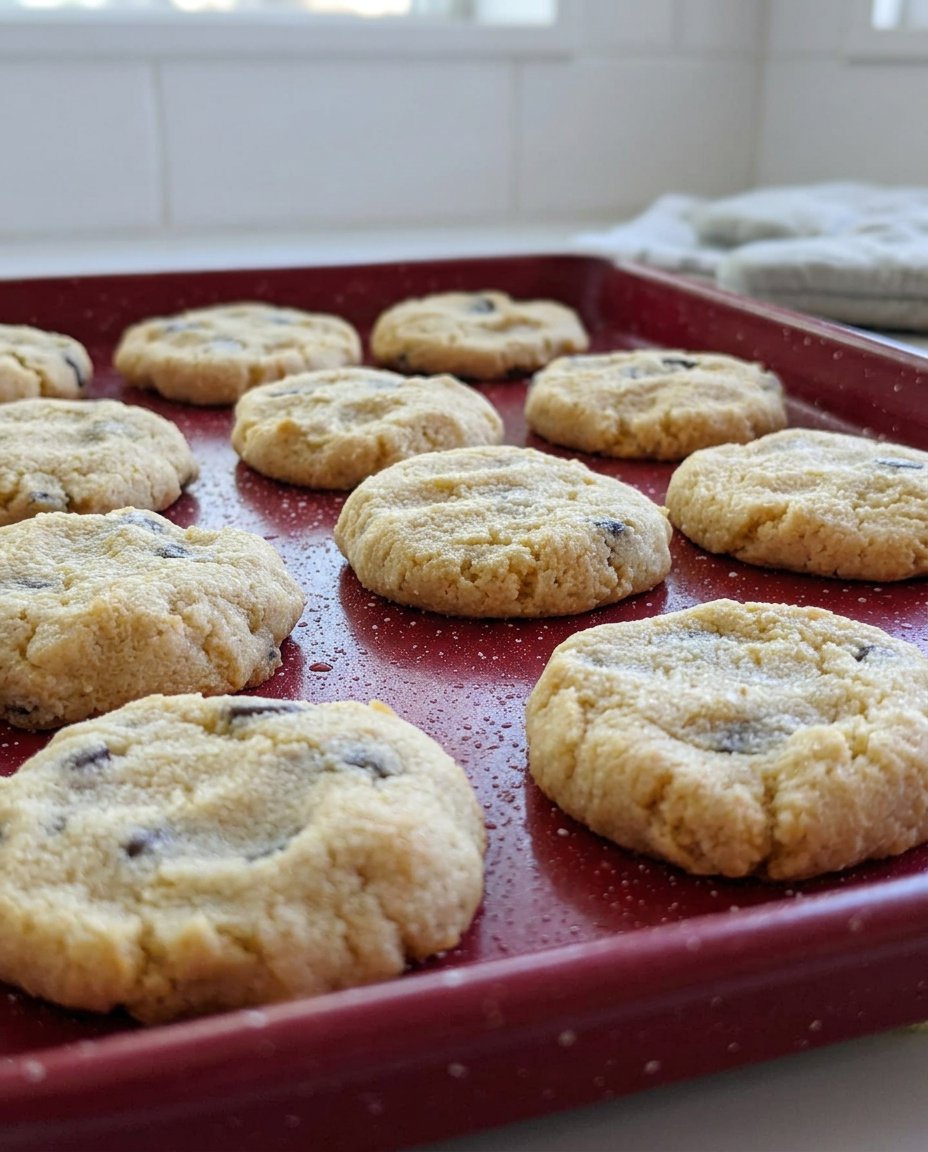
- Gently flatten each ball with your palm to a 1/3-inch thickness and bake for 12 to 14 minutes until edges are barely golden.
- Let the cookies rest on the sheet for 5 minutes before transferring to a wire rack to cool completely.
- Whisk the powdered sugar and lemon juice into a thick glaze and spoon over the cooled cookies, allowing 30 minutes to set.
Notes
For the most intense citrus profile, rub the lemon zest into the granulated sugar with your fingertips before creaming the butter; this releases more essential oils. If you are baking in a very humid environment, start with less lemon juice in your glaze to ensure it sets into a firm, protective shell.
- Prep Time: 15 mins
- Cook Time: 14 mins
- Category: Dessert
- Method: Baking
- Cuisine: American
The Secret to Lasting Softness
To achieve a cookie that stays soft for days, every ingredient must play a specific role in moisture management and structural integrity. Using cool room temperature butter is vital; if the butter is too warm, the cookies will spread too thin and lose that characteristic chew. Here is a look at what makes these Lemon Glazed Cookies 2 so special:
- All-Purpose Flour (286 grams): Provides the necessary structure without making the cookies heavy or tough.
- Unsalted Butter (227 grams): The high fat content is what creates that wonderful, tender crumb. Keeping it at a cool room temperature (about 65°F or 18°C) allows for better aeration during the creaming process.
- Granulated Sugar (150 grams): Sweetens the dough while helping to lock in moisture as it dissolves into the butter.
- Fresh Lemon Zest: Using the zest from three medium lemons provides the essential oils that carry the most flavor without adding excess liquid that could ruin the dough’s balance.
- One Large Egg: Acts as the binder. I recommend using an egg that is also at a cool room temperature to prevent the butter from curdling during the mixing phase.
- Powdered Sugar and Fresh Lemon Juice: These two ingredients form the protective glaze that keeps the cookie soft while adding a sharp, refreshing finish.
The Step-by-Step Texture Method
Step 1: Prep and Preheat
Start by preheating your oven to 350°F (177°C). It is important that the oven is fully reached its temperature before the cookies go in to ensure an immediate rise. Line two heavy-duty baking sheets with parchment paper or silicone mats. This prevents the bottoms from browning too quickly and makes cleanup easy.
Step 2: Combine Dry Ingredients
In a medium-sized bowl, whisk together the all-purpose flour, baking powder, and fine sea salt. Whisking not only combines the leavening agent but also aerates the flour, which contributes to a lighter, softer cookie texture. Set this mixture aside until you are ready to incorporate it into the wet ingredients.
Step 3: Cream the Butter and Zest
In a large mixing bowl, use an electric mixer with the paddle attachment. Beat the cool room temperature butter, sugar, and lemon zest together. I recommend beating for a full 3 to 4 minutes. This long creaming time allows the sugar crystals to rub against the lemon zest, releasing the fragrant oils and creating a pale, fluffy base that results in a superior crumb.
Step 4: Add the Egg
Add the large egg to the creamed mixture. Beat for about 1 minute until the mixture is very well combined and looks smooth. Make sure to scrape down the sides and the bottom of the bowl with a flexible spatula to ensure every bit of butter is fully integrated with the egg.
Step 5: Incorporate the Flour
Turn your mixer to the lowest speed. Gradually add the flour mixture and blend until just incorporated. The dough will look slightly dry or shaggy at first, but don’t be tempted to overmix. Overmixing develops gluten, which leads to a tough, bready cookie instead of a soft, tender one. Stop as soon as no more white streaks of flour are visible.
Step 6: Shape and Flatten
Using a medium spring-loaded cookie scoop (about 1.5 tablespoons), portion out balls of dough. Roll each ball between your palms until it is smooth, then place them on the baking sheets about 2 inches apart. Use your palm to gently flatten each ball until it is about 1/3-inch thick. This ensures even baking and a consistent texture from edge to center.
Step 7: Bake to Perfection
Bake for 12 to 14 minutes. You are looking for the edges to be just barely golden brown while the centers still look slightly soft and set. Do not overbake! If you wait until the centers are dark, the cookies will be hard once they cool. Let them rest on the baking sheet for 5 minutes before moving them to a wire rack to cool completely.
Step 8: Glaze and Set
Whisk the powdered sugar and lemon juice together in a small bowl. Add the juice one tablespoon at a time until you have a thick but pourable consistency. Spoon the glaze over the cooled cookies. The glaze will set in about 30 minutes, creating a beautiful, sweet-tart shell that preserves the moisture inside.
Mehmet’s Freshness Secrets
To make sure your Lemon Glazed Cookies 2 stay soft for as long as possible, I recommend storing them with a small piece of white bread in the container. The bread will release moisture, which the cookies will absorb, preventing them from drying out. Another tip is to always use fresh lemons; bottled juice lacks the brightness and the essential oils found in the skin. When zesting, avoid the white pith, as it is bitter and can ruin the delicate sweetness of the dough. For more insights on perfecting your oven results, check out our guide on Classic Cookie Recipes.
If you find your cookies are getting a bit firm after a few days, you can revive them by placing one on a plate and microwaving it for just 5 to 8 seconds. This softens the butter and sugar slightly, giving it that fresh-from-the-oven feel. Always store these in a single layer if the glaze is still wet, or use parchment paper between layers once they are fully set to prevent sticking.
Flavor Tweaks and Texture Options
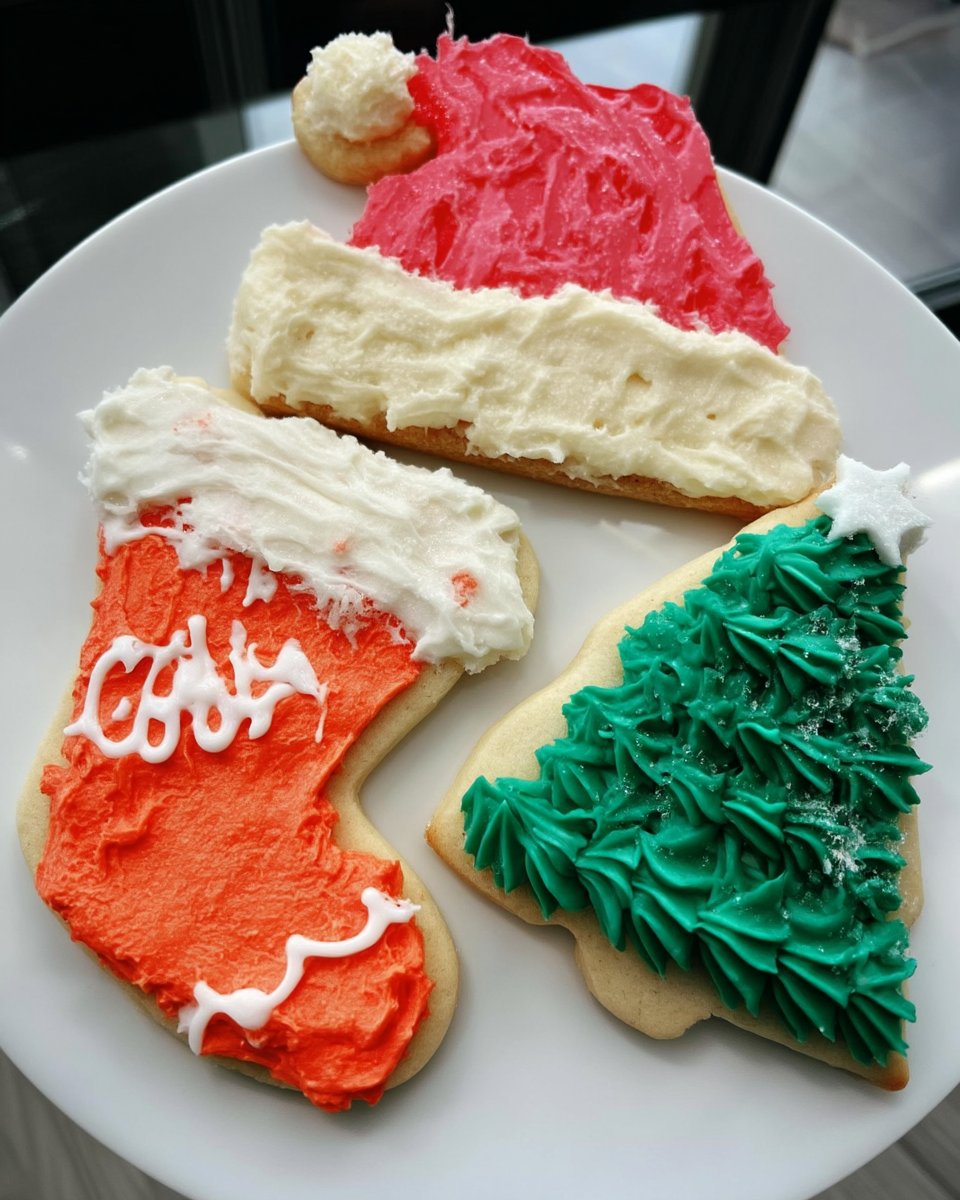
While I love the traditional lemon profile, you can easily adapt this recipe to suit different seasons or preferences. Many of our readers have had great success replacing the lemon with lime for a tropical twist or orange for a softer, sweeter citrus note. If you prefer a more substantial treat, you can press the dough into an 8×8-inch pan and bake them as cookie bars for 23 to 25 minutes. This creates a denser, fudgier texture that is perfect for picnics. For ideas on how to adapt these for the holidays, take a look at our Holiday Cookie Celebrations.
You can also add a teaspoon of poppy seeds to the dough for a classic lemon-poppy seed pairing that adds a delightful little crunch. If you want a richer glaze, replace the lemon juice with a bit of heavy cream and a drop of lemon oil, which creates a creamier, opaque icing that feels very luxurious on the tongue.
The Best Way to Serve and Store

These cookies are best served at room temperature alongside a warm cup of Earl Grey tea or a glass of cold milk. The acidity of the lemon cuts through the richness of the butter, making them a very refreshing afternoon snack. Because they are so sturdy yet soft, they are also a fantastic option for shipping to loved ones or bringing to a bake sale. For more ideas on quick treats for any event, browse our collection of Quick & Easy Cookies.
To maintain the jar-fresh texture, place the cookies in an airtight glass jar once the glaze is completely dry. If you are serving these at a party, garnish the platter with fresh mint leaves and a few extra curls of lemon zest to emphasize the fresh ingredients. They can also be frozen for up to three months; just thaw them at room temperature for an hour before serving to regain that soft, tender bite.
Final Thoughts on Soft Lemon Perfection
Mastering the texture of a citrus cookie is all about protecting the crumb from the air. By using the creaming method and sealing each treat with a tart glaze, you ensure a soft, satisfying experience every time you reach into the jar. No more worrying about hard, dry cookies by day three—these Lemon Glazed Cookies 2 are built to last. For more tips on making your bakes look as good as they taste, visit our Cookie Decorating Traditions page. Please share your baking success with us on Instagram, Facebook, or Pinterest. Happy baking!

