I still remember standing on a wooden stool in my grandmother’s kitchen, watching her transform a simple, liquid batter into delicate, crispy flowers. Those Sunday afternoons were filled with the scent of warm vanilla and the rhythmic click of the iron against the side of the heavy pot. While I treasure those memories, I have found ways to simplify the process so I can bring that same heritage flavor to my own busy family without spending the entire day over a hot stove.

These golden, airy cookies are a true labor of love that actually comes together surprisingly fast once you get into a groove. By using modern tools like a reliable thermometer and high-quality non-stick irons, we can achieve that perfect, melt-in-your-mouth crunch in a fraction of the time. This version stays true to the ancestral roots of the recipe while fitting perfectly into a modern baking schedule.
The Magic of Modern Nostalgia
There is something truly special about a cookie that looks like a work of art but relies on basic pantry staples you already have in your cupboard. You will love this recipe because it brings a massive amount of festive flair to your table with very little investment in ingredients. It is the ultimate way to show your loved ones you care through a time-honored tradition that has been updated for efficiency.
These cookies are remarkably light, providing a satisfying snap that heavier baked goods simply cannot match. Because the batter is so simple, the focus stays on the delicate texture and the subtle sweetness of the vanilla and powdered sugar. It is a wonderful project for those who want to feel connected to their history while maintaining a fast-paced life. Plus, the sheer joy of watching the batter puff up and release from the iron in seconds is a thrill that never gets old, no matter how many times you make them.
Another reason to fall in love with these treats is their versatility. While they are deeply rooted in Scandinavian history, they fit in perfectly at any modern gathering, from office potlucks to elegant holiday parties. They are the kind of treat that starts conversations and prompts stories about the old country, yet they take about as much active time as a standard batch of drop cookies once the oil is hot. It is about getting that heirloom quality without the heirloom-sized time commitment.
Print
Rosettes
- Total Time: 35 mins
- Yield: 36 cookies
- Diet: Vegetarian
Description
These delicate Scandinavian rosette cookies are light, airy, and beautifully crisp, offering a nostalgic crunch with every bite. Made with simple pantry staples and a specialty iron, they are an elegant and impressive addition to any holiday dessert spread.
Ingredients
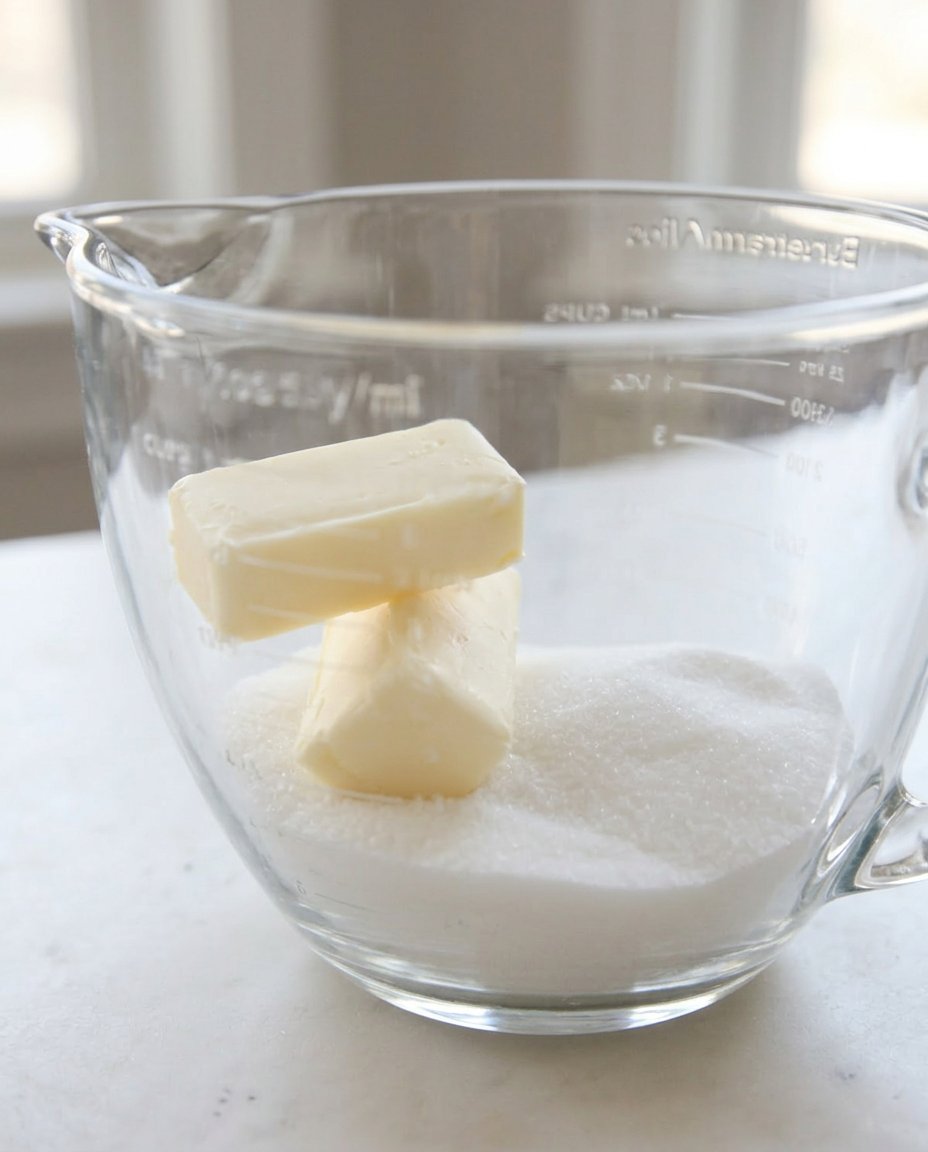
- 2 large eggs, room temperature
- 1 tablespoon white sugar
- 1/4 teaspoon salt
- 1 cup all-purpose flour, sifted
- 1 cup whole milk
- 1 teaspoon vanilla extract
- Vegetable oil, for frying
- Confectioners’ sugar, for dusting
Instructions
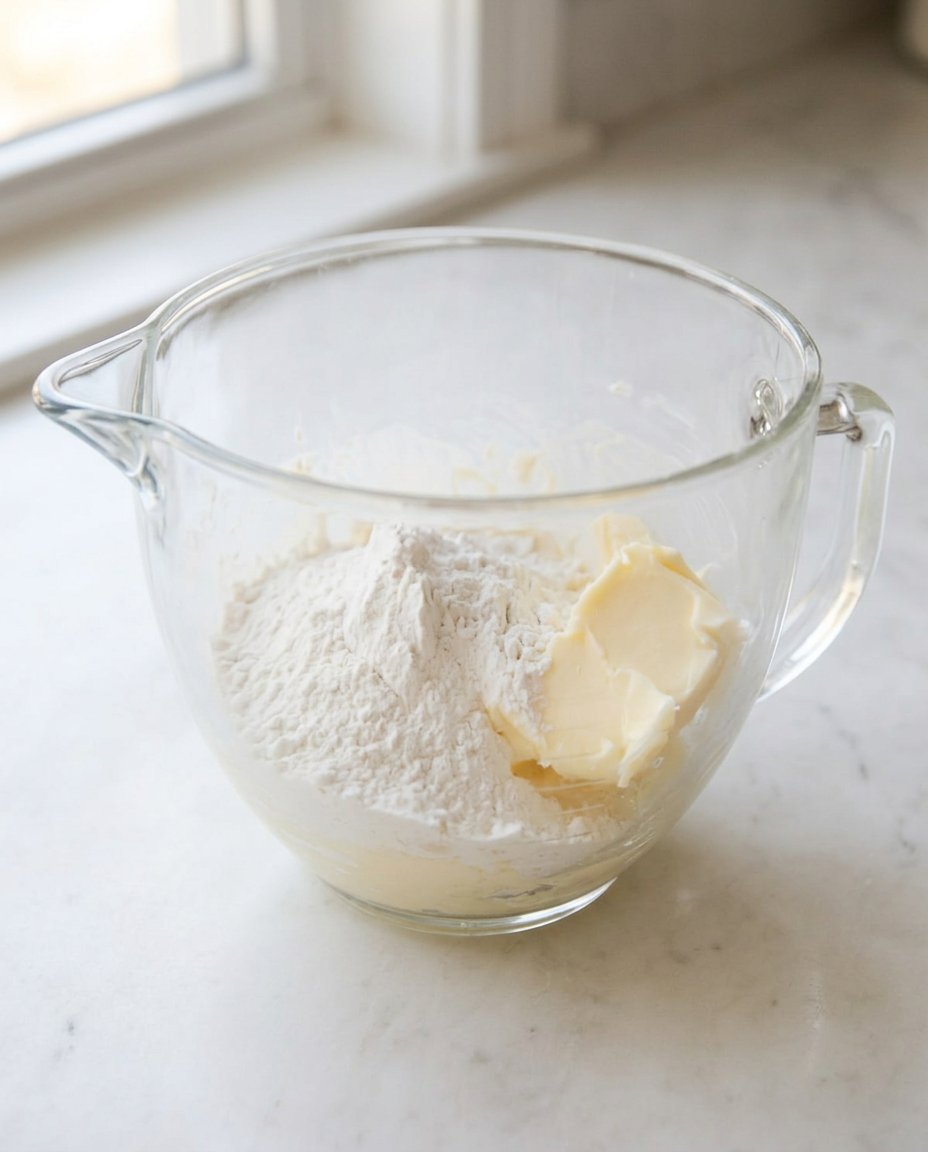
- In a large mixing bowl, whisk together the eggs, sugar, and salt until frothy, then blend in the sifted flour, milk, and vanilla until the batter is completely smooth.
- Let the batter rest for 10 minutes while heating two inches of vegetable oil in a heavy skillet to exactly 375°F (190°C), ensuring the rosette iron is submerged in the oil as it heats.
- Lift the hot iron, blot it quickly on a paper towel, and dip the bottom three-quarters into the batter, being careful not to let the batter run over the top of the iron.
- Immediately plunge the batter-coated iron into the hot oil for about 30 seconds until the cookie expands and releases from the iron.
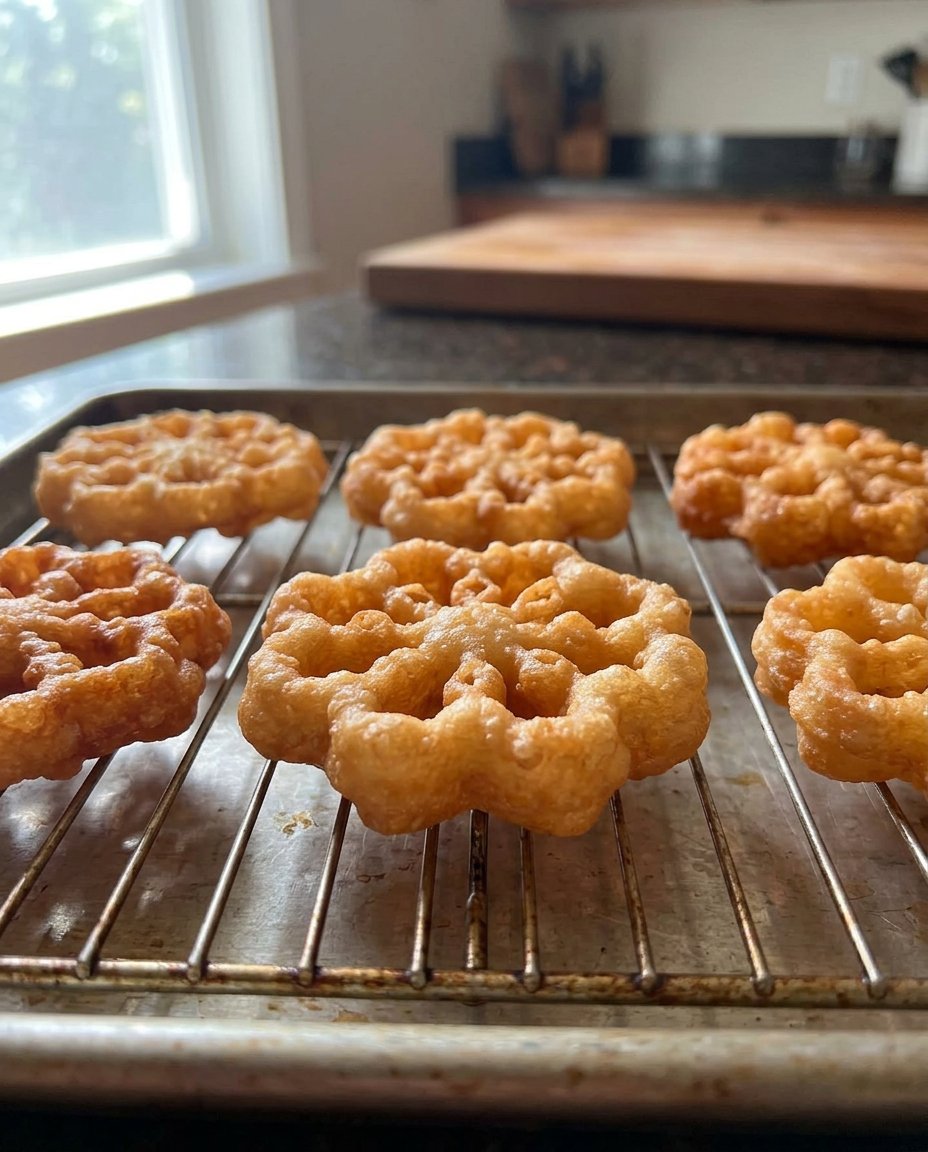
- Fry the rosette until it reaches a very light golden brown on both sides, then remove with a slotted spoon and drain upside down on a wire rack.
- Allow the cookies to cool completely before dusting them generously with confectioners’ sugar using a fine-mesh sieve.
Notes
To ensure your rosettes never stick, always reheat the iron in the hot oil for at least one minute between each cookie. If the cookies are not releasing easily, check that your batter hasn’t coated the top of the iron, and use a thermometer to verify your oil stays at a consistent 375 degrees throughout the process.
- Prep Time: 15 mins
- Cook Time: 20 mins
- Category: Dessert
- Method: Frying
- Cuisine: Scandinavian
Simple Ingredients for a Classic Crunch
To get started with these treats, you only need a handful of items that are likely already sitting in your kitchen. The beauty of this recipe lies in how these humble components work together to create something so intricate and beautiful. Using fresh, room-temperature ingredients makes a big difference in how the batter clings to the iron.
- Large Eggs: These provide the structure and the richness that allows the batter to crisp up without falling apart. Using room-temperature eggs helps them blend more easily into the milk.
- White Sugar: Just a touch of sugar is needed in the batter itself, as most of the sweetness comes from the final dusting of confectioners’ sugar.
- All-Purpose Flour: Make sure to sift your flour before measuring to keep the batter smooth and light. This prevents clumps that could cause the cookies to stick to the iron.
- Milk: Whole milk provides the best fat content for a tender yet crispy result. It acts as the liquid base that carries the other flavors.
- Vanilla Extract: This is where the nostalgic aroma comes from. A high-quality extract makes a noticeable difference in the final taste.
- Vegetable Oil: You need an oil with a high smoke point for frying. This allows you to maintain the necessary 375 degrees without the oil breaking down or smoking.
- Confectioners’ Sugar: This is the traditional finishing touch that gives the cookies their snowy, festive appearance.
How to Make Crispy Rosettes
Step 1: Prepare the Batter
In a large mixing bowl, beat the eggs, sugar, and salt together until the mixture is well-combined and slightly frothy. Whisk in the sifted flour, milk, and vanilla extract. Continue beating the mixture until it is completely smooth and free of any lumps. Let the batter rest for about ten minutes while you prepare your frying station; this allows the air bubbles to settle and the flour to fully hydrate.
Step 2: Heat the Oil and Iron
Pour about two inches of vegetable oil into a deep, heavy skillet or a Dutch oven. Place your rosette iron inside the oil and heat it over medium-high heat until the oil reaches exactly 375 degrees F (190 degrees C). It is vital to heat the iron along with the oil so that the batter will sizzle and stick to it properly when dipped.
Step 3: Dip the Hot Iron
Once the oil and iron are at the correct temperature, lift the iron out of the oil and let the excess oil drain off for a second. Carefully dip the bottom of the hot iron into the batter, making sure the batter comes up about three-quarters of the way but does not go over the top of the iron. If the batter covers the top, the cookie will be trapped and won’t release into the oil.
Step 4: Fry to Golden Perfection
Immediately plunge the batter-coated iron into the hot oil. Hold it there for about 30 seconds. The cookie should begin to expand and pull away from the iron. If it doesn’t drop off on its own, you can give it a gentle nudge with a fork. Fry the rosette until it is a very light golden brown on both sides, which happens very quickly.
Step 5: Drain and Cool
Use a slotted spoon or a fork to lift the fried cookie out of the oil and place it onto a wire rack set over paper towels. It is best to place them upside down at first so any trapped oil can drain out of the crevices. While the iron is still hot, return it to the oil for a minute to reheat before dipping it into the batter for the next one.
Step 6: The Final Touch
Once the rosettes have cooled completely and are crisp to the touch, sprinkle them generously with confectioners’ sugar using a fine-mesh sieve. Serve them immediately or store them in an airtight container to maintain their crunch.
Meagan’s Tips for Success
One of the most important things to remember is the temperature of your oil. If the oil is too cold, the cookies will be greasy and soggy; if it is too hot, they will burn before they are cooked through. I always use a clip-on thermometer to keep a close eye on the heat throughout the process. Another trick is to blot your iron on a paper towel very quickly after taking it out of the oil and before dipping it into the batter. This removes excess oil that might prevent the batter from sticking. For more ideas on managing your holiday kitchen efficiently, check out our guide on Holiday Cookie Celebrations. Also, make sure your batter is in a shallow, wide bowl so you have plenty of room to maneuver the iron without hitting the sides. If you find the batter is getting too thin as you work, give it a quick whisk to keep it consistent. This simple method ensures that every single cookie comes out looking like a professional masterpiece.
Creative Twists on a Classic
While the traditional vanilla flavor is hard to beat, you can easily adapt this recipe to suit your personal taste. Try swapping the vanilla extract for almond extract or even a bit of rum extract for a deeper, more complex flavor profile. You can also mix a teaspoon of ground cinnamon into the confectioners’ sugar for a warm, spicy finish that is perfect for chilly afternoons. If you want to see how others have handled these delicate treats, you can find more inspiration on this traditional rosette recipe. For those who love a bit of color, adding a tiny drop of gel food coloring to the batter can create beautiful pastel flowers for springtime celebrations. You might also look into Cookie Decorating Traditions to find more ways to make your holiday spreads pop. Using different iron shapes, like stars or butterflies, is another quick way to change the look without changing the simple method.
Beautiful Ways to Serve Your Treats
These delicate cookies look stunning when piled high on a vintage cake stand or a simple white platter. To make them feel even more special, you can serve them alongside a bowl of fresh berries or a dollop of lightly sweetened whipped cream. They are the perfect accompaniment to a hot cup of coffee or a spicy chai tea during a quick afternoon break. If you are looking for more ways to share your bakes with friends and family, browse through our Quick & Easy Cookies section for inspiration. For a modern touch, try serving them as a garnish on top of a simple vanilla pudding or a bowl of chocolate mousse. The contrast between the creamy dessert and the crunchy cookie is absolutely delightful and makes for a very sophisticated presentation with very little extra effort.
Heritage Rediscovered in Your Modern Kitchen
Bringing these old-world flavors into your home doesn’t have to be a daunting task. By focusing on simple techniques and the right tools, you can honor your family’s history while still having time to enjoy the day. These crispy, golden treats are a reminder that some of the best things in life are the ones that connect us to our past while fitting into our present. If you enjoyed this journey into nostalgic baking, you might love our other Classic Cookie Recipes that bridge the gap between tradition and speed. I would love to see your beautiful creations, so please share your photos with our community on Instagram or Facebook. Happy baking, and may your kitchen always be filled with the warmth of sweet memories and delicious smells!
