Many home bakers struggle with shortbread that turns out as dry as a desert or as hard as a brick. I have spent years perfecting this method to make sure every single batch results in that legendary melt-in-your-mouth texture we all crave. By focusing on the temperature of your butter and the length of your chill time, we can transform a few simple staples into a vintage treasure that stays fresh for over a week in your favorite cookie jar.

This recipe is a tribute to the simplicity of Scottish tradition, updated with a few texture-focused tweaks to keep the crumb tender and light. It is a wonderful way to fill your kitchen with the scent of high-quality butter and vanilla, creating a cookie that is as satisfying to make as it is to eat with your afternoon tea.
The Secret to Melt-in-Your-Mouth Perfection
You will love these cookies because they strike the perfect balance between a crisp snap and a delicate, buttery crumb. Unlike many modern recipes that rely on complex additives, this shortbread celebrates the purity of its ingredients to achieve a texture that literally dissolves on the tongue. It is a reliable, proven method that solves the problem of crumbly, sandy cookies that fall apart too easily. These treats are designed to be jar-fresh for days, meaning you can bake a batch on Sunday and still enjoy a tender, perfect bite by the following Friday. It is the ultimate comfort food for those who appreciate the heritage of a well-made butter cookie.
Print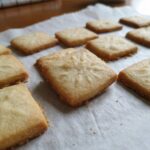
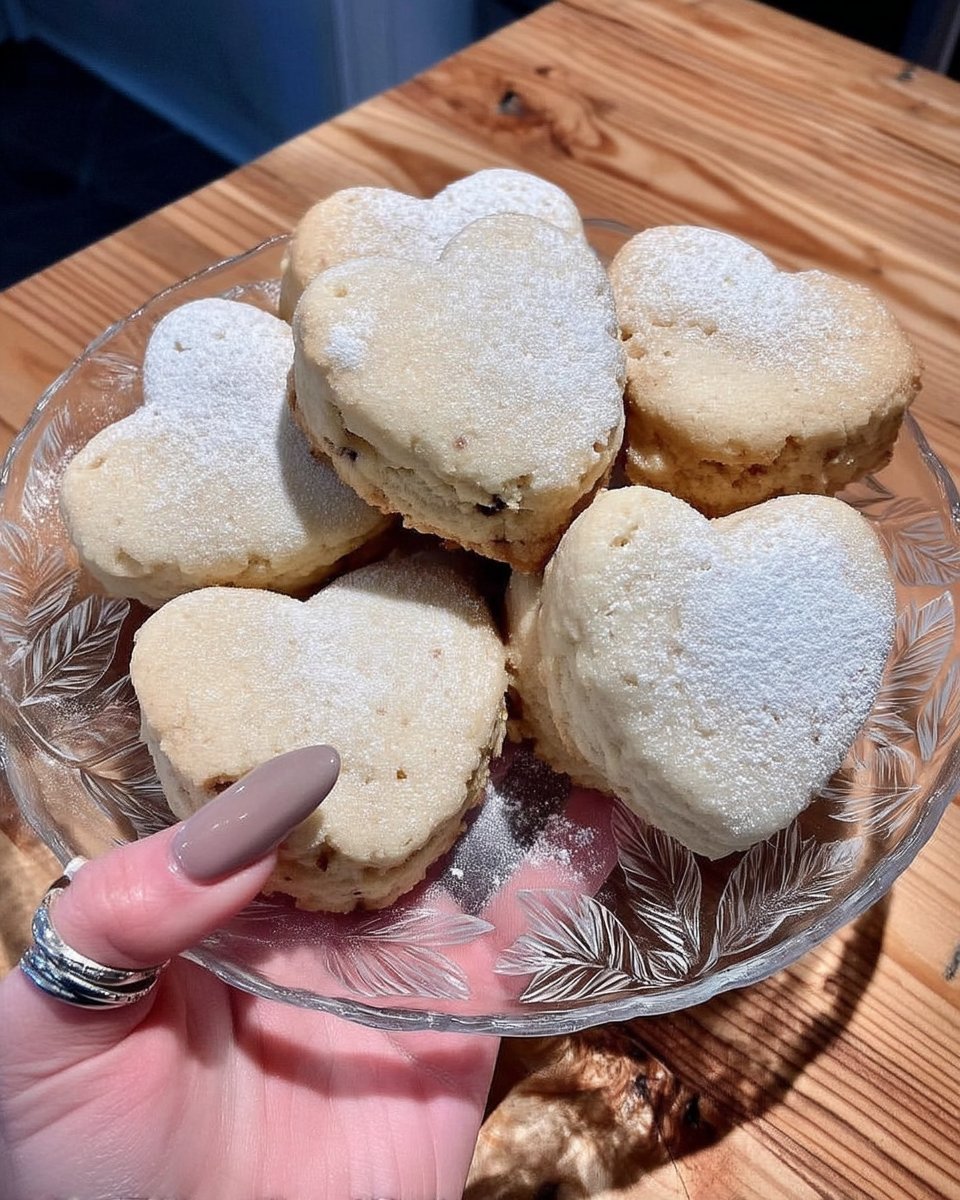
Shortbread Cookies
- Total Time: 1 hour 25 mins
- Yield: 16 cookies
- Diet: Vegetarian
Description
Experience the ultimate melt-in-your-mouth shortbread that balances a delicate crumb with rich, buttery flavor. This traditional recipe focuses on temperature and chilling techniques to ensure a perfect, bakery-quality cookie every time.
Ingredients
- 142g (10 tbsp) Unsalted Butter, room temperature
- 1/2 cup Confectioners’ Sugar
- 1/2 tsp Pure Vanilla Extract
- 180g (1 1/2 cups) All-Purpose Flour
- 1/2 tsp Kosher Salt
Instructions
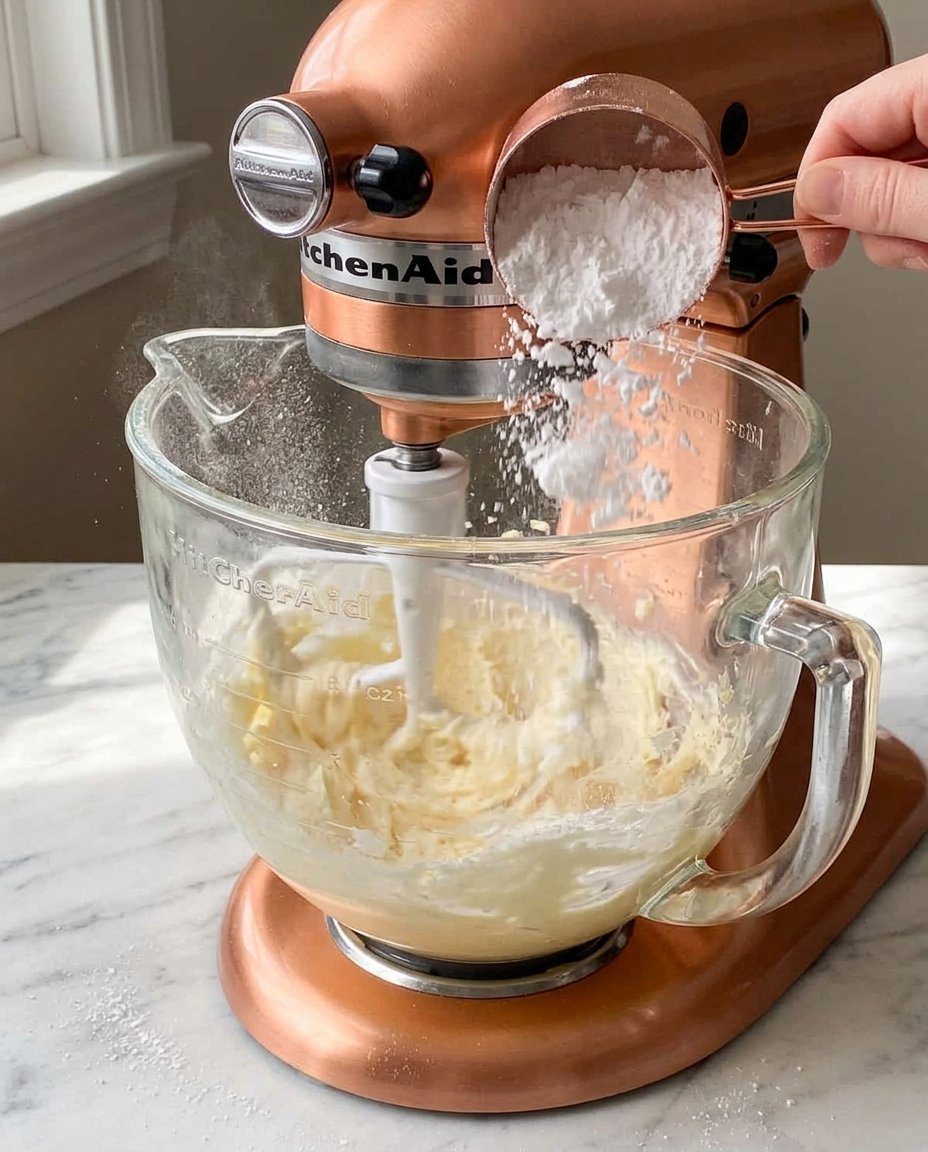
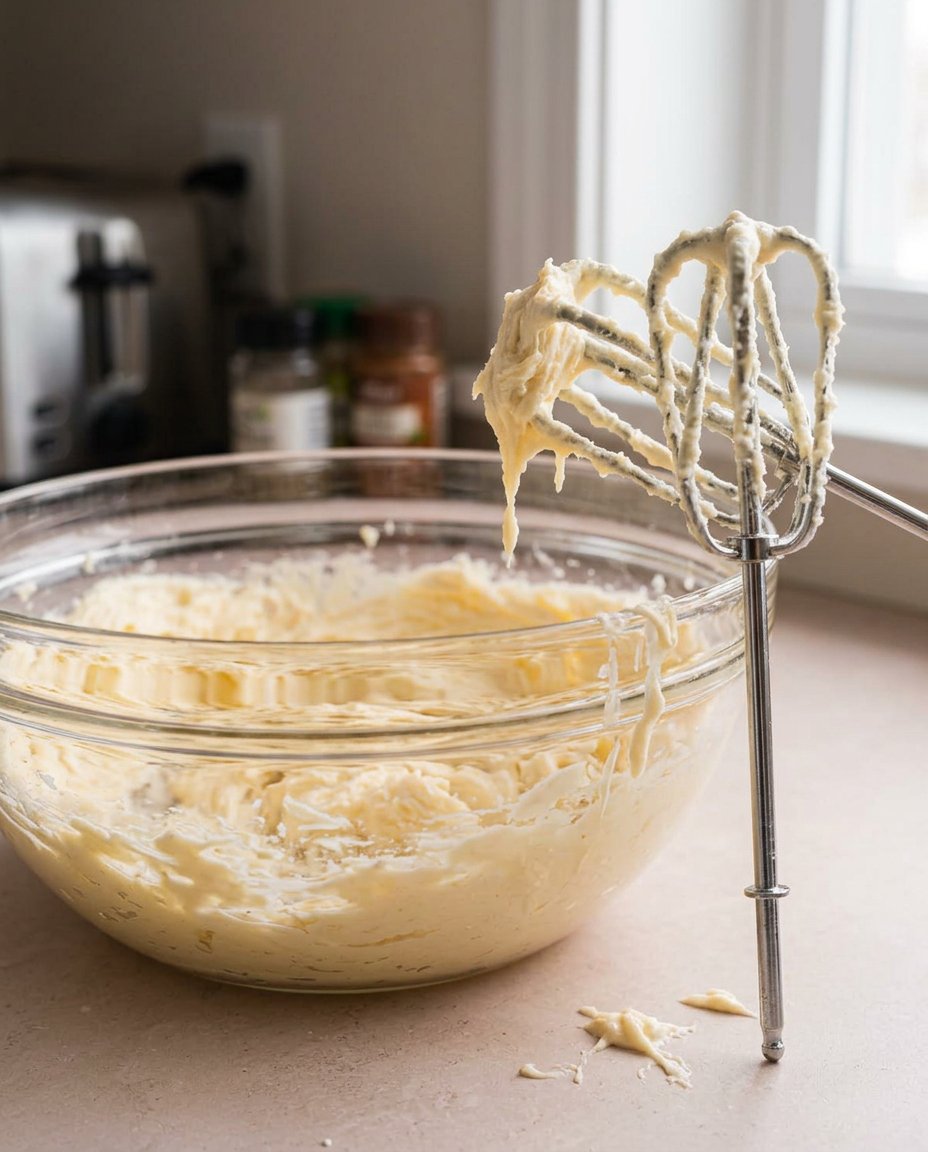
- Place room temperature butter and vanilla extract in a stand mixer with a paddle attachment and beat until smooth and creamy.
- Add the confectioners’ sugar and salt, then mix on low speed until fully combined, scraping the sides of the bowl as needed.
- Gradually add the all-purpose flour on the lowest setting, mixing only until the dough just begins to come together.
- Turn the dough onto plastic wrap, shape into a log or rectangle, wrap tightly, and refrigerate for at least 1 hour.
- Preheat your oven to 350F (177C) and slice the chilled dough into 1/2-inch thick pieces.
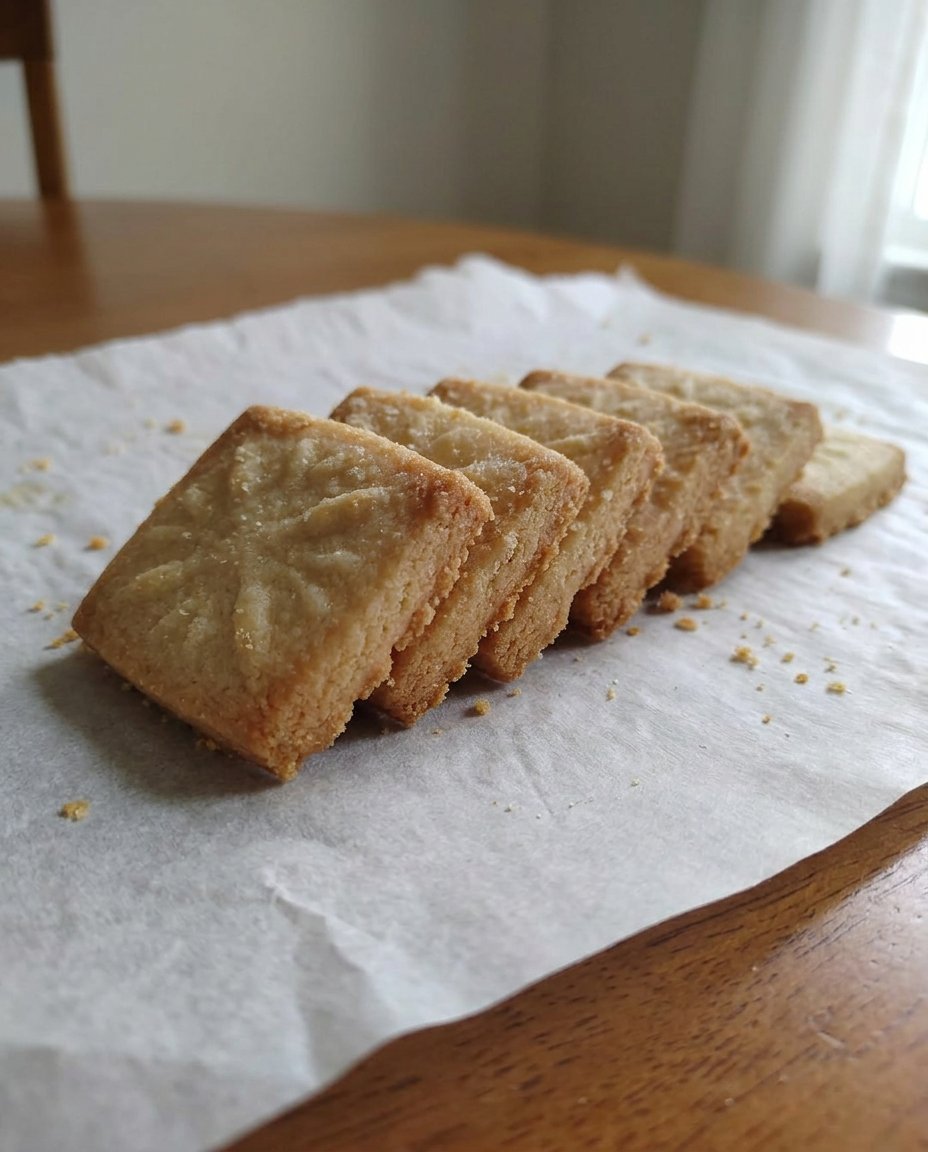
- Place slices on a lined baking sheet, prick the tops with a fork, and bake for 10 minutes until very pale gold.
- Cool completely on a wire rack to allow the cookies to firm up and set.
Notes
For the most delicate texture, use high-fat European-style butter and ensure it is fully at room temperature before you begin creaming. If your kitchen is warm and the dough feels soft while slicing, return it to the freezer for five minutes to ensure clean edges and prevent spreading.
- Prep Time: 15 mins
- Cook Time: 10 mins
- Category: Dessert
- Method: Baking
- Cuisine: Scottish
The Essentials for a Tender Crumb
To achieve the perfect texture, we must look at the building blocks of this classic treat. Every ingredient serves a purpose in maintaining moisture and ensuring a fine, delicate structure.
- Unsalted Butter (142g / 10 tbsp): This is the heart of the cookie. Using unsalted butter at room temperature allows you to control the salt content and makes sure the creaming process is smooth. High-quality butter provides the richness that defines a true shortbread.
- Confectioners’ Sugar (1/2 cup): I prefer powdered sugar over granulated because it contains a small amount of cornstarch. This helps create a much finer, tighter crumb that contributes to that melt-away sensation.
- Pure Vanilla Extract (1/2 tsp): While traditional Scottish shortbread is plain, a touch of vanilla adds a warm depth that rounds out the buttery flavor beautifully.
- All-Purpose Flour (180g / 1 1/2 cups): This provides just enough structure without making the cookie tough. Measuring by weight is key to preventing a dry, floury mess.
- Kosher Salt (1/2 tsp): A tiny pinch helps brighten the butter notes and balances the sweetness of the sugar.
The Texture-Focused Method
Step 1: Cream the Foundation
Start by placing your room temperature butter and vanilla extract in a stand mixer fitted with the paddle attachment. Beat them together until the mixture is smooth and creamy. This step is vital for incorporating the flavoring evenly into the fat.
Step 2: Sift and Combine
Add your confectioners’ sugar and salt to the bowl. Mix on a low speed until the sugar is fully integrated. Scrape down the sides of the bowl with a spatula to make sure no pockets of sugar are left behind, which could cause uneven browning.
Step 3: Incorporate the Flour
With the mixer on its lowest setting, gradually add the all-purpose flour. Mix just until the dough begins to come together. Over-mixing at this stage will develop too much gluten, which leads to a hard cookie instead of a tender one.
Step 4: Shape and Chill
Turn the dough out onto a piece of plastic wrap and shape it into a rectangular prism or a log. Wrap it tightly and place it in the refrigerator for at least one hour. This chilling time allows the butter to firm up and the flour to hydrate, which prevents the cookies from spreading in the oven.
Step 5: Slice and Indent
Preheat your oven to 350F (177C). Use a sharp knife to cut the chilled dough into 1/2-inch thick slices. Place them on a baking sheet lined with a silicone mat. Use a fork to press a pattern into the top of each cookie; this is not just for looks, but also helps steam escape for an even bake.
Step 6: Bake to Pale Perfection
Bake for approximately 10 minutes, rotating the tray halfway through. You are looking for a very pale gold color—do not let them brown too much, or they will lose their delicate texture. Let them cool completely on a wire rack to set the snap.
Mehmet’s Secrets for Lasting Softness
The biggest mistake people make is overbaking. These cookies should stay pale; if they turn dark brown, the moisture has been cooked out, and they will become rock-hard. For the best results, use European-style butter which has a higher fat content and less water. If you find your dough is too crumbly to slice, let it sit at room temperature for five minutes before cutting. To keep your cookies jar-fresh, place a small piece of bread in the container to maintain the perfect humidity level. For more inspiration on classic bakes, check out our collection of Classic Cookie Recipes. You can also look at these authentic shortbread techniques for more historical context on the bake.
Creative Twists on a Scottish Classic
While the original is hard to beat, you can easily adapt this recipe to suit your mood. For a citrusy brightness, add the zest of one lemon or orange to the butter during the creaming step. If you enjoy a bit of crunch, fold in 1/4 cup of finely chopped toasted pecans or walnuts before chilling the dough. For a more festive version, try dipping half of each cooled cookie into melted dark chocolate and sprinkling with sea salt. These variations are perfect for your Holiday Cookie Celebrations and make wonderful gifts that stay fresh during shipping.
How to Enjoy Your Buttery Treasures
These cookies are best enjoyed alongside a hot beverage that can stand up to their rich butteriness. A strong Earl Grey tea or a dark roast coffee is a classic pairing. If you are looking for Quick & Easy Cookies to serve at a party, these can be arranged on a platter with fresh berries and a dollop of lemon curd. They also make an incredible base for a simple dessert sandwich if you spread a little raspberry jam between two cookies. Always serve them at room temperature to make sure the fat is soft enough to melt on the tongue.
A Legacy of Buttery Goodness
Mastering the shortbread cookie is a rite of passage for any home baker who values texture and tradition. By following these steps and respecting the chill time, you create a treat that honors the past while staying fresh and delicious for the modern cookie jar. Whether you are baking these for a quiet afternoon or as part of your Cookie Decorating Traditions, the result is always a satisfying, buttery win. Please share your baking success with us and follow our journey for more texture-perfect recipes! Check us out on Pinterest, Instagram, and Facebook.


