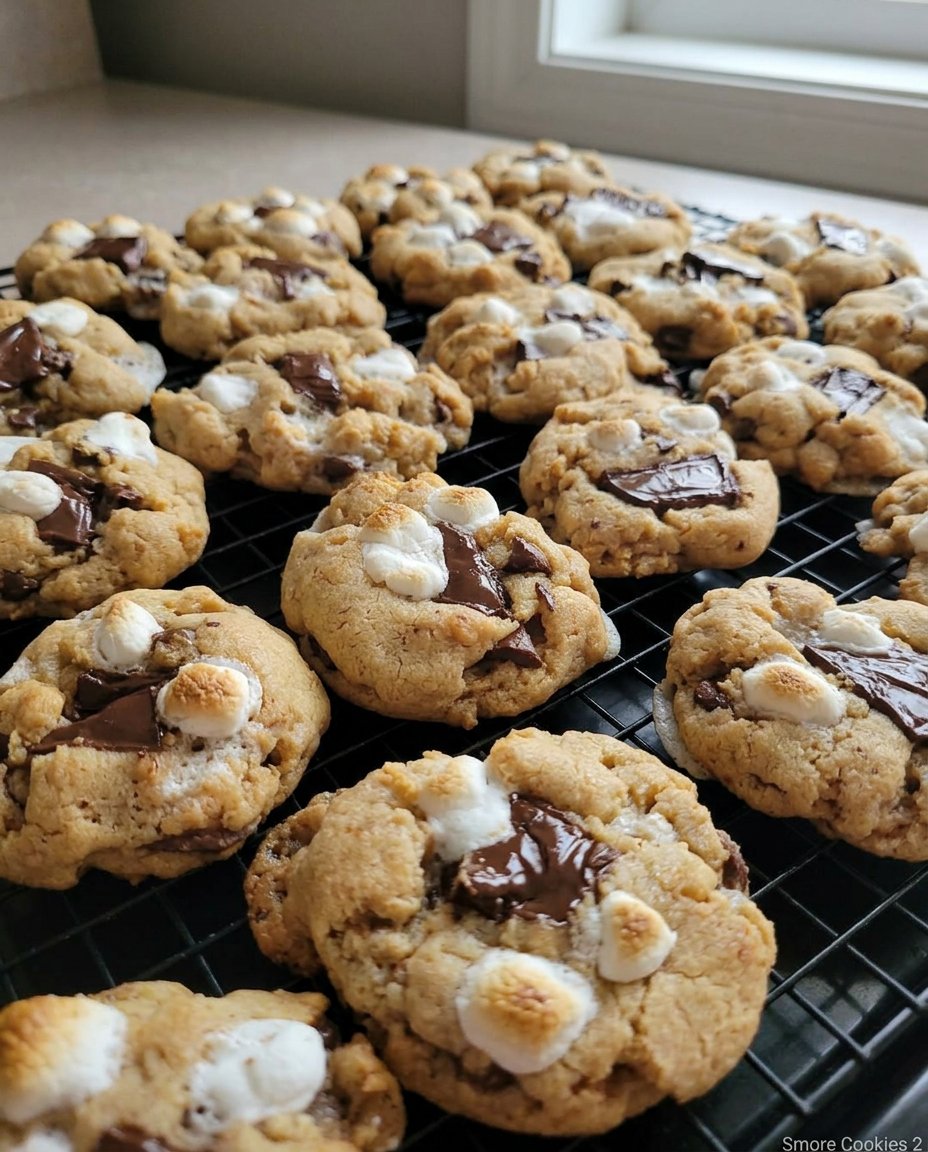
Whenever I pull out my Smore Cookies 2 recipe, I am instantly transported back to the summer of 1964, sitting on a weathered porch swing while the fireflies danced in the tall grass. My Grandma had a way of making every evening feel like a celebration, often surprising us with treats that tasted like a campfire gathered into a single bite. She believed that a cookie should be more than just sugar and flour; it should be a memory you can hold in your hand. This particular recipe was born from a rainy evening when we couldn’t go outside, so she brought the spirit of the crackling fire right into her warm, yellow kitchen.

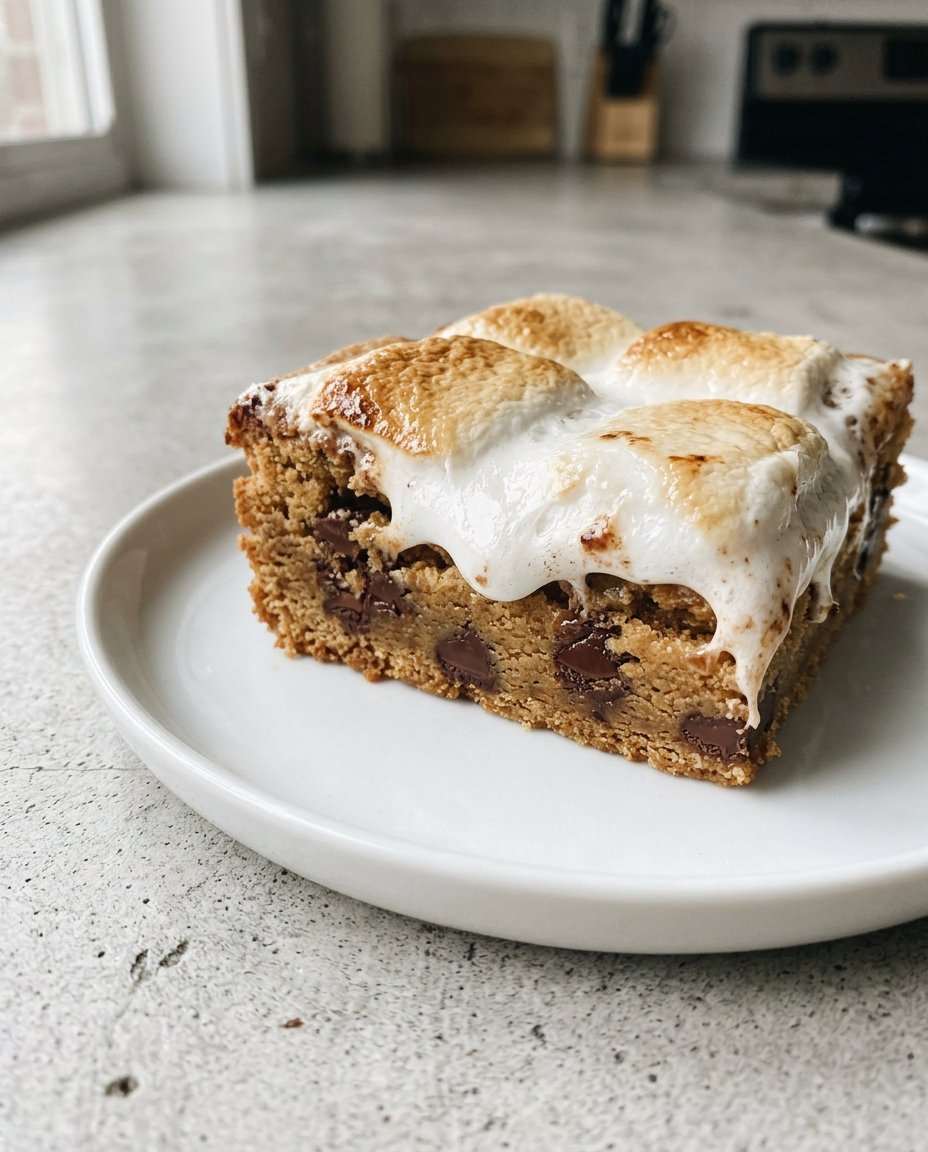
These cookies are a true labor of love, featuring a secret marshmallow heart that stays soft and gooey long after they come out of the oven. We use the traditional method of tucking the marshmallow deep inside the dough, which allows it to melt into a sweet, silken surprise without making a mess of your baking sheets. It is a timeless technique that I have preserved on a stained index card for decades, and now I am so pleased to share this bit of family heritage with your own kitchen. There is something truly magical about the way the toasted graham cracker crumbs mingle with the melting chocolate in this cherished recipe.
A Timeless Jar Favorite for Every Generation
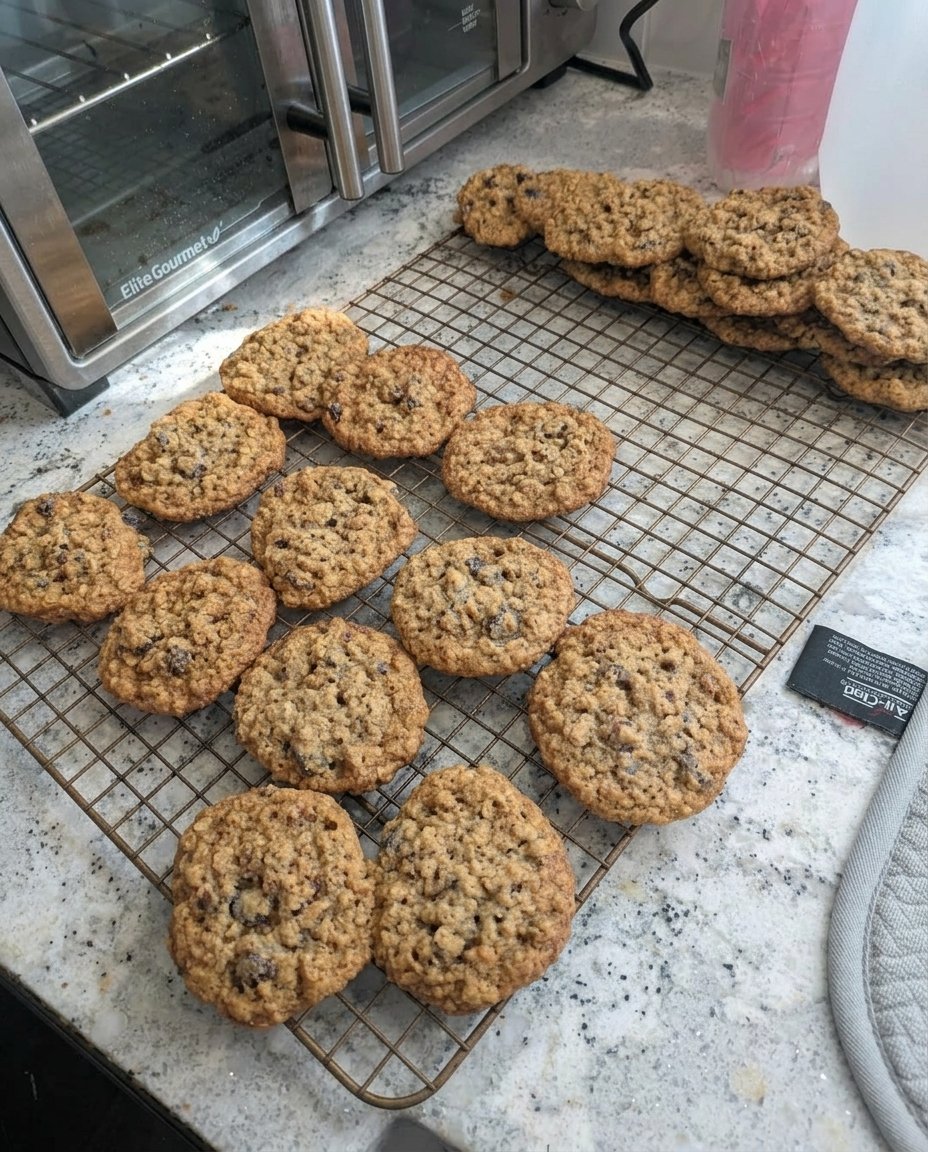
There is a specific kind of joy that comes from reaching into a heavy ceramic cookie jar and pulling out a treat that feels substantial and home-baked. These Smore Cookies 2 are exactly that—a reliable, comforting classic that never goes out of style because they rely on the simple flavors we have loved since childhood. You will love how the outside of the cookie offers a gentle crunch from the graham cracker pieces, while the interior remains incredibly tender and chewy. It is a texture that reminds me of the old-fashioned bakeries where everything was made from scratch and with a great deal of patience.
Another reason this recipe is such a treasure is its ability to stay fresh and soft for days on end. Unlike modern cookies that often turn hard or crumbly by the next morning, these maintain their heritage quality thanks to the way the marshmallow moisture interacts with the butter-rich dough. They are the perfect addition to a picnic basket or a potluck spread, bringing a touch of nostalgic warmth to any gathering. When you see the look on a child’s face as they discover the hidden marshmallow center, you will understand why this has remained a family favorite through so many years of changing fashions.
Print
Smore Cookies 2
- Total Time: 1 hour
- Yield: 6 cookies
- Diet: Vegetarian
Description
Enjoy a nostalgic taste of summer with these thick, buttery cookies featuring a hidden gooey marshmallow center and crunchy graham cracker pieces. These heritage-style treats perfectly capture the essence of a campfire s’more in a portable, soft-baked form.
Ingredients
- 1/2 cup unsalted butter, softened
- 1/4 cup granulated sugar
- 1/2 cup brown sugar, packed
- 1 teaspoon pure vanilla extract
- 1 large egg
- 1 1/2 cups all-purpose flour
- 1/2 teaspoon baking soda
- 1 pinch salt
- 1/2 cup semi-sweet chocolate chips
- 3 large marshmallows (halved) or 6 mini marshmallows
- 4 graham cracker sheets
Instructions
- In a medium-sized mixing bowl, whisk together the all-purpose flour, baking soda, and a pinch of salt.
- In a separate large bowl, beat the softened butter and granulated sugar for one minute, then add the brown sugar and continue beating until light and creamy.
- Add the egg and pure vanilla extract to the butter mixture and beat until well combined and glossy.
- Gradually add the dry flour mixture to the wet ingredients on the lowest mixer setting, mixing only until no white streaks remain.
- Gently fold the chocolate chips into the dough using a wooden spoon or spatula.
- Scoop out twelve portions of dough (about one tablespoon each); place a marshmallow piece between two portions and pinch the edges to seal the marshmallow completely inside, forming 6 large balls.
- Break three graham cracker sheets into 36 small pieces and press six pieces into the surface of each prepared dough ball.
- Place the cookie balls in the refrigerator to chill for at least thirty minutes.
- Preheat your oven to 350°F and bake the cookies on a large sheet for 11 to 13 minutes until the edges are light golden brown.
- Sprinkle crumbs from the remaining graham cracker sheet over the warm cookies and let them cool completely on the baking sheet to set the marshmallow.
Notes
To ensure the marshmallow stays inside the cookie, double-check that the dough seal is tight and there are no visible white spots before baking. If you prefer a more toasted flavor, you can briefly use a kitchen torch on the marshmallow centers if any part of them peek through the top after baking.
- Prep Time: 20 mins
- Cook Time: 12 mins
- Category: Dessert
- Method: Baking
- Cuisine: American
Simple Ingredients for Smore Cookies 2
To make these cookies just like Grandma did, we start with the basic pantry staples that have formed the backbone of American baking for a century. We use real, unsalted butter because the flavor is purer and more traditional than anything else. When you cream the butter with the granulated and brown sugars, you are building the foundation of that classic, deep flavor that defines a truly great homemade cookie. The brown sugar adds a hint of molasses warmth, which is essential for recreating that old-fashioned campfire profile.
- Unsalted Butter: Make sure it is softened to room temperature so it creams beautifully with the sugars.
- Granulated and Brown Sugar: This combination creates the perfect balance of sweetness and a soft, chewy texture.
- Pure Vanilla Extract: A generous teaspoon brings out the richness of the chocolate and the sweetness of the marshmallow.
- All-Purpose Flour: The standard for heritage baking, providing the right structure for our hidden surprises.
- Chocolate Chips: I prefer a high-quality semi-sweet chip to balance the sweetness of the marshmallow.
- Marshmallows: You can use large ones snipped in half or mini ones; they act as the gooey heart of the cookie.
- Graham Cracker Sheets: These provide the nostalgic crunch and that signature honey-wheat flavor we all remember.
The Heritage Method
Step 1: Prepare the Flour Mixture
In a medium-sized mixing bowl, whisk together your all-purpose flour, baking soda, and a pinch of salt. This step is vital to make sure the leavening is distributed evenly so your cookies rise with a beautiful, consistent dome. Set this bowl aside for a moment while we focus on the wet ingredients.
Step 2: Cream the Butter and Sugars
In a separate large bowl, take your softened butter and the granulated sugar. Beat them together until the mixture looks smooth and pale, which usually takes about a minute of steady work. Add the brown sugar and continue to beat for another thirty seconds until the mixture is light and creamy, just like the base of an old-fashioned sponge cake.
Step 3: Add the Egg and Vanilla
Crack your large egg into the butter mixture and pour in the pure vanilla extract. Beat these in until everything is well combined and the batter looks glossy. This is where the kitchen starts to smell like a dream, with that warm vanilla scent filling the air.
Step 4: Incorporate the Dry Ingredients
Turn your mixer to its lowest setting and gradually add the flour mixture to the wet ingredients. Mix only until there are no longer any white streaks of flour visible. It is important not to overwork the dough at this stage, as we want to keep the texture tender and soft.
Step 5: Fold in the Chocolate
Using a sturdy wooden spoon or a spatula, gently fold in the chocolate chips. Make sure they are spread throughout the dough so every bite has a bit of chocolatey goodness.
Step 6: Create the Marshmallow Center
Using a tablespoon measure, scoop out six portions of dough. Take a marshmallow piece and press it firmly on top of one dough ball. Then, scoop another tablespoon of dough and place it on top of the marshmallow. Use your fingers to pinch and seal the edges, then roll it into a smooth ball so the marshmallow is completely hidden inside.
Step 7: The Graham Cracker Layer
Take three of your graham cracker sheets and break them into small pieces—aim for about 36 pieces in total. Press three of these small cracker shards into the surface of each dough ball. This gives the cookies their beautiful, rustic appearance and a lovely crunch.
Step 8: Chill the Dough
Place your prepared cookie balls in the refrigerator for at least thirty minutes. This brief rest allows the butter to firm up again, which helps the cookies hold their shape in the oven and prevents the marshmallow from escaping too early.
Step 9: Bake to Golden Perfection
Preheat your oven to 350F. Space six cookies on a large baking sheet and bake for 11 to 13 minutes. You are looking for the edges to just start turning a light golden brown while the centers still look a bit soft. This ensures they stay chewy once cooled.
Step 10: The Final Touch
As soon as you pull the tray from the oven, crush your remaining graham cracker sheet with your fingers and sprinkle the crumbs over the warm cookies. Let them sit on the baking sheet until they are completely cool; this is very important so the marshmallow sets properly and doesn’t stick to your pan.
Grandma’s Secrets for the Perfect Batch

One of the most important things to remember when making these cookies is the seal. You want to be very careful to wrap the dough entirely around the marshmallow. If there is a small gap, the marshmallow will bubble out and stick to the pan, making it harder to remove the cookies later. If you find your dough is sticking to your hands, a light dusting of flour can help you manage the rolling process more easily. For those who love a deep, complex flavor, I often suggest looking at our Classic Cookie Recipes to see how different fats can change the bake.
Another trick I learned over the years is to use a heavy-duty baking sheet. Thin pans can often cause the bottoms of the cookies to brown too quickly before the marshmallow has a chance to soften. If you only have thin pans, try stacking two of them on top of each other to provide better insulation. You can also read more about traditional cookie techniques in this guide on smores cookies which shares some wonderful insights on small-batch baking. Finally, always store these in a tin or a jar with a tight lid; they will stay soft for up to a week if kept away from the air.
Heritage Twists on a Family Classic
While the original recipe is perfection in its own right, there are several ways you can put your own stamp on these treats. For a more sophisticated flavor, you might try browning your butter before mixing it with the sugars; this adds a nutty, toasted aroma that pairs beautifully with the graham crackers. Some members of our family like to use dark chocolate chunks instead of milk chocolate chips to provide a bit of bitterness that cuts through the sweet marshmallow center. If you are baking for a special occasion, you might find inspiration in our Holiday Cookie Celebrations where we discuss adding festive spices like cinnamon or nutmeg to the dough.
Another lovely variation is to use different types of crackers. While traditional honey graham crackers are the standard, cinnamon-dusted grahams or even crushed digestive biscuits can offer a unique flavor profile that still feels very nostalgic. You can also try using flavored marshmallows, like vanilla bean or even toasted coconut, to add an unexpected layer of flavor. No matter which path you choose, the heart of the cookie remains a tribute to simple, honest baking that brings people together around the kitchen table.
How to Share the Tradition
There is no better way to serve these cookies than with a tall, cold glass of milk. It is the classic pairing that has stood the test of time, helping to wash down the rich chocolate and sweet marshmallow. I love to pile these high on a vintage milk-glass platter when company comes over, or simply leave them in a clear glass jar on the counter for the grandkids to find. If you are looking for more ways to present your treats, our Quick & Easy Cookies section has many ideas for simple yet beautiful serving styles.
For a special evening treat, try warming a cookie in the oven for just a minute before serving. This softens the marshmallow heart again, making it feel like it was just pulled from a campfire. These are also wonderful when crumbled over a bowl of high-quality vanilla bean ice cream for a truly decadent dessert. Sharing these cookies is about more than just food; it is about passing down a feeling of home and the simple pleasures that make life sweet. Whether it’s a quiet Tuesday or a celebratory gathering, these cookies bring a touch of heritage to every plate.
The Sweet Heritage of Home Baking
Baking these cookies is a way to keep the stories of our ancestors alive in our own kitchens. Every time the scent of toasted graham crackers fills the air, I feel a little closer to the generations of women who came before me, baking with love and a sense of hope for the future. I hope this recipe brings as much warmth and joy to your family as it has to mine over the years. For more ways to add a personal touch to your bakes, do look into our Cookie Decorating Traditions. Please share your baking photos with us on Facebook or tag us on Instagram so we can see your beautiful creations. You can also find more nostalgic inspiration on our Pinterest boards. Keep the cookie jar full and your heart even fuller.

