My mother, Pauline, made the most wonderful thumbprint cookies every Sunday, but her recipe lived only in her head. I spent years chasing that specific melt-in-your-mouth shortbread texture until I stumbled upon a vintage recipe from a baker named Mitzi. Finding a recipe that matched my own family name felt like a sign from the baking heavens.

This version respects the original 1950s flavor but uses modern shortcuts to get you from dough to cooling rack in just 50 minutes. You get that classic buttery crumble and sweet jam center without the long wait. It is the perfect way to bring a little heritage magic into your busy modern kitchen.
A Perfect Treat for Any Occasion
You are going to love these because they offer the ultimate balance of rich, buttery shortbread and sweet, tangy fruit. Most vintage recipes require hours of chilling or complicated rolling, but I have simplified this to a quick drop-and-press method that saves you time without sacrificing that nostalgic quality. It is a reliable recipe that works every single time, whether you are a seasoned baker or just starting out.
Another reason to adore these is the texture. By using a mix of powdered sugar in the dough and granulated sugar for the coating, you get a cookie that is tender on the inside with a delightful little crunch on the outside. This recipe is also incredibly versatile. I provide two different ways to shape them—one for those who want a round, classic look and another for those who believe the jam is the best part. It is heritage flavor made for the way we live today.
Print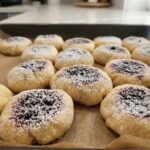
Thumbprint Cookies
- Total Time: 50 mins
- Yield: 24 cookies
- Diet: Vegetarian
Description
These classic thumbprint cookies feature a buttery, melt-in-your-mouth shortbread base finished with a sweet, glassy jam center. This modernized vintage recipe streamlines the process to deliver a professional-looking treat with the perfect balance of crumble and fruitiness in under an hour.
Ingredients
- 1/2 cup unsalted butter, softened
- 1/3 cup powdered sugar
- 1 large egg yolk
- 1/2 teaspoon vanilla extract
- 1/4 teaspoon fine salt
- 1/8 teaspoon almond extract
- 1 1/4 cups all-purpose flour
- 1/3 cup fruit jam (raspberry, apricot, or strawberry)
- 1/4 cup white granulated sugar (for rolling)
- 1/2 cup powdered sugar (for icing)
- 1 tablespoon milk
Instructions
- Preheat your oven to 325 degrees F (165 degrees C) and line a large baking sheet with a silicone mat or parchment paper.
- In a large bowl, use a rubber spatula to cream together 1/3 cup powdered sugar and softened butter until the mixture is smooth and creamy.
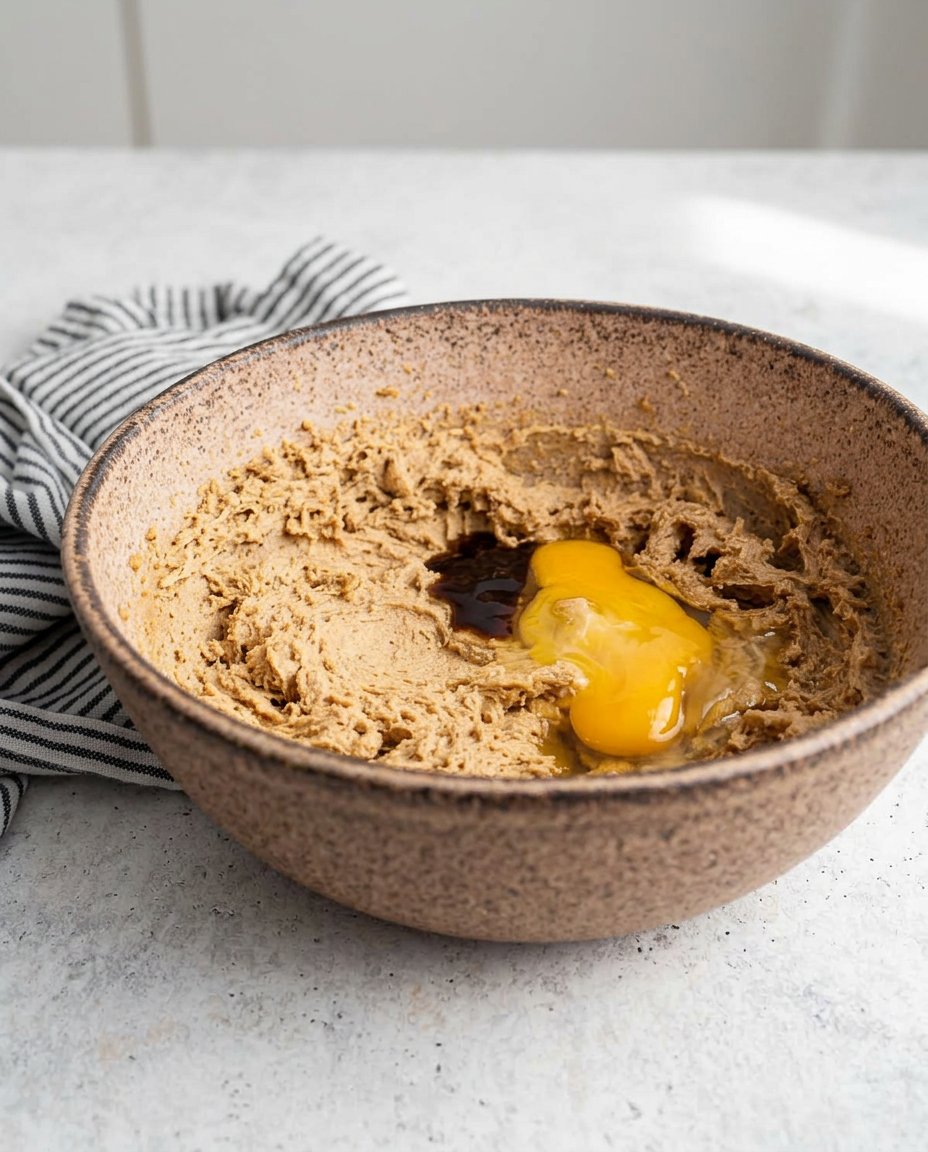
- Stir in the egg yolk, vanilla extract, fine salt, and almond extract, mixing until the color is uniform and ingredients are fully combined.
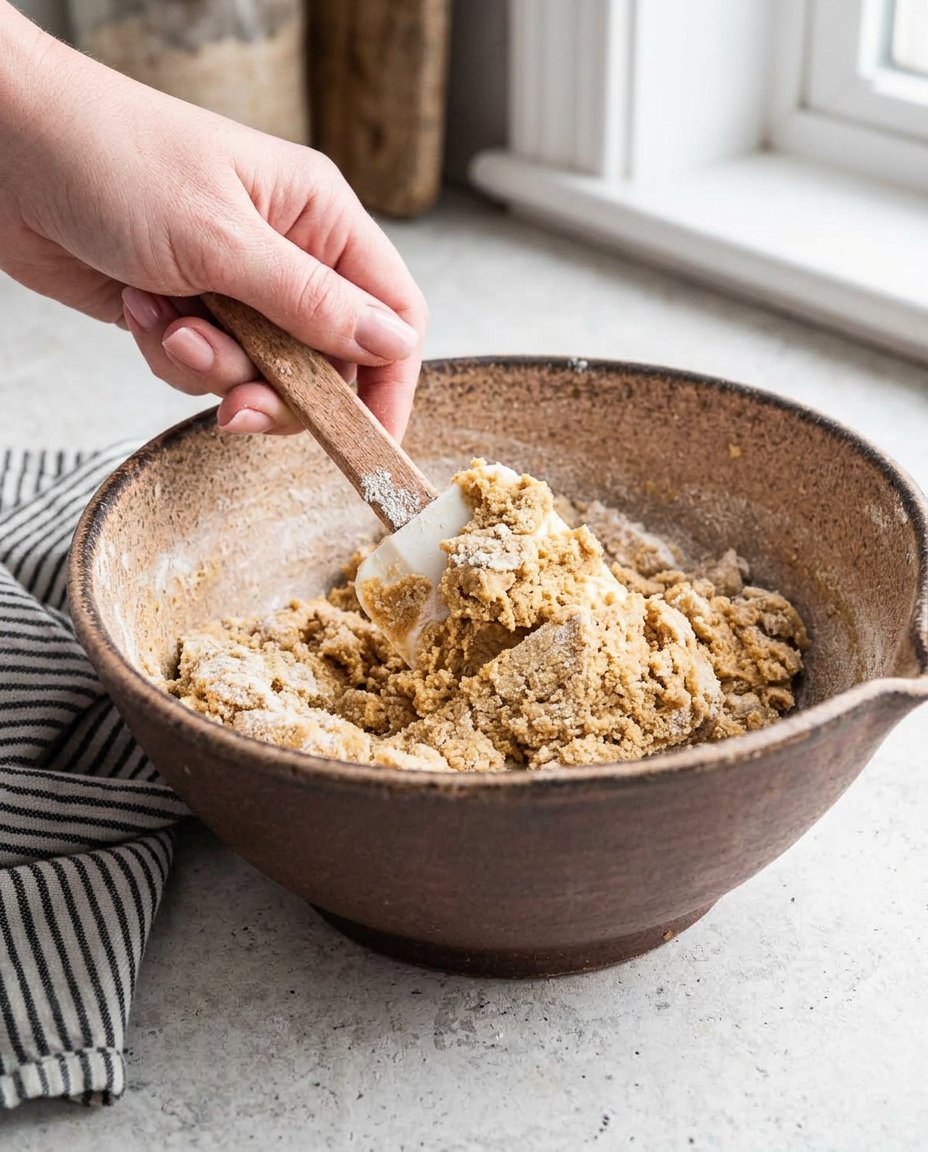
- Add the all-purpose flour to the wet ingredients and blend with the spatula until the dough just comes together into a soft mass.
- Portion the dough into 1/2-ounce balls using a small scoop, roll each in white granulated sugar, and place them several inches apart on the baking sheet.
- Create an indentation in the center of each ball using the end of a wooden spoon for a rounder shape or your thumb for a wider, shallower well.
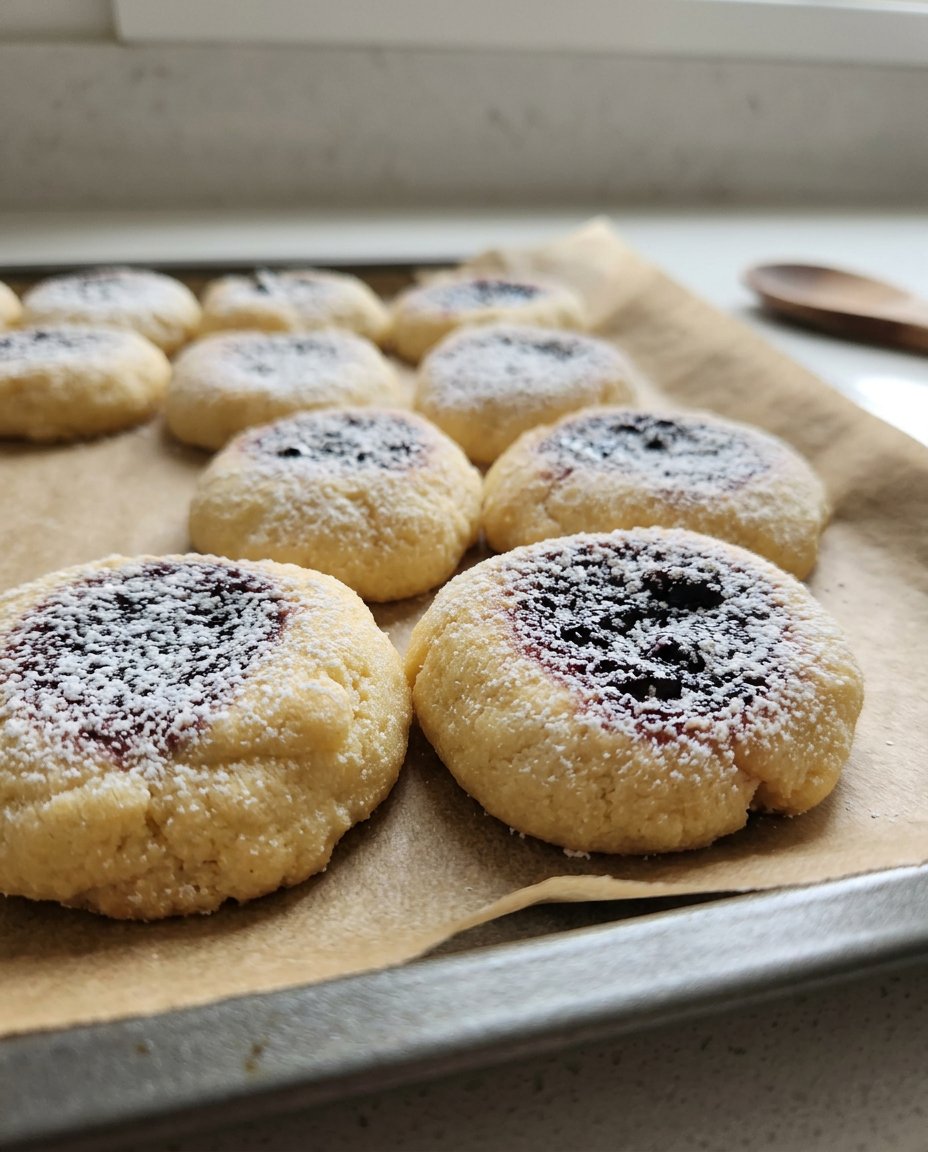
- Spoon your chosen jam into the centers, tap the tray to settle the filling, and bake for 15 minutes until the edges are a very light golden brown.
- Let the cookies rest on the sheet for 5 minutes before transferring to a wire rack to cool, then whisk the icing ingredients and pipe a zigzag pattern over the tops.
Notes
To ensure your cookies have a perfectly smooth finish, use a high-quality preserve or jam rather than a jelly, which can sometimes become too liquid in the oven. If you prefer a very clean look, you can slightly warm the jam in the microwave for a few seconds before filling to help it settle into a glassy pool without air bubbles. These cookies stay fresh and tender for several days when stored in an airtight container at room temperature.
- Prep Time: 20 mins
- Cook Time: 15 mins
- Category: Dessert
- Method: Baking
- Cuisine: American
Simple Pantry Ingredients
To make these classic treats, you only need a few basic items that are likely already in your kitchen. We keep things simple to let the high-quality butter and fruit flavors shine through. Using room temperature ingredients is the secret to getting that creamy consistency without having to use a heavy mixer for a long time.
- Unsalted Butter: This provides the rich base. Make sure it is soft so it blends easily with the sugar.
- Powdered Sugar: I use this in the dough because it contains a bit of cornstarch, which helps create that melt-in-your-mouth feel Grandma always achieved.
- Egg Yolk: Adding just the yolk instead of the whole egg makes the dough richer and prevents it from becoming too cake-like.
- Vanilla and Almond Extracts: Vanilla is standard, but a tiny hint of almond extract is the secret shortcut to making these taste like they came from a high-end vintage bakery.
- All-Purpose Flour: This gives the cookies their structure. Be sure to measure it correctly so the dough isn’t too dry.
- Fruit Jam: You can use raspberry, apricot, or even strawberry. I recommend a high-quality preserve for the best flavor.
- White Sugar: This is for rolling the dough balls, giving them a beautiful sparkle and a bit of texture.
Quick Method
Step 1: Prep Your Kitchen
Preheat your oven to 325 degrees F (165 degrees C). This lower temperature ensures the cookies bake evenly without browning too quickly. Line a large baking sheet with a silicone mat or parchment paper to prevent sticking and make cleanup a breeze.
Step 2: Cream the Base
In a large bowl, use a rubber spatula to mix the 1/3 cup of powdered sugar and the softened butter. Work them together until the mixture is smooth and creamy. This manual method keeps the dough dense and short, just like traditional shortbread.
Step 3: Add the Flavors
Stir in the egg yolk, vanilla extract, fine salt, and that tiny bit of almond extract. Mix well until everything is fully combined and the color is uniform. The almond scent will start to make your kitchen smell wonderful immediately.
Step 4: Incorporate the Flour
Add the all-purpose flour to the wet ingredients. Use your spatula to blend it in until the dough just comes together. Be careful not to overmix here; you want a tender cookie, not a tough one.
Step 5: Shape and Roll
Use a small sorbet scoop or a tablespoon to portion the dough into 1/2-ounce balls. Roll each ball in a plate of white sugar until coated, then roll it again between your palms to press the sugar in. Place them several inches apart on your prepared baking sheet.
Step 6: Create the Thumbprints
For rounder cookies, use the end of a wooden spoon dusted with powdered sugar to poke a deep well in the center. For flatter, jammier cookies, simply use your thumb to press a large, shallow indentation into each ball.
Step 7: Fill and Bake
Spoon your chosen jam into the centers. Tap the baking sheet firmly against the counter once or twice to help the jam settle and remove air bubbles. Bake for 15 minutes until the edges are a very light golden brown. Let them rest on the sheet for 5 minutes before moving them to a wire rack.
Step 8: The Finishing Touch
Once the cookies are completely cool, whisk together the icing ingredients. Pipe a zigzag pattern over the top for a professional look. Let the icing set for about 15 minutes before serving.
Meagan’s Quick Wins
One of my favorite time-saving tips is to skip the chilling process entirely. While many old-fashioned recipes insist on hours in the fridge, this specific ratio of butter to flour is designed to hold its shape perfectly at room temperature. If you find your hands are running warm while rolling, just rinse them in cold water for a moment to keep the dough from sticking. For the most Quick & Easy Cookies, use a small zip-top bag with the corner snipped off to pipe your jam into the centers—it is much faster and cleaner than using a spoon.
Another trick for a perfect finish is to warm your jam in the microwave for about 10 seconds before filling. This makes it more fluid, so it settles into a perfectly smooth, glassy pool inside the cookie. If you are worried about the cookies cracking when you press your thumb in, make sure your dough is well-mixed and smooth. If a crack does appear, just use your damp finger to gently smooth the edges back together before baking.
Quick Twists
While jam is the traditional choice, you can easily change these up to suit your family’s tastes. Try filling the centers with lemon curd for a bright, zesty flavor, or use Nutella for a rich chocolate-hazelnut treat that kids absolutely love. You can even swap the white sugar coating for crushed nuts if you want a bit more crunch and a savory edge. If you enjoy experimenting with different flavors, check out our other Classic Cookie Recipes for more inspiration.
For a holiday version, use red raspberry jam and green mint-flavored icing to make them look festive without any extra work. You can also experiment with different extracts; swap the almond for peppermint or lemon extract to completely change the profile of the cookie base. The possibilities are endless, and because the base recipe is so sturdy, it can handle almost any simple addition you throw at it.
Modern Sharing
These cookies are wonderful for more than just a Sunday afternoon treat. They pack beautifully into lunchboxes because the jam stays put and the cookie is sturdy enough not to crumble into dust by noon. I love serving these on a vintage platter alongside some fresh fruit for a quick weeknight dessert that feels special. For more ideas on presenting your treats, look through our Holiday Cookie Celebrations guide.
If you are hosting a gathering, these are the perfect size for a dessert tray. Their bright centers add a pop of color that naturally draws the eye. They also pair exceptionally well with a hot cup of tea or coffee, as the buttery shortbread is designed to be enjoyed with a warm beverage. Because they look so impressive with the piped icing, they make wonderful gifts when tucked into a simple tin with a bit of parchment paper between the layers.
Heritage Rediscovered
Bringing these thumbprint cookies back into my regular baking rotation has been such a joy. They remind me that we don’t need all day to create something that tastes like a treasured memory. By using these modern methods, we can keep our family traditions alive even when our schedules are packed. I hope these become a staple in your home just as they have in mine. For more ways to make your baking look beautiful and traditional, visit our section on Cookie Decorating Traditions.
If you enjoyed this recipe, please share your results with me! I would love to see which jam flavors you chose. You can find more quick heritage recipes and join our community on Pinterest, Instagram, and Facebook. Happy baking!


