For years, I watched spritz cookies turn into dry, crumbly pucks by the second day. I’ve spent seasons refining this heritage recipe to guarantee every buttery shape stays tender and melt-in-your-mouth soft. This version preserves the delicate snap of a classic spritz while adding the moisture retention needed for a long-lasting treat that won’t go stale.

These Vanilla Spritz Cookies are a masterclass in balance, using room-temperature butter to create a dough that flows perfectly through a press. The addition of almond extract provides that nostalgic bakery aroma that fills the house as they bake. You’ll find these are the most reliable, tender cookies for your holiday tins or everyday snacking, staying fresh for a full week.
A Perfect Treat for Any Occasion
You will love these cookies because they solve the oldest problem in the cookie jar: the dreaded dry spritz. Most vintage recipes focus on a crisp snap, but they often sacrifice moisture to get there. My approach focuses on a specific creaming method that aerates the butter without overworking the flour, resulting in a cookie that is structurally sound enough for the press but remarkably tender to the bite.
These cookies are also incredibly versatile. While many see them as a holiday staple, the base vanilla and almond flavor profile makes them a wonderful companion for afternoon tea or a light summer dessert. Because they freeze so well, you can have a batch of dough ready to go whenever the craving strikes, making them a reliable treasure in your baking repertoire. They stay soft and chewy for days, proving that you don’t have to choose between beautiful shapes and a satisfying texture.
Print
Vanilla Spritz Cookies
- Total Time: 28 mins
- Yield: 48 cookies
- Diet: Vegetarian
Description
These buttery, melt-in-your-mouth vanilla spritz cookies are designed to stay tender and soft for days. Using a specific creaming method and a touch of almond extract, they offer a nostalgic bakery flavor that is perfect for any festive occasion or tea-time snack.
Ingredients
- 226g (2 sticks) unsalted butter, softened to room temperature
- 1 cup granulated sugar
- 1 large egg
- 1 teaspoon pure vanilla extract
- 1/2 teaspoon almond extract
- 291g (2 1/3 cups) all-purpose flour, spooned and leveled
- 1/2 teaspoon salt
Instructions
- Preheat oven to 350°F (177°C) and prepare unlined or silicone-lined baking sheets.
- In a large bowl, cream the softened butter and granulated sugar on medium-high speed for 3 minutes until pale and smooth.
- Add the egg, vanilla extract, and almond extract, then beat on high for 1 minute until fully emulsified.
- On low speed, gradually mix in the flour and salt until the dough is uniform and pliable.
- Load the dough into a cookie press and click shapes onto the cool baking sheets, spaced 2 inches apart.
- Bake for 7 to 9 minutes until the edges are just barely set; cool on the pan for 5 minutes before transferring to a wire rack.
Notes
To ensure your cookies release perfectly from the press, avoid using parchment paper, which can be too slippery for the dough to grip. If your kitchen is warm, chill the loaded cookie press for 10 minutes before use to help the dough hold its intricate patterns during the baking process.
- Prep Time: 20 mins
- Cook Time: 8 mins
- Category: Dessert
- Method: Baking
- Cuisine: American
The Soft Secret Ingredients

To achieve that perfect chew and moisture retention, every ingredient in this list serves a specific purpose for the final texture. We focus on high-quality fats and precise flour measurements to make certain the dough is neither too oily nor too crumbly.
- Unsalted Butter: Use two sticks (226g) of high-quality butter. It must be truly softened to room temperature—not melted—to allow the sugar to create tiny air pockets during creaming.
- Granulated Sugar: This provides the sweetness and helps in the creaming process, creating a smooth dough that passes through the press plates without snagging.
- Large Egg: The egg acts as our binder and provides the necessary moisture to keep the cookies from becoming brittle.
- Pure Vanilla and Almond Extracts: This combination creates the signature “heritage” flavor. The almond extract is the secret to that professional bakery finish.
- All-Purpose Flour: Use 2 and 1/3 cups (291g), making sure to spoon and level your measuring cups. This prevents adding too much flour, which is the primary cause of dry, hard cookies.
- Salt: A half teaspoon balances the richness of the butter and sugar, making the vanilla notes pop.
Using these simple staples, we build a dough that is pliable and forgiving, perfect for those who want to spend more time decorating and less time struggling with a stubborn cookie press.
The Texture Process
Step 1: Prep Your Ingredients and Pans
Preheat your oven to 350°F (177°C). Line two or three large baking sheets with silicone baking mats, or use nonstick sheets with no liner. Avoid parchment paper here; the dough needs the grip of the pan or a silicone mat to release from the press properly. If you have space, put your baking sheets in the fridge for a few minutes; the dough adheres better to a cool surface.
Step 2: Creaming the Foundation
In a large bowl, use a handheld or stand mixer with the paddle attachment. Beat the softened butter and granulated sugar together on medium-high speed for about 3 minutes. You are looking for a smooth, pale mixture. This step is vital for a light, tender crumb that won’t feel heavy or dense.
Step 3: Emulsifying the Flavors
Add the egg, vanilla extract, and almond extract to the butter mixture. Beat on high speed for about 1 minute until everything is fully combined. Scrape down the sides and the bottom of the bowl to make certain no butter streaks remain, then beat again briefly. This emulsification is what keeps the cookies moist as they bake.
Step 4: Incorporating the Dry Ingredients
Turn the mixer to low speed and gradually add the flour and salt. Once the flour is mostly in, turn the speed up to high and beat until the dough is completely uniform. The dough should be soft, pliable, and slightly tacky but not sticky enough to cling to your fingers.
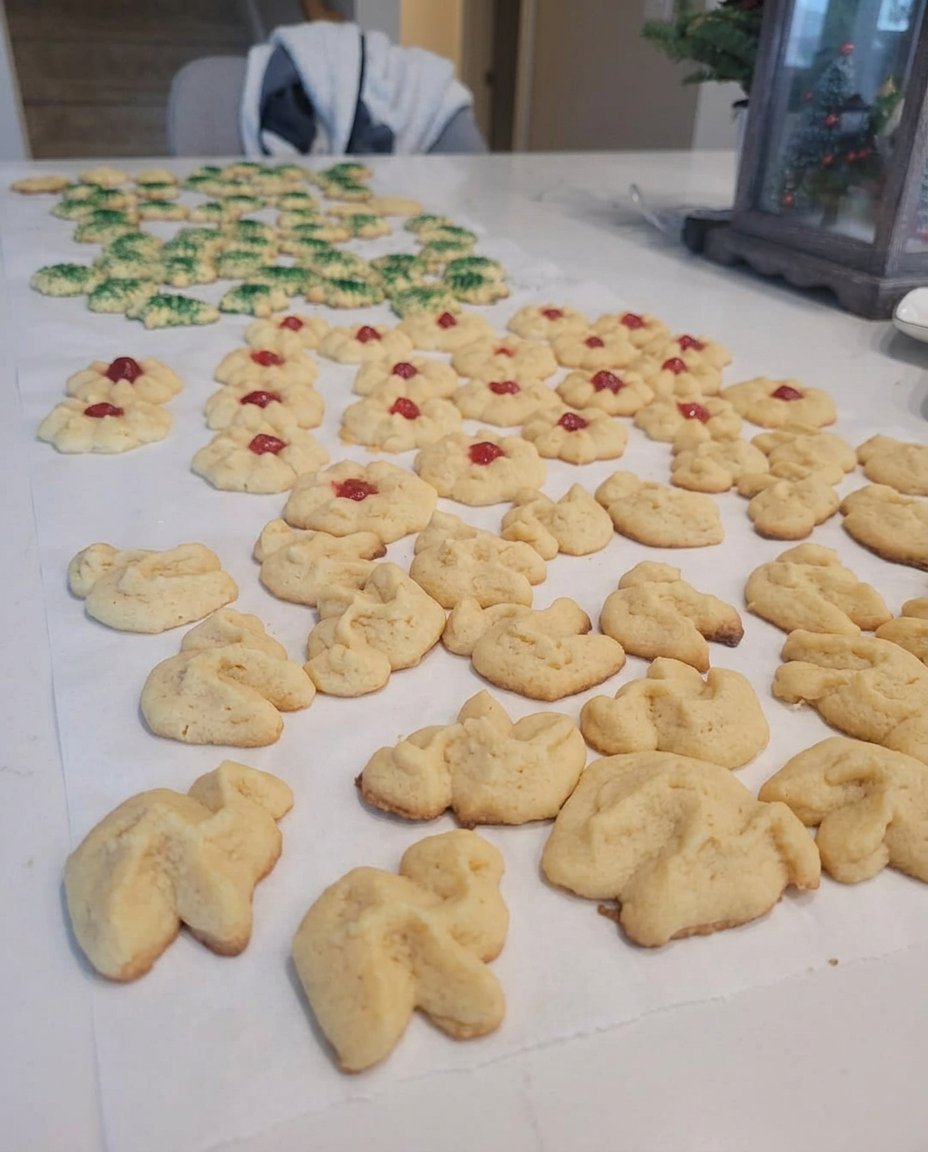
Step 5: Pressing the Shapes
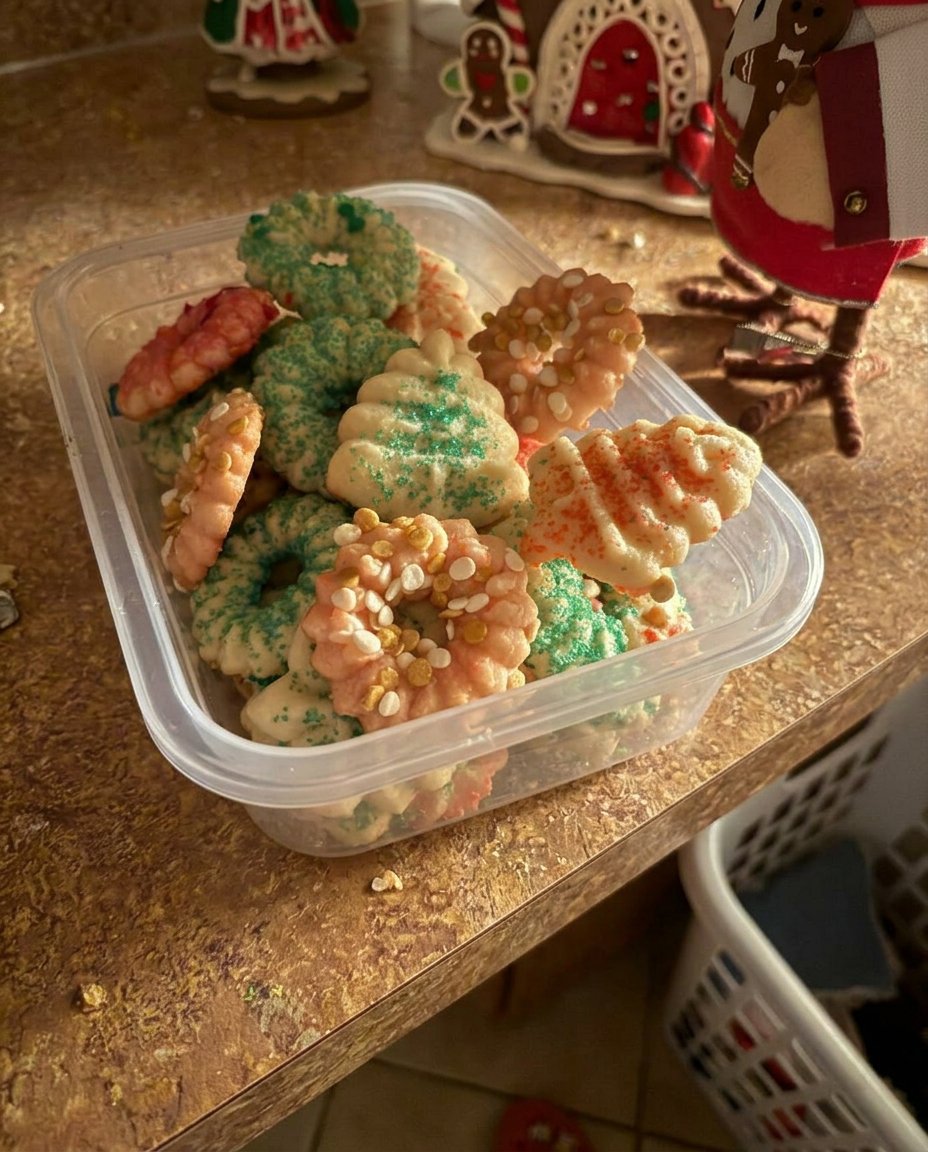
Follow your manufacturer’s instructions to load your cookie press. Hold the press completely perpendicular to your cool baking sheet and click out the cookies, leaving about 2 inches of space between them. If you want to add sprinkles, lightly brush the tops with a tiny bit of water first so they stay put during the bake.
Step 6: Baking for Tenderness
Bake for 7 to 9 minutes. The secret to a soft spritz is to pull them out when the edges are only very lightly browned. If they look dark gold, they will be crunchy rather than tender. Let them rest on the warm baking sheet for 5 minutes before moving them to a wire rack to cool completely.
Freshness Secrets and Texture Wisdom
One of my favorite tricks for keeping these cookies soft for days is to add a tiny slice of white bread to the airtight container where you store them. The cookies will pull moisture from the bread, keeping them perfectly tender. Also, never over-flour your work surface if you are doing manual shapes; too much flour is the enemy of the soft cookie. If you are looking for more ways to master your oven, check out our guide on Classic Cookie Recipes.
Another tip is to avoid over-beating once the flour is added. You want to mix just until combined to prevent gluten development, which can make the cookies tough. If the dough gets too warm while you are working, don’t hesitate to pop the whole press in the fridge for ten minutes. A cool dough maintains the intricate details of the press plates much better than warm dough.
Heritage Changes and Flavor Options
You can easily adapt this dough to fit any season or taste preference. For a chocolate version, replace 1/4 cup of the flour with high-quality cocoa powder. If you prefer a brighter profile, add the zest of one lemon or orange to the sugar before creaming. For those who enjoy a bit of spice, a quarter teaspoon of cinnamon or nutmeg added to the dry ingredients provides a warm, cozy feel. If you enjoy making treats for the holidays, you might also like our ideas for Holiday Cookie Celebrations.
For a different texture experience, you can dip the cooled cookies halfway into melted dark chocolate and top them with crushed pistachios or sea salt. This adds a sophisticated layer of flavor and a nice contrast to the soft, buttery base of the spritz.
Jar Fresh Enjoyment
These cookies are best served at room temperature with a hot cup of coffee or a cold glass of milk. Because they are bite-sized, they make excellent additions to a dessert platter or a tea party spread. If you are gifting them, stack them in a vintage tin lined with wax paper to preserve that jar-fresh texture. For more decorating inspiration, visit our section on Cookie Decorating Traditions.
If you find the cookies have lost a bit of their softness after several days, a quick five-second zap in the microwave will revive that fresh-from-the-oven feel. The butter will soften just enough to make the cookie tender again, making it a perfect midnight snack.
Soft Baking for the Soul
Perfecting the spritz cookie is about more than just a pretty shape; it is about honoring a tradition of buttery, tender treats that bring people together. By focusing on moisture and proper creaming, you can keep these cookies soft and wonderful for your family all week long. If you need something faster for a busy weekday, check out our Quick & Easy Cookies. This recipe was inspired by the techniques found at Sally’s Baking Addiction, which I have adapted to focus on long-lasting softness. Happy baking!
Find more inspiration on our social pages:

