I still remember the way the kitchen smelled every October when Grandma pulled out her heavy stoneware bowl and that particular stained index card. The air would fill with the sharp, warm scent of ground ginger and the deep, earthy sweetness of dark molasses. It was a signal that the seasons were changing and the cookie jar would soon be full of these crisp, spicy treasures.

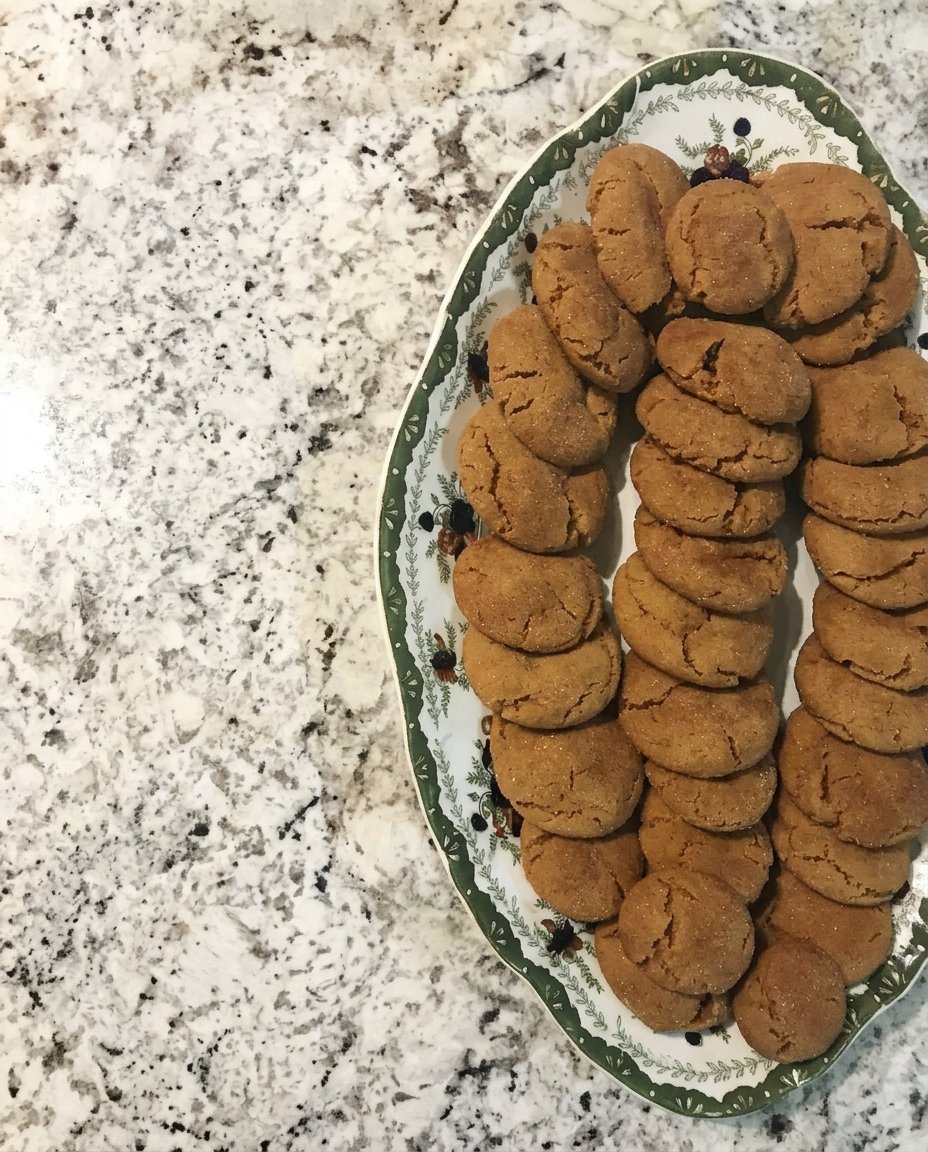
This Gingersnap Cookies 3 recipe is a direct link to those golden afternoons, yielding sixty beautiful cookies that crackle perfectly on top. We use simple pantry staples like butter, sugar, and flour to create a treat that has stood the test of time in our family for generations. There is something truly special about a cookie that tastes exactly like a childhood memory.
A Timeless Classic for the Cookie Jar
You will love these cookies because they represent the very heart of heritage baking. They offer a perfect balance of a crisp exterior and a slightly chewy center that lingers with the warmth of cinnamon and ginger. Unlike modern recipes that try to do too much, this one relies on the honest flavors of dark molasses and creamed butter.
These cookies are remarkably sturdy, making them the ideal choice for filling a vintage glass jar on your counter. They stay fresh and snappy for days, which is why they have been a staple at church bake sales and family reunions since the 1950s. Every bite is a reminder that the simplest recipes are often the ones we treasure the most throughout our lives.
Baking these is also a wonderful way to involve the little ones in the kitchen. Rolling the small dough balls in cinnamon sugar is a tactile joy that creates lasting bonds between generations. When you see those beautiful cracks form on the surface in the oven, you know you have captured a bit of baking magic that hasn’t changed in over seventy years.
Print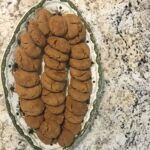
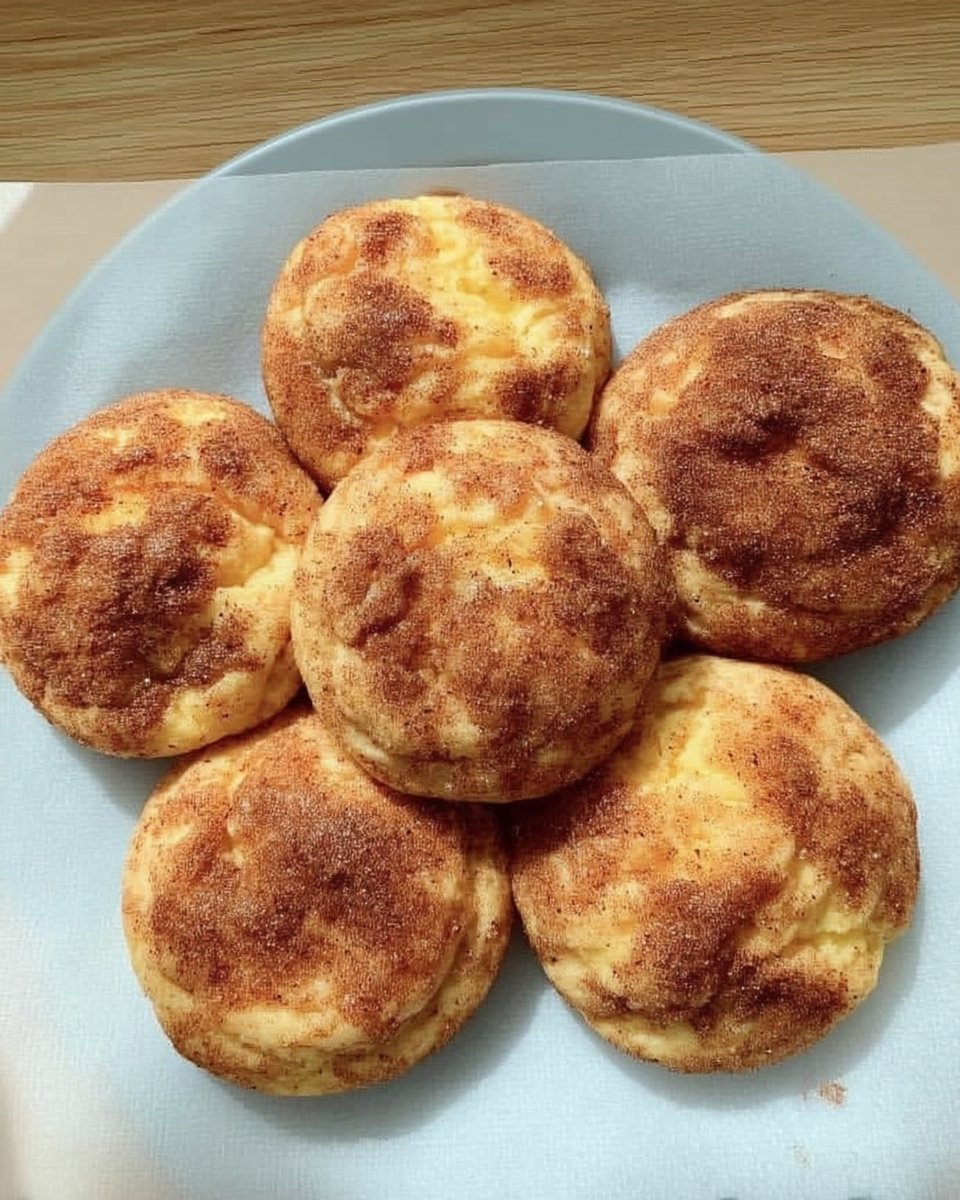
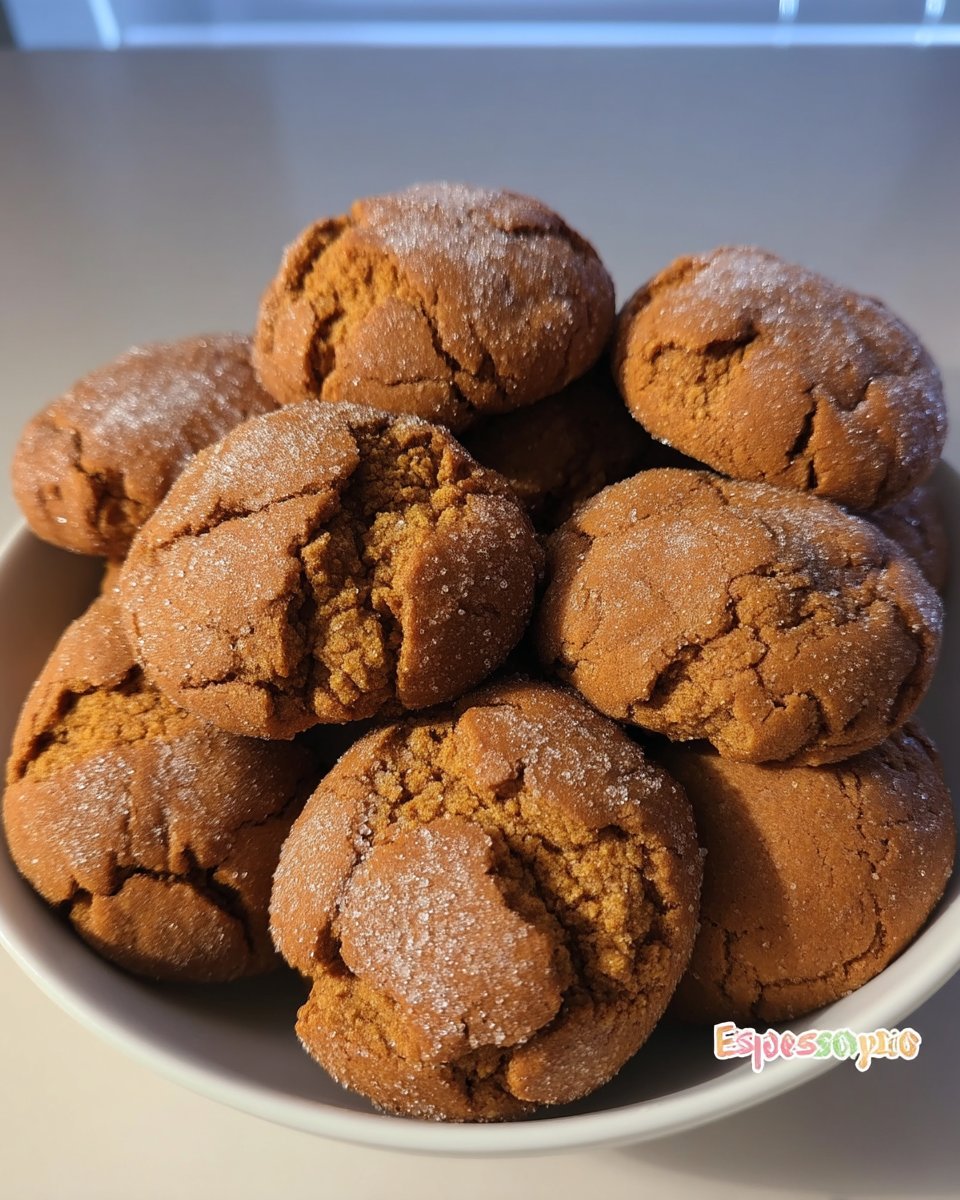
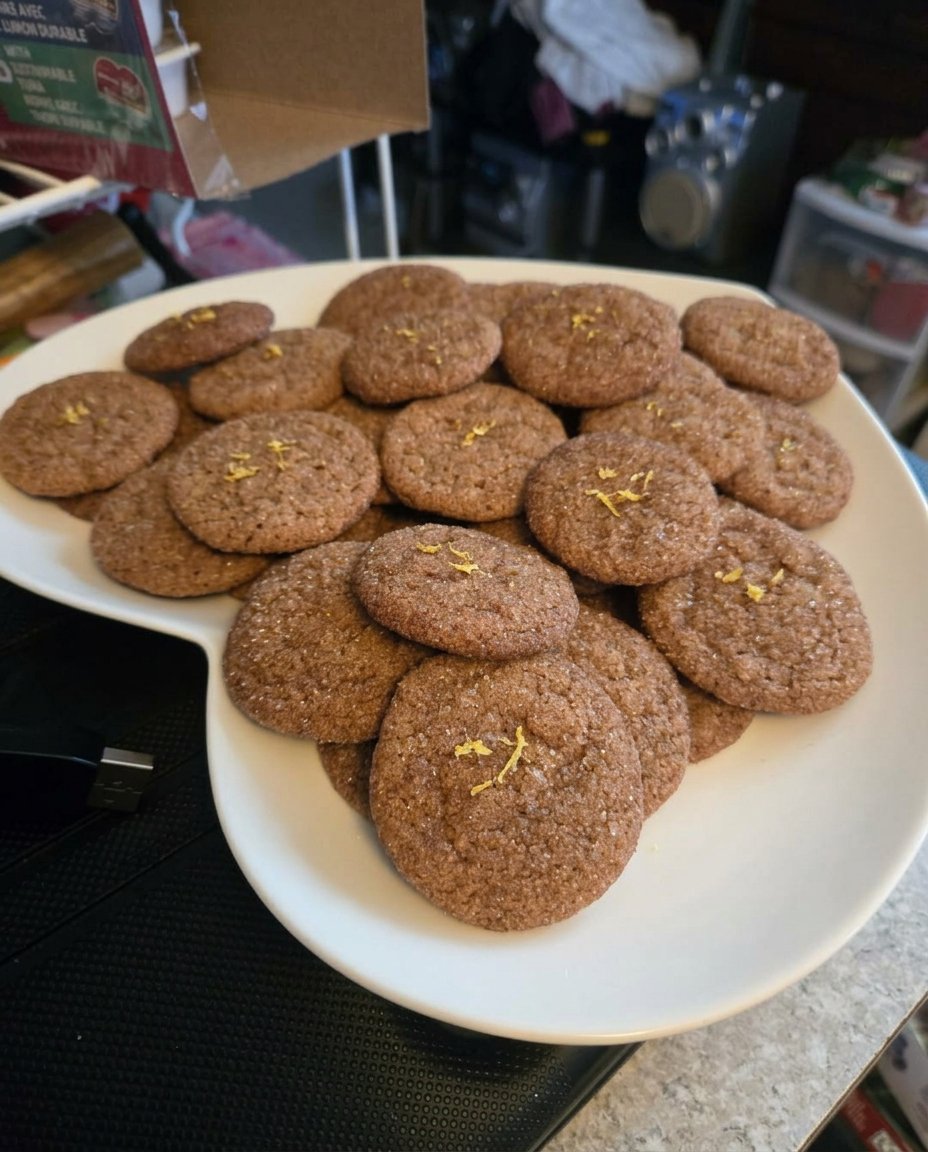
Gingersnap Cookies 3
- Total Time: 30 mins
- Yield: 60 cookies
- Diet: Vegetarian
Description
Experience the nostalgic warmth of traditional baking with these perfectly spiced gingersnap cookies. This heritage recipe creates sixty crisp, molasses-rich cookies featuring a beautiful crackled finish and a sweet cinnamon-sugar coating.
Ingredients
- Sifted all-purpose flour
- Ground ginger
- Baking soda
- Ground cinnamon
- Salt
- Butter or Shortening
- White sugar
- Large egg
- Dark molasses
- Cinnamon sugar
Instructions
- Preheat your oven to 350 degrees F (175 degrees C) and set aside a small bowl of cinnamon sugar for the final coating.
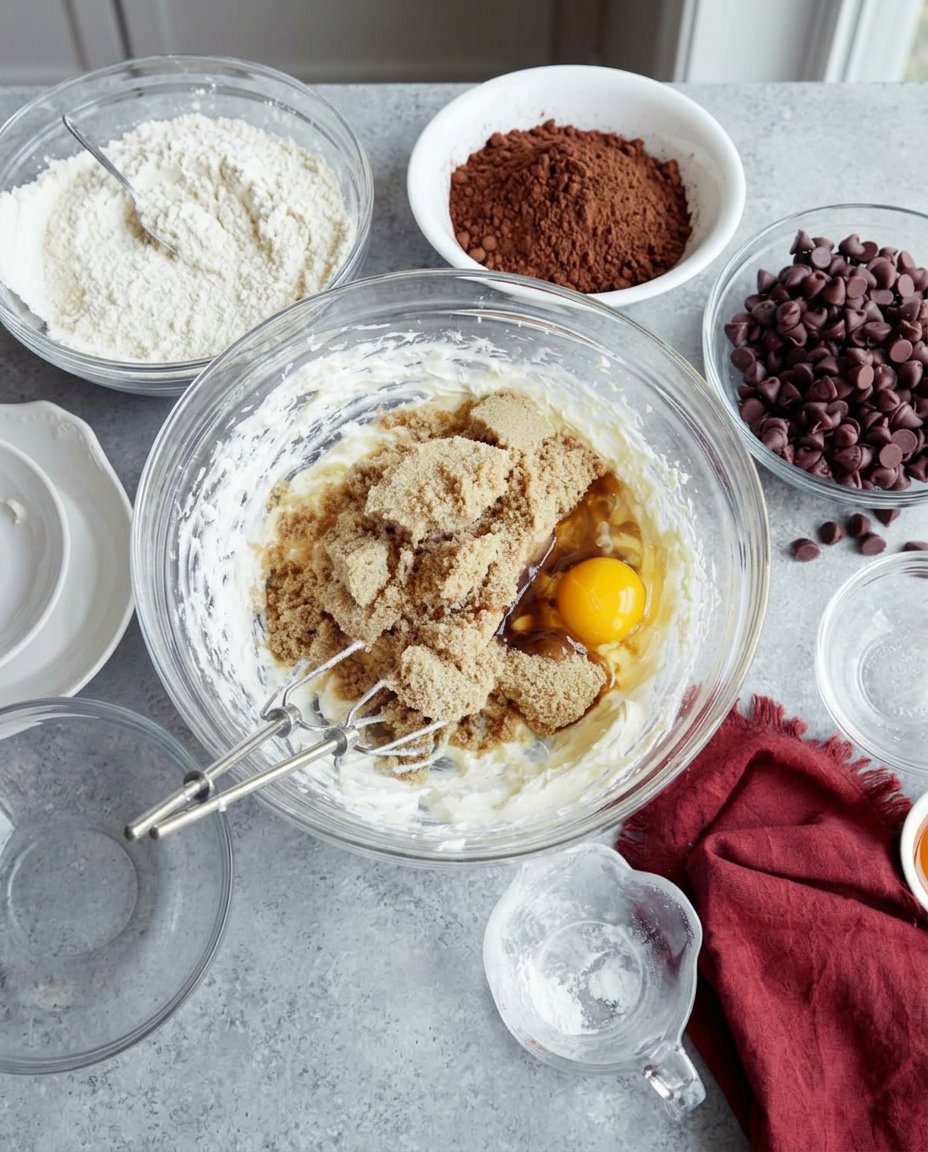
- Sift the all-purpose flour, ground ginger, baking soda, cinnamon, and salt together into a bowl, then sift the entire dry mixture a second time.
- Beat the butter in a large separate bowl until creamy, then gradually add the white sugar and mix until well combined.
- Incorporate the large egg and dark molasses into the butter mixture, beating until the batter is light and fluffy.
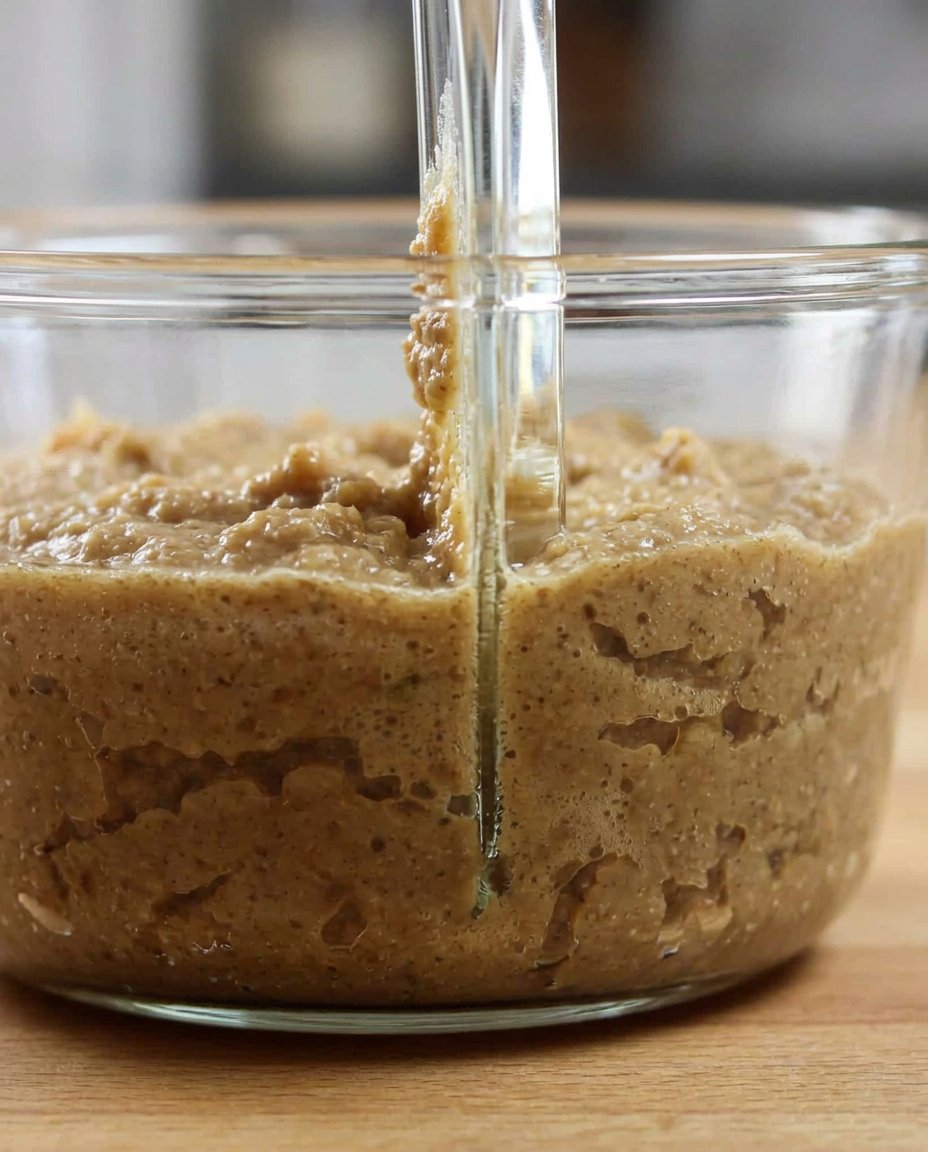
- Stir in one-third of the dry sifted ingredients, then sift in the rest and mix until a soft dough forms.
- Pinch off pieces of dough and roll them into 1-inch balls between your palms.
- Coat each ball evenly in the cinnamon sugar and place them 2 inches apart on ungreased baking sheets.
- Bake for 10 minutes, rotating the sheets halfway through, until tops are rounded and cracked; let cool on a wire rack to firm up.
Notes
For a more consistent bake, ensure your butter is at room temperature before you begin creaming it with the sugar. If you prefer a more intense spice flavor, you can slightly increase the ratio of cinnamon to sugar used for the outer coating.
- Prep Time: 20 mins
- Cook Time: 10 mins
- Category: Dessert
- Method: Baking
- Cuisine: American
Simple Staples from the Pantry
To make these traditional treats, we look to the ingredients that our grandmothers always kept on hand. There are no fancy additions here, just high-quality basics that come together to create a complex and comforting flavor profile.
- Dark Molasses: This is the soul of the cookie, providing that deep color and the distinct, slightly smoky sweetness that defines a true gingersnap.
- Ground Ginger and Cinnamon: These spices provide the “snap” and the warmth that makes your kitchen smell like a cozy sanctuary.
- Butter or Shortening: Using real butter adds a rich flavor, while shortening can help achieve that classic, uniform crackle on the top.
- Cinnamon Sugar: This final coating is what gives the cookies their signature sparkle and an extra layer of sweetness right on the tongue.
- Baking Soda: This is the secret to getting those lovely rounded tops and the characteristic cracks that we all look for in a heritage gingersnap.
When you gather these items, you are not just preparing to bake; you are preparing to recreate a piece of culinary history. I always recommend sifting your flour and spices twice, just as the recipe suggests, to make sure everything is distributed perfectly for a consistent bake every single time.
The Heritage Method for Perfect Gingersnaps
Step 1: Prep Your Kitchen and Sugar
Start by preheating your oven to 350 degrees F (175 degrees C). This temperature is key for getting the right rise and snap. In a small, shallow bowl, place your cinnamon sugar and set it aside; this will be the final touch for your dough balls before they hit the heat.
Step 2: The Double Sifting Secret
Take your sifted all-purpose flour, ground ginger, baking soda, cinnamon, and salt. Sift them together into a large mixing bowl and stir well. Then, sift the whole mixture a second time. This traditional technique makes the dough light and ensures the spices are perfectly blended for a uniform flavor.
Step 3: Creaming the Butter
In a separate large bowl, beat your butter with an electric mixer until it is smooth and creamy. Gradually add in the white sugar, continuing to beat the mixture. This step builds the structure of your cookie, so take your time until the butter and sugar are well-married.
Step 4: Adding the Heart of the Cookie
Next, beat in the large egg and the dark molasses. Continue mixing until the batter is light and fluffy. You will see the color transform into a beautiful, rich mahogany that promises a deep, spicy flavor in the finished product.
Step 5: Mixing the Dough
Sift about one-third of your dry flour mixture into the butter and molasses mixture. Stir it in until it is well combined, then sift in the remaining flour. Stir gently until a soft, fragrant dough forms that is easy to handle and not too sticky.
Step 6: Rolling the Balls
Pinch off small pieces of the dough and roll them between your palms into 1-inch balls. Try to keep them consistent in size so they all bake at the same rate. This is the part of the process that always reminds me of sitting at the kitchen table with my mother.
Step 7: The Sugar Coating
Roll each dough ball in the cinnamon sugar until it is completely and evenly coated. Place them about 2 inches apart on ungreased baking sheets. This spacing is important because the cookies will spread slightly as they bake to create those perfect rounds.
Step 8: Baking for the Crackle
Bake in your preheated oven for about 10 minutes. Halfway through, switch the racks to make sure they bake evenly. You are looking for the tops to be rounded and showing those beautiful, slight cracks. Let them cool on a wire rack to firm up and gain their signature snap.
Teresa’s Wisdom for a Better Snap
One of the most important things to remember is the sifting process. By sifting the dry ingredients twice, you prevent any clumps of baking soda or ginger, which can ruin the delicate balance of the cookie. If you find your kitchen is a bit warm, you can chill the dough for about twenty minutes before rolling it into balls to keep them from spreading too much.
For those who love a variety of treats, checking out our Quick & Easy Cookies can give you more ideas for filling that jar. Always make sure your butter is at room temperature but not melted, as this affects the texture and the way the cookies rise in the oven. Keeping them in an airtight glass jar once they are completely cool will maintain that crispness for a full week.
Family Favorites and Heritage Twists
While the original recipe is perfection, many families have added their own little touches over the years. Some folks like to add a half-cup of finely chopped walnuts or pecans for an extra crunch. Others prefer to use brown sugar instead of white sugar in the dough for a deeper, more caramel-like flavor that pairs beautifully with the molasses.
If you are looking for ways to celebrate the season, our Holiday Cookie Celebrations section has many more ideas. You might also consider the Allrecipes magazine version, which suggests using two tablespoons of cinnamon mixed with two teaspoons of sugar for the coating to provide a more intense spice profile. You can find more inspiration on the Grandma’s Gingersnaps page if you want to see how other families have adapted this classic.
Sharing Tradition and Cookie Jar Joy
There is no better way to serve these cookies than with a tall, cold glass of milk. The way the spicy ginger interacts with the cool dairy is a match made in heaven. They are also wonderful when served alongside a warm cup of coffee or tea during a quiet afternoon break.
For more ways to present your bakes, look through our Classic Cookie Recipes for inspiration. I love placing these in a vintage cookie jar and letting the grandkids help themselves whenever they visit. They also make wonderful gifts when stacked in a simple tin lined with parchment paper and tied with a bit of twine.
The Sweet Heritage of Home Baking
Baking these Gingersnap Cookies 3 is about more than just satisfying a sweet tooth; it is about keeping a beautiful tradition alive. Each time we sift that flour and roll those dough balls in sugar, we are honoring the bakers who came before us. I hope these cookies bring as much warmth and joy to your home as they have to mine for all these years. For more ways to keep your kitchen healthy and happy, visit our Wholesome Cookie Options page. Don’t forget to share your baking memories with us on Pinterest, Instagram, and Facebook. Happy baking, from my kitchen to yours!
